Mast Project Versatower BP60
I got my first licence in 1984 but because of my qrl I had to move a couple of times. Every time I had to find a house with place for antennas and a landlord, willing to admit to drill holes in his house and to build up antennes. And each time I found some of the neighbours with electronic equipment which did not fulfil the electromagnetic standards. So my dream was all the years for the time after retirement to have my own house and a Versatower. I love this typ of construction because it allows me not only to lower the mast when we have heavy wind, but also to tilt it over to work at the antennas more or less from the ground ( I dislike to be high over the ground).
A special thank to GM3WOJ, his "Lattice tower information pages" helped me a lot with my tower project!
So this is how I fullfilled my dream:
We found a house in the beautiful holiday location of "Muhr am See" with all the infrastructur in the village.
June 2016 I got retired and started to work at the project. I learned that I need a official permission for a tower with more than 10m height and that I need a architecture for the static calculations, the official architectural drawings and so on.
13th August 2016 I bought a Versatower BP 60.
17th August 2016 I gave the application form to the local authorities for construction work.
2nd March 2017 I finally got the permission for construction of the tower.
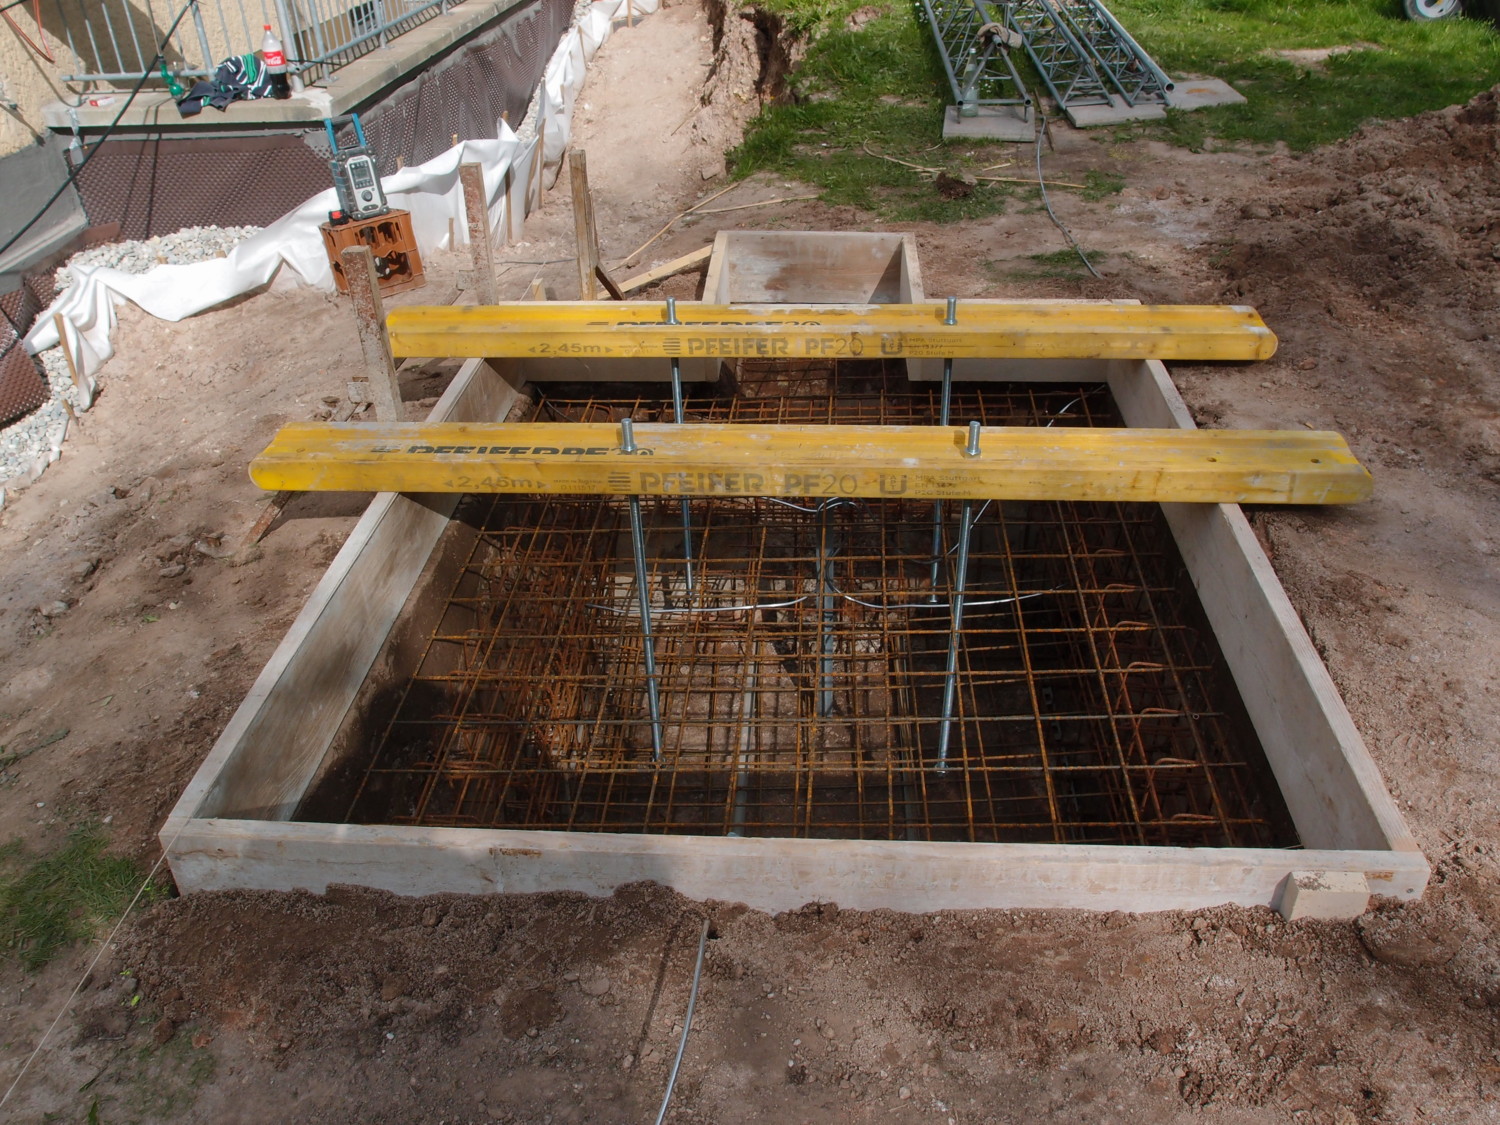
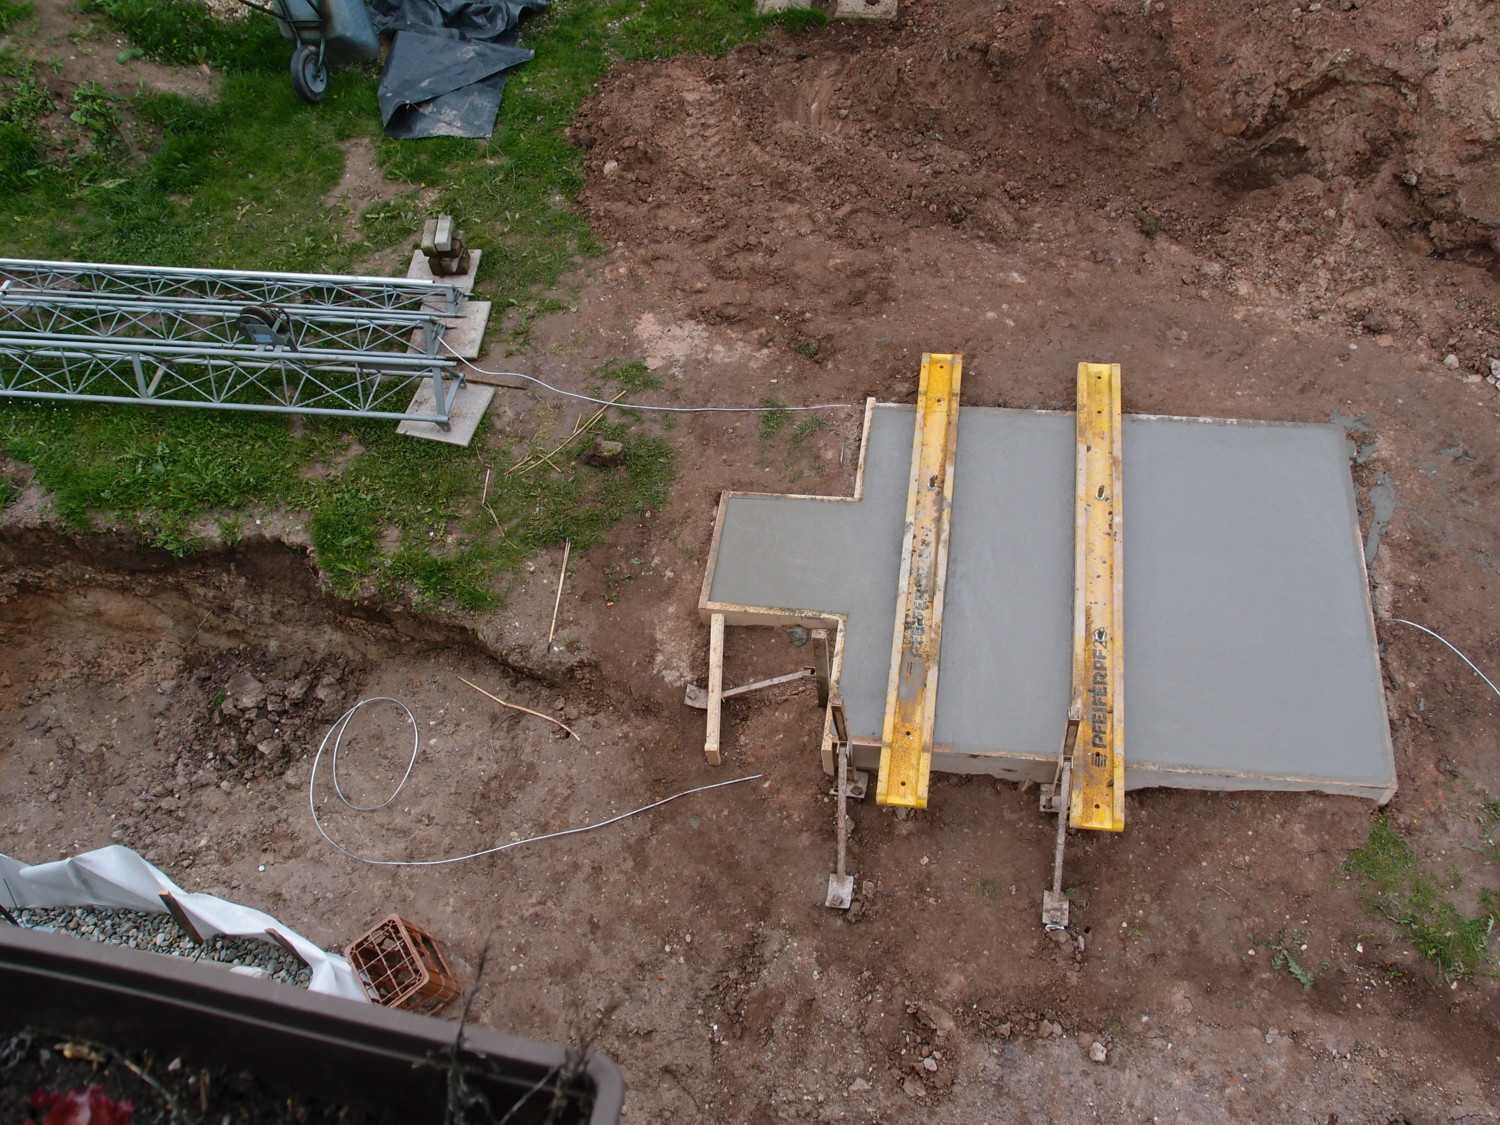
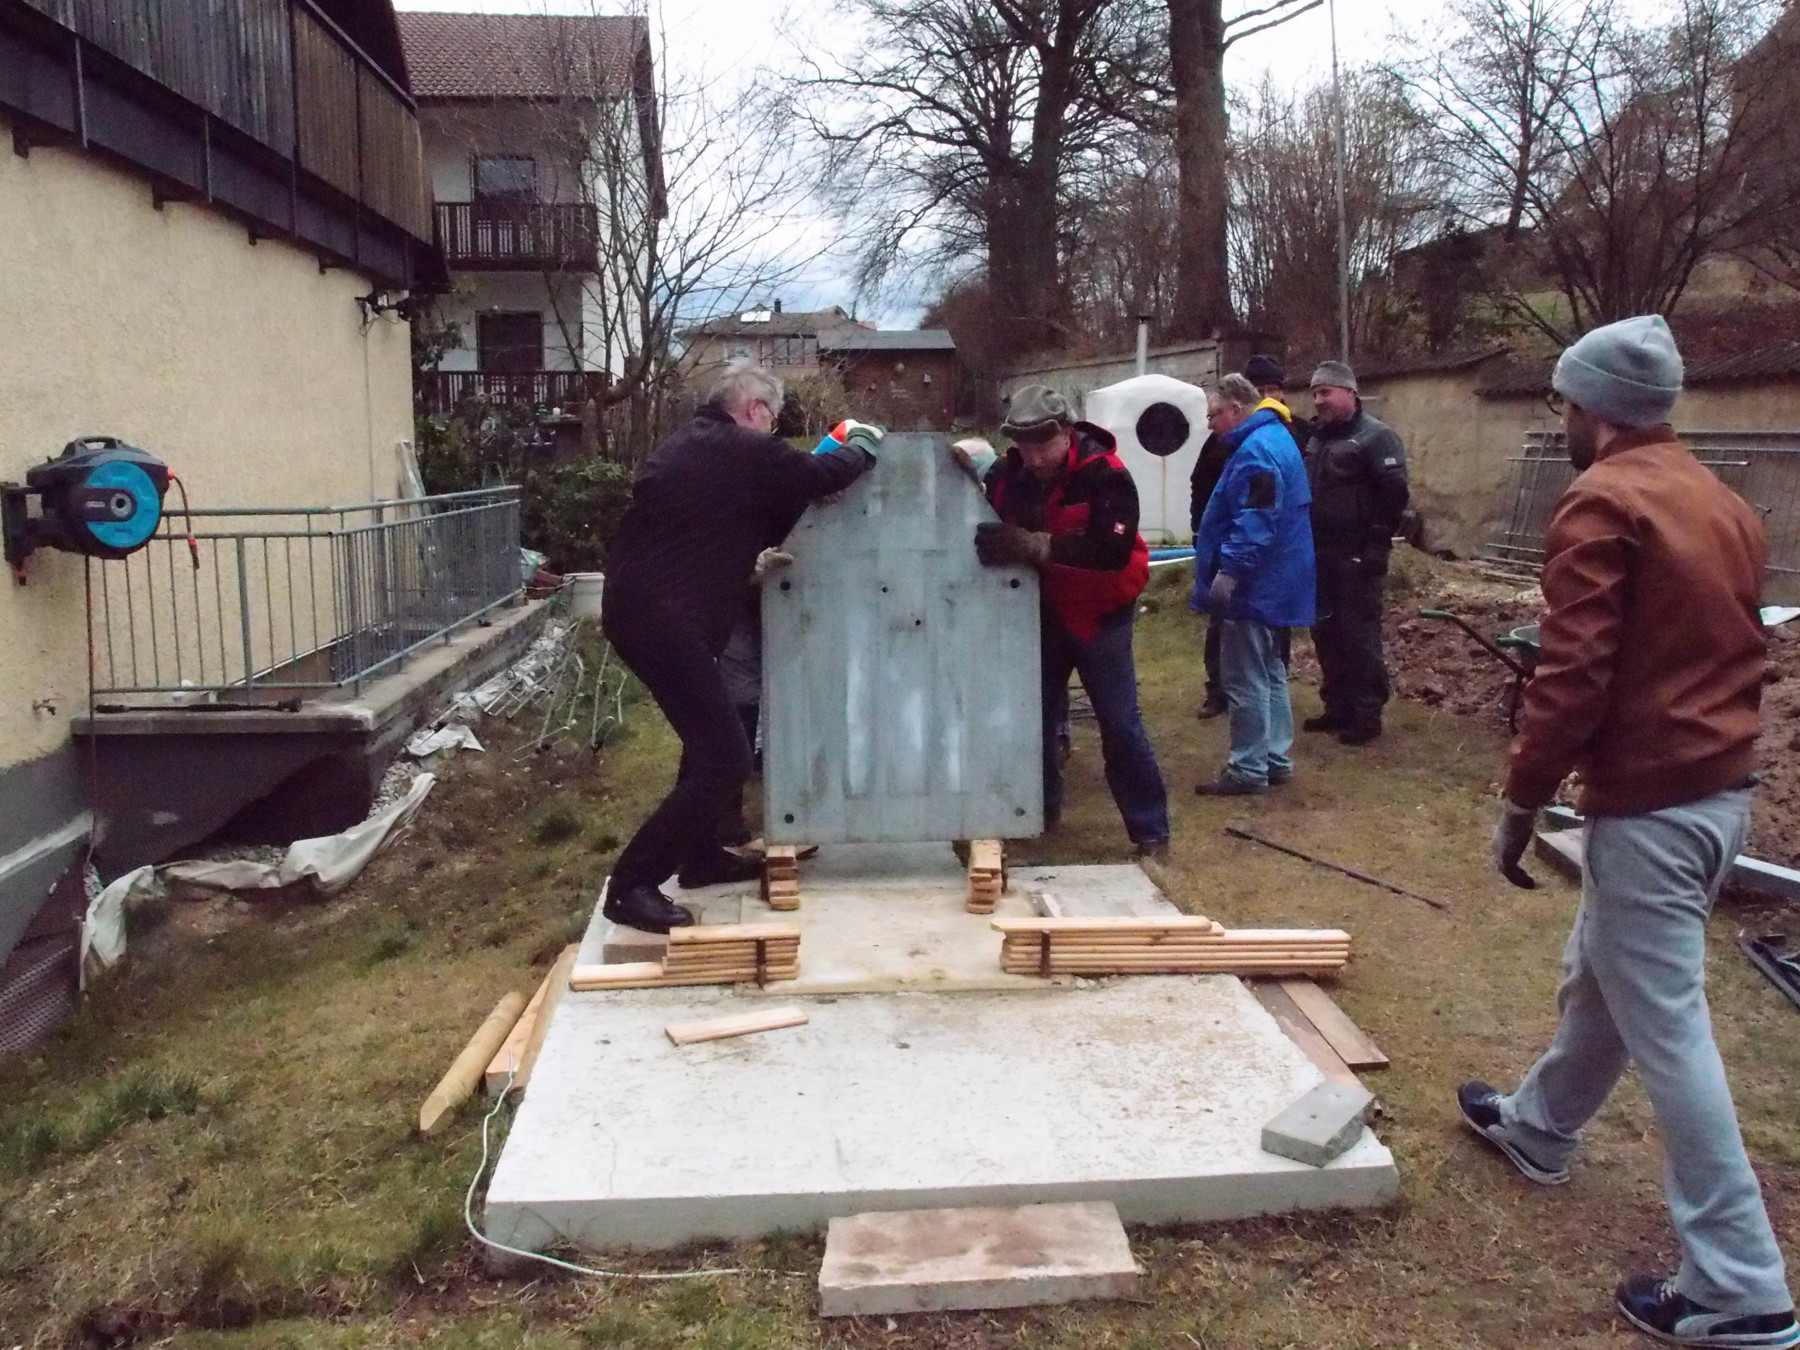
11/12th May 2017 the basement was made by our local construction company Bau Buck. Originally planned for the next week, but in the late afternoon on wednesday I learned that they wanted to start on Thursday :-)
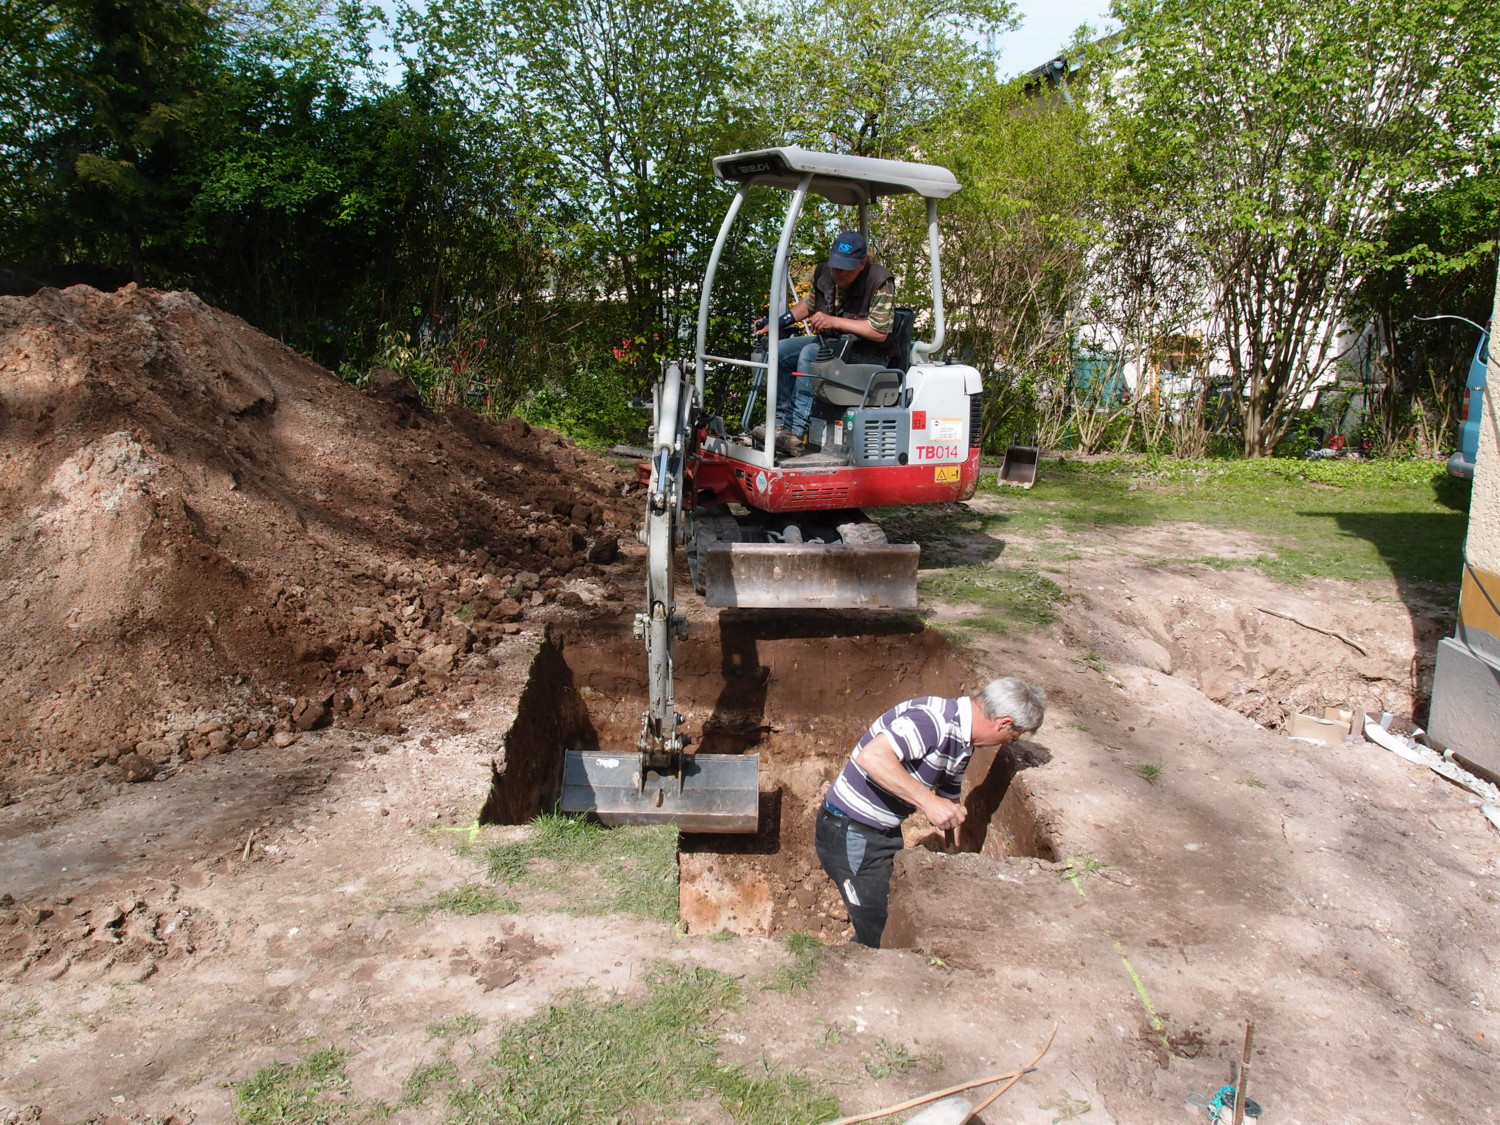 Digging the hole for basement 1,2x1,8x2,2m
 with 2 earth poles for grounding, each 3m long
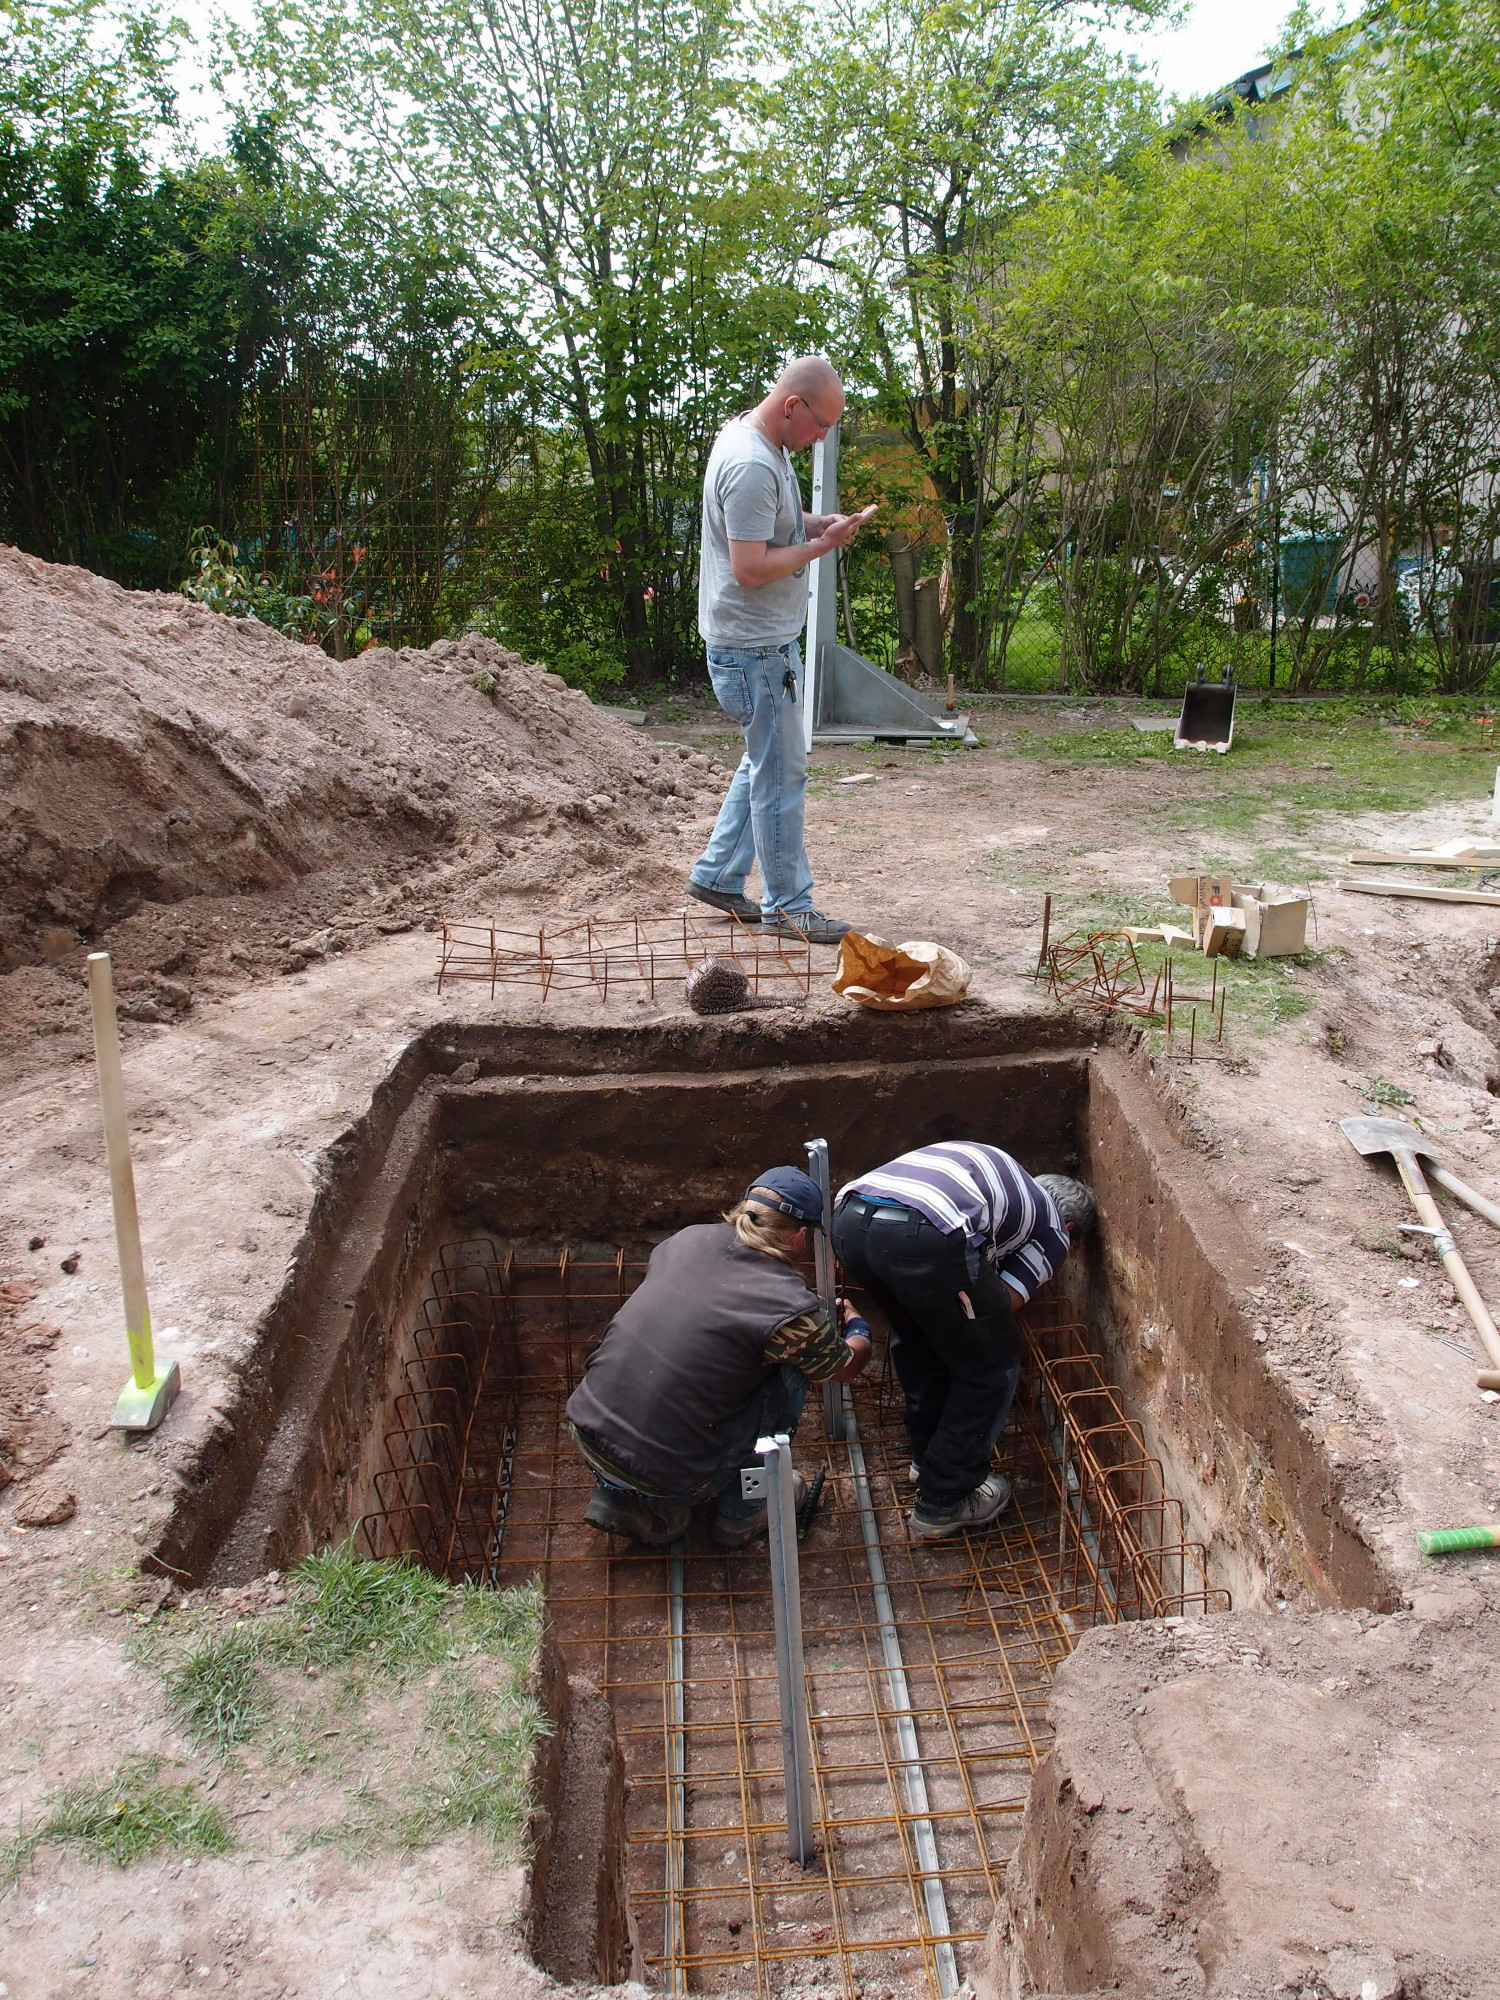
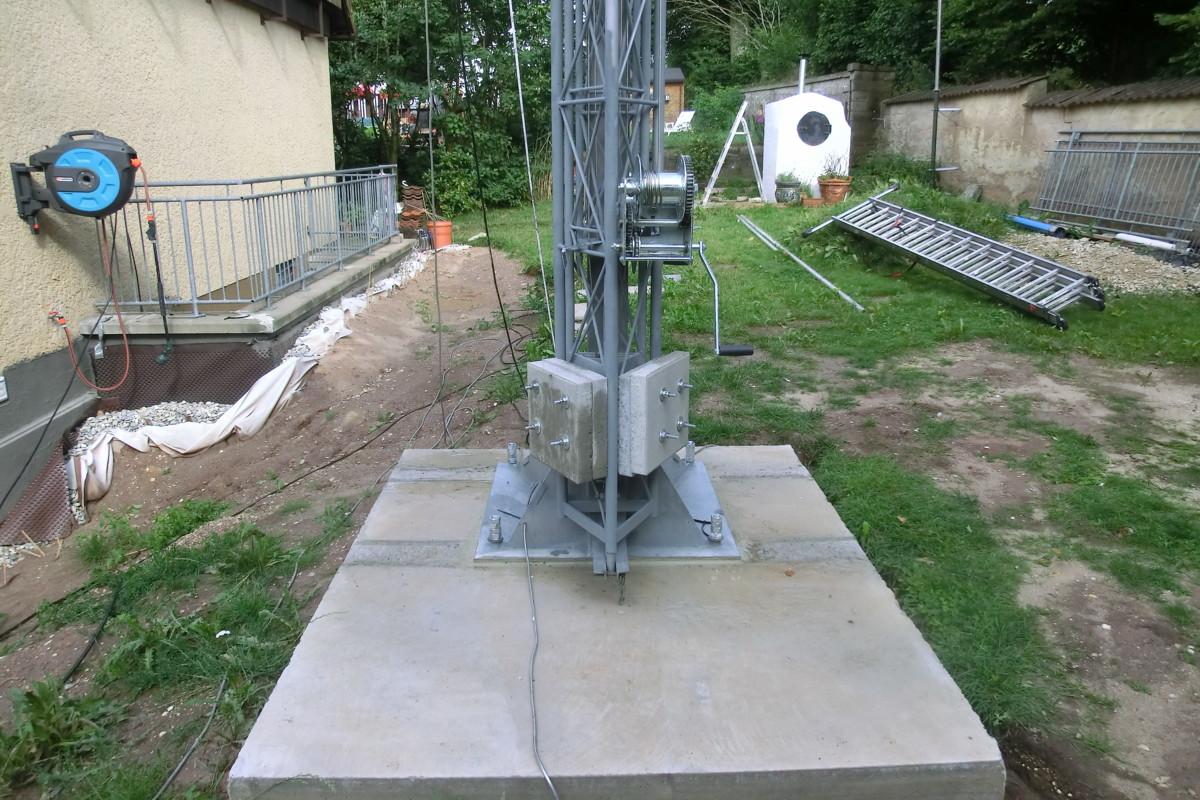
2 earthpools for grounding are in the basement, each 3m long. And in addition to the normal planned basement I made a 60x60cm head piece so I have the opportunity to fix a winch there.
 Grounding
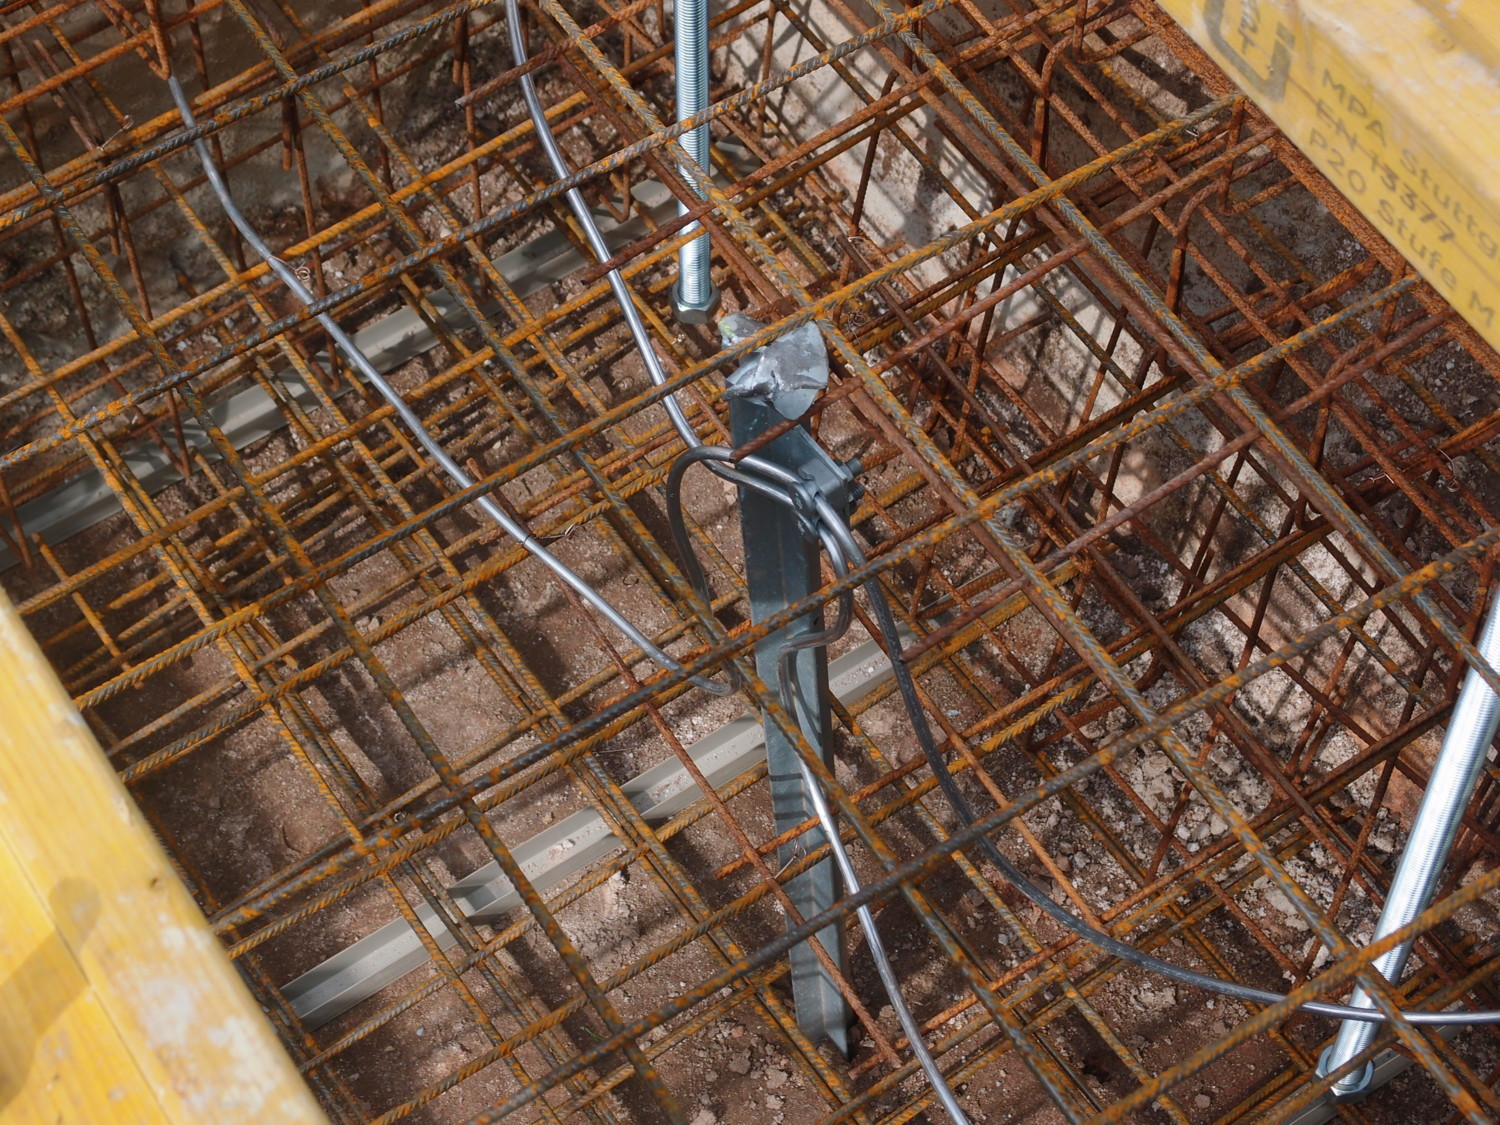
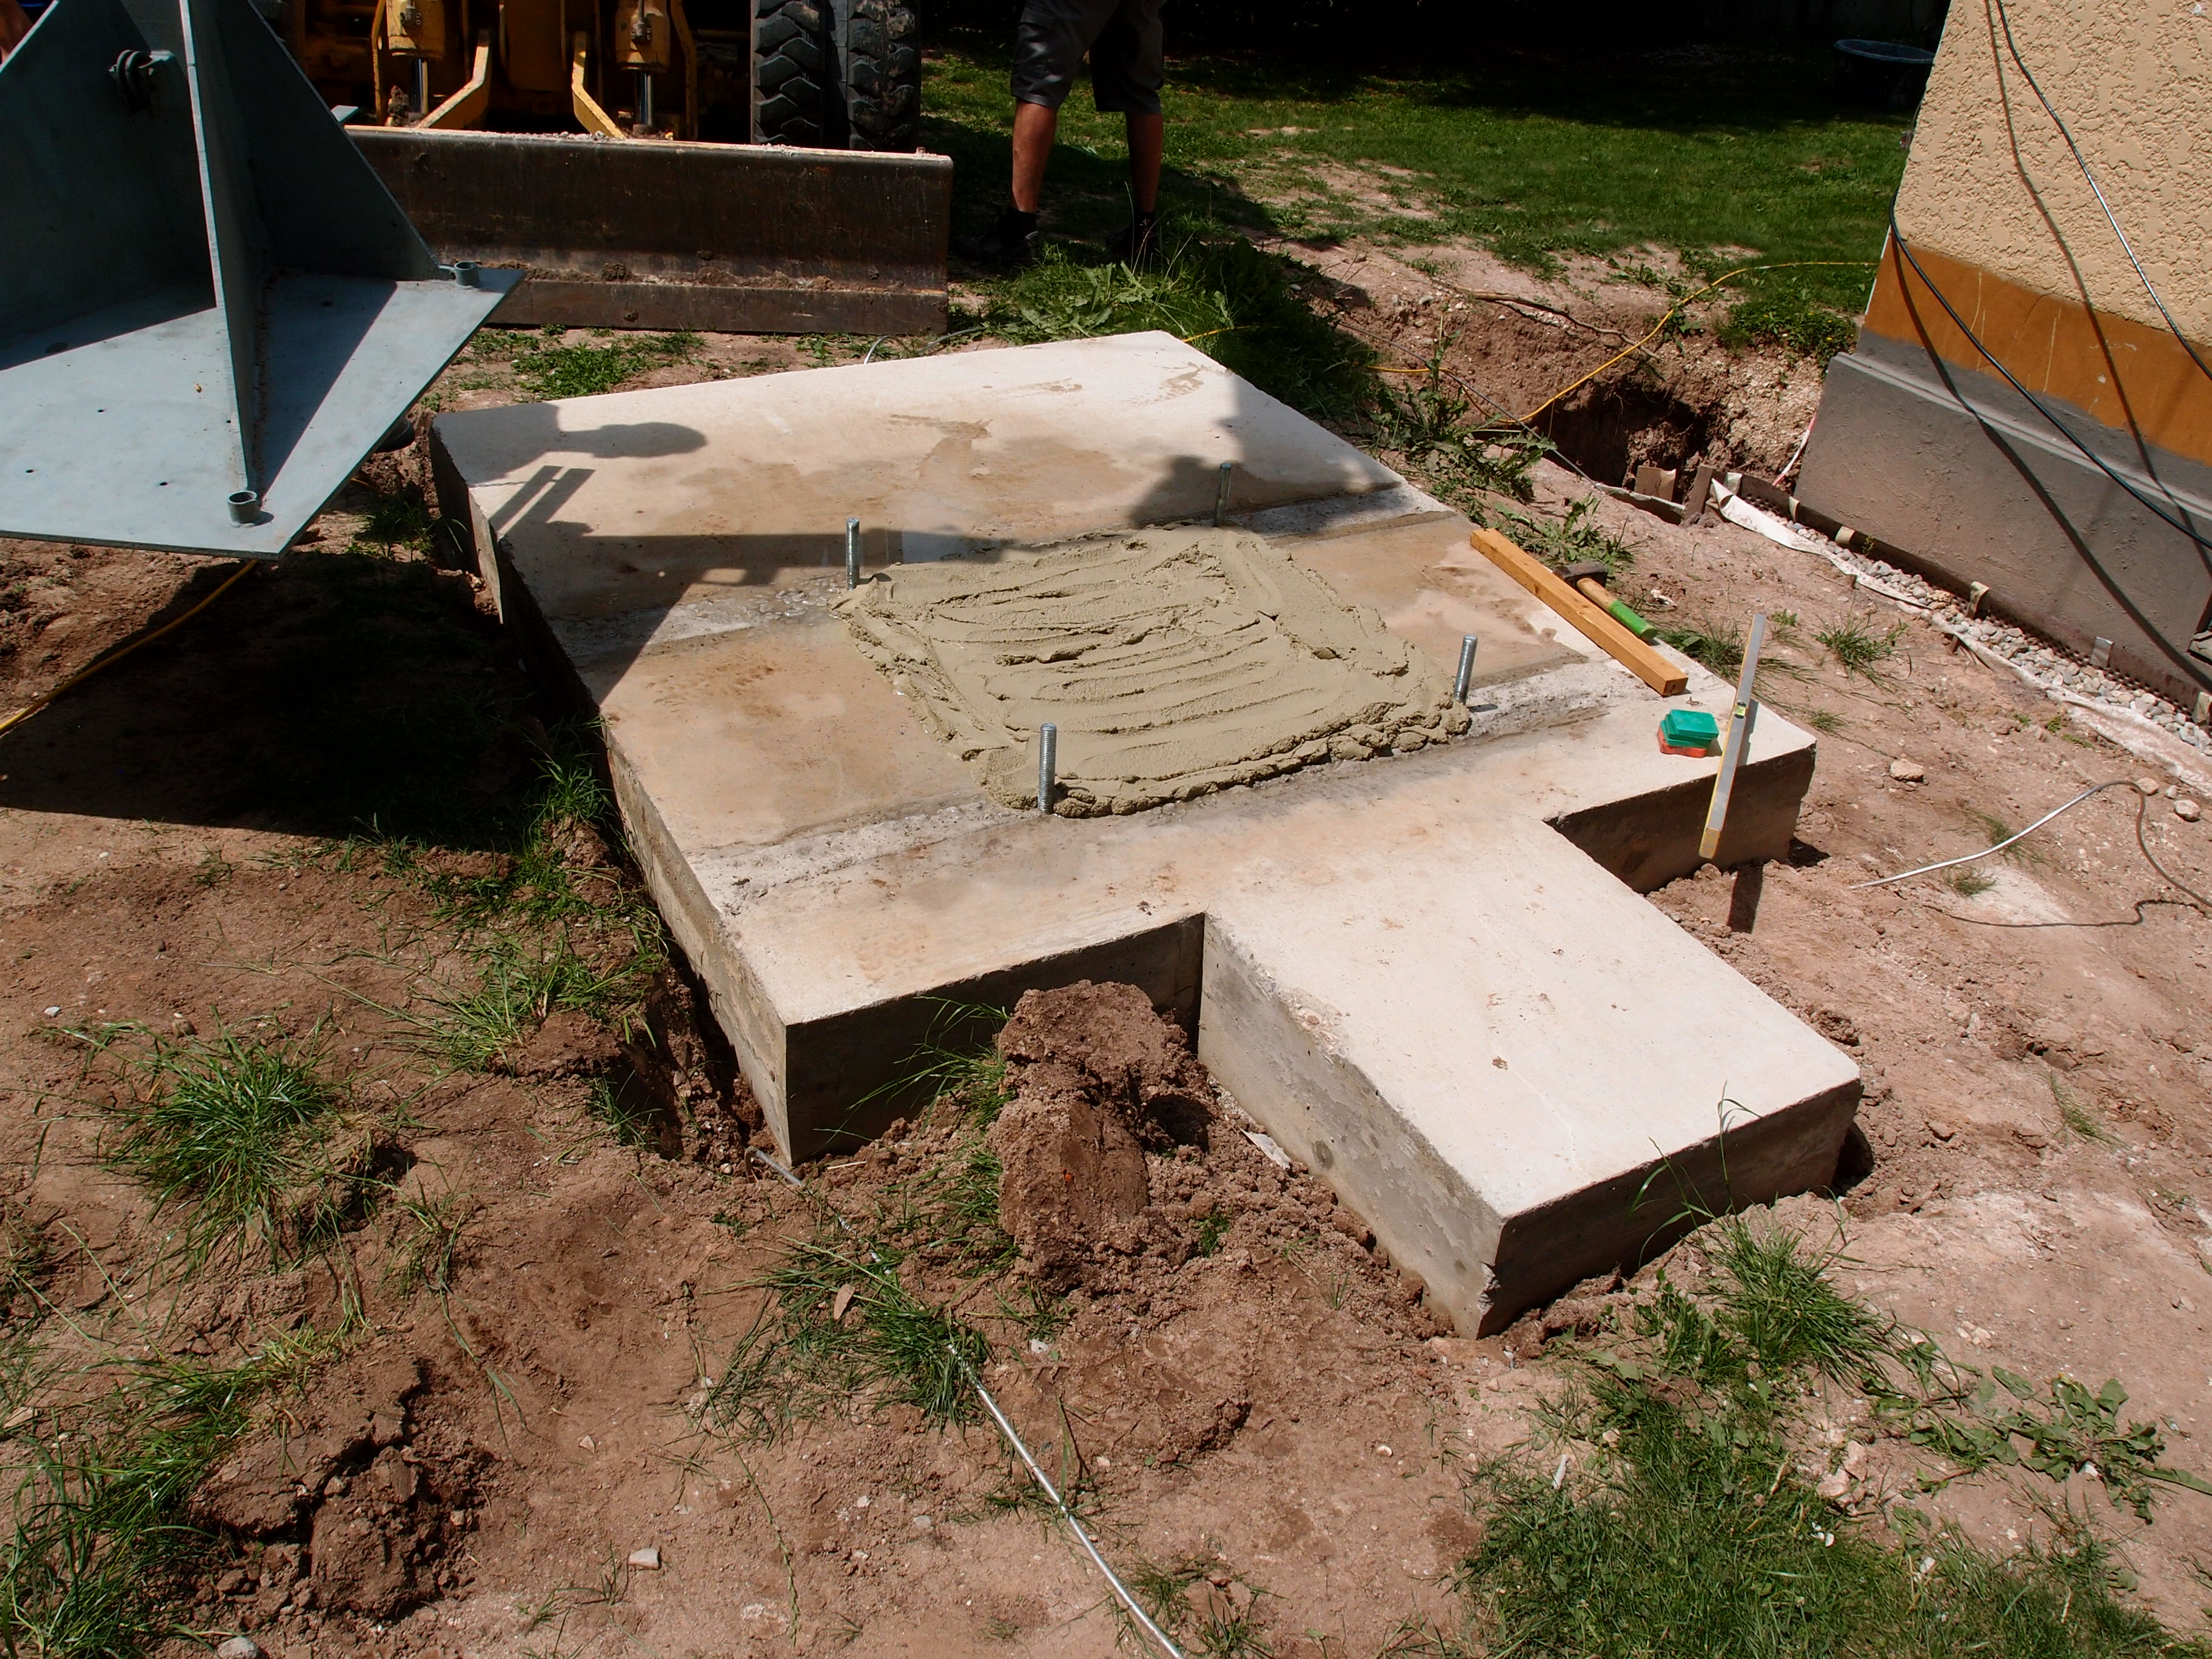
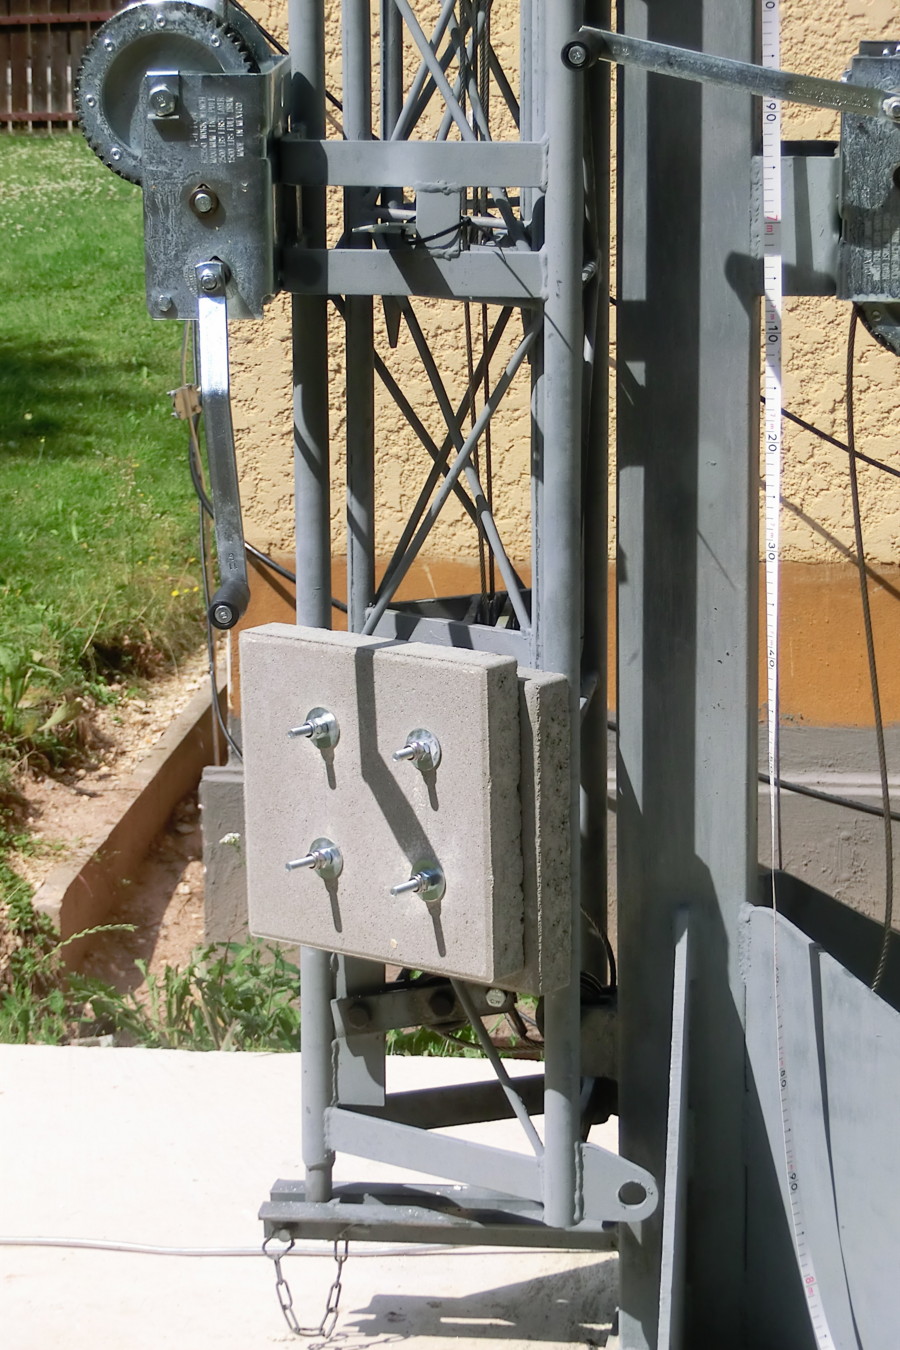
 fixing the anchor bolts
fixing the anchor bolts
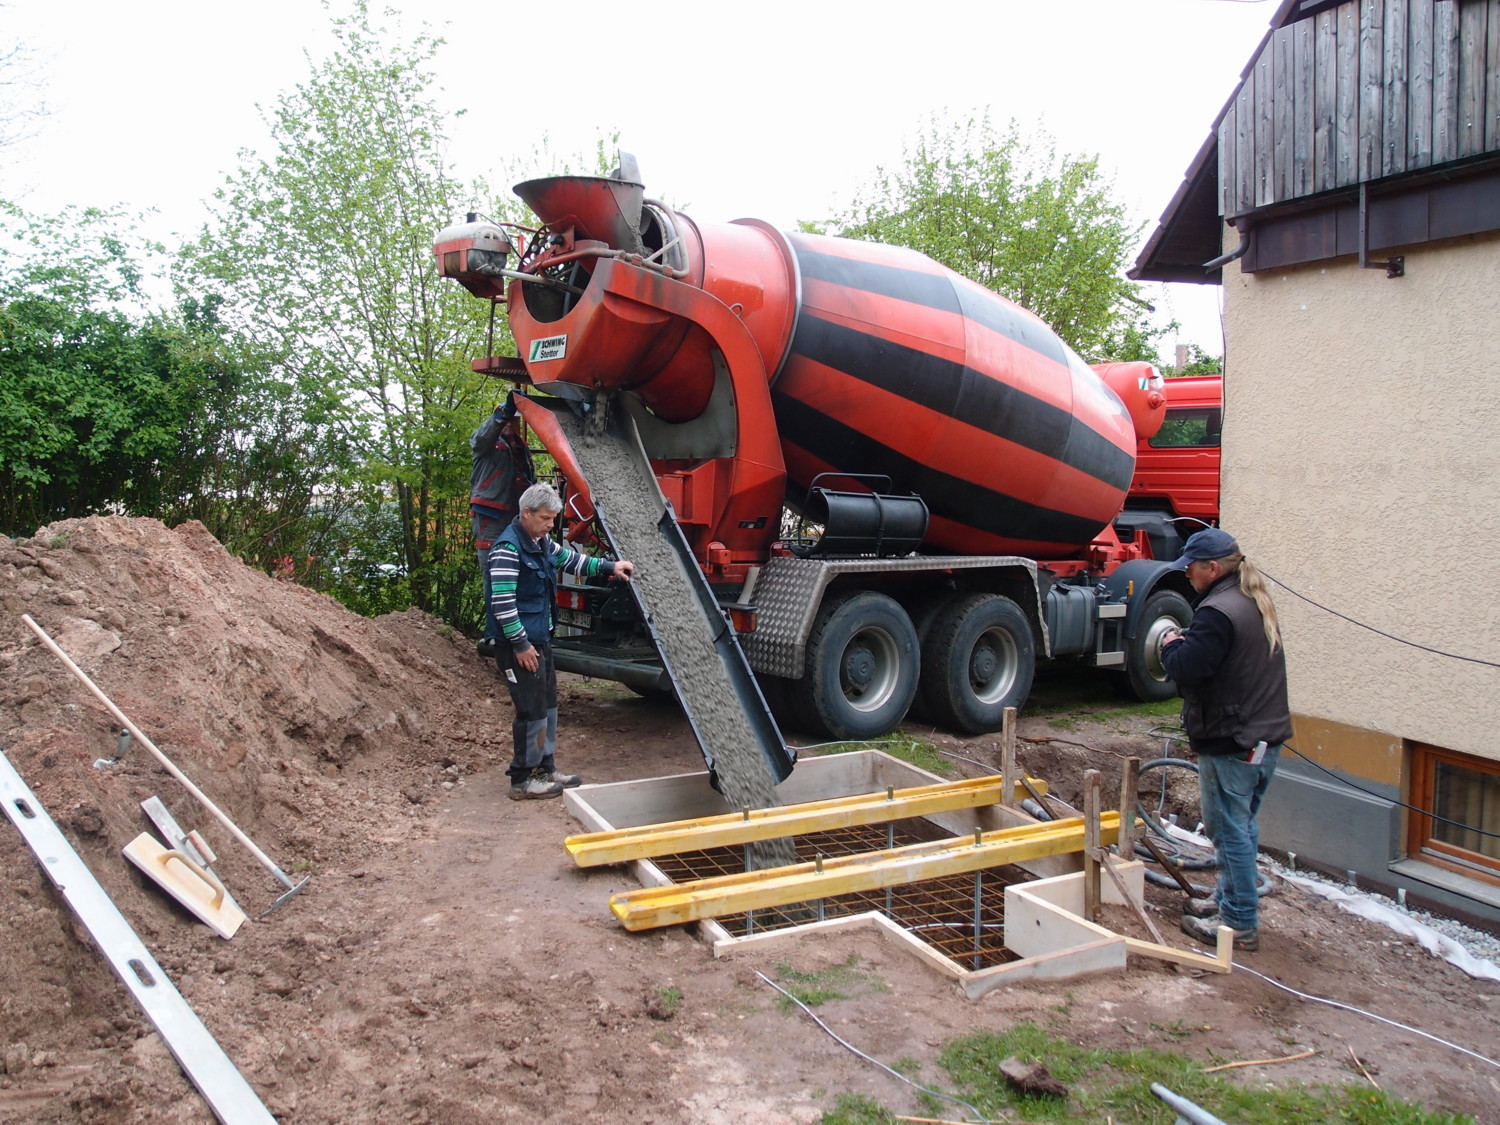
the big day, 5,25 m3 concret were filled in
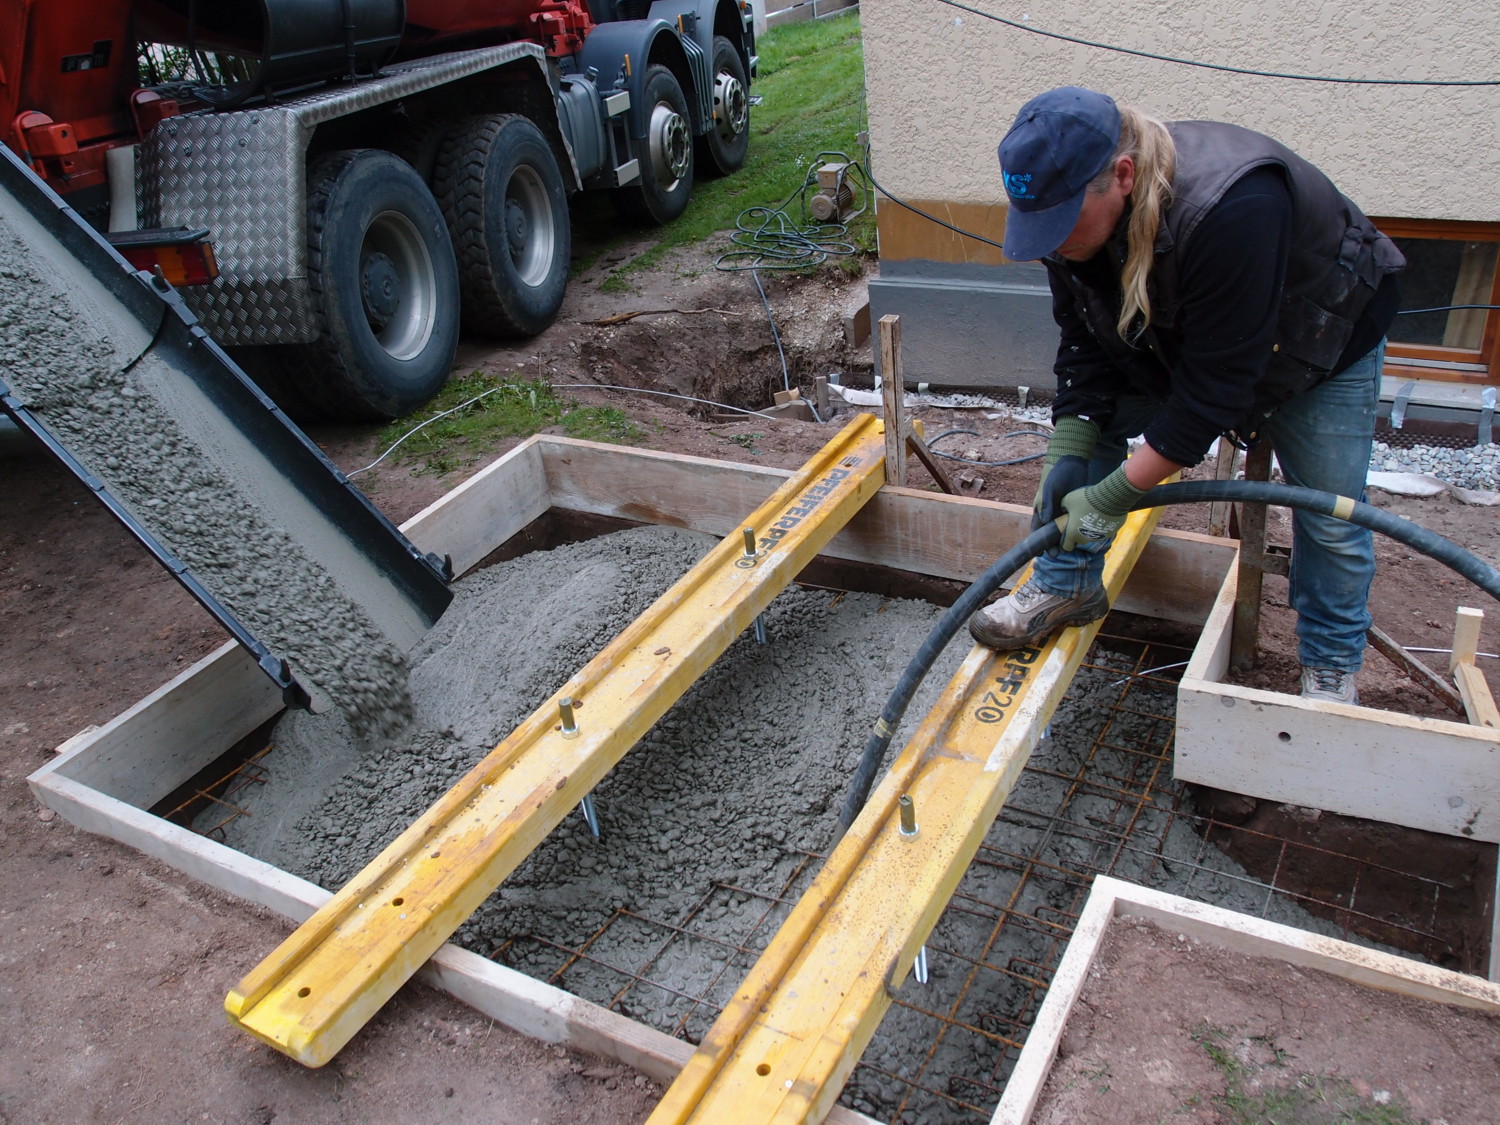
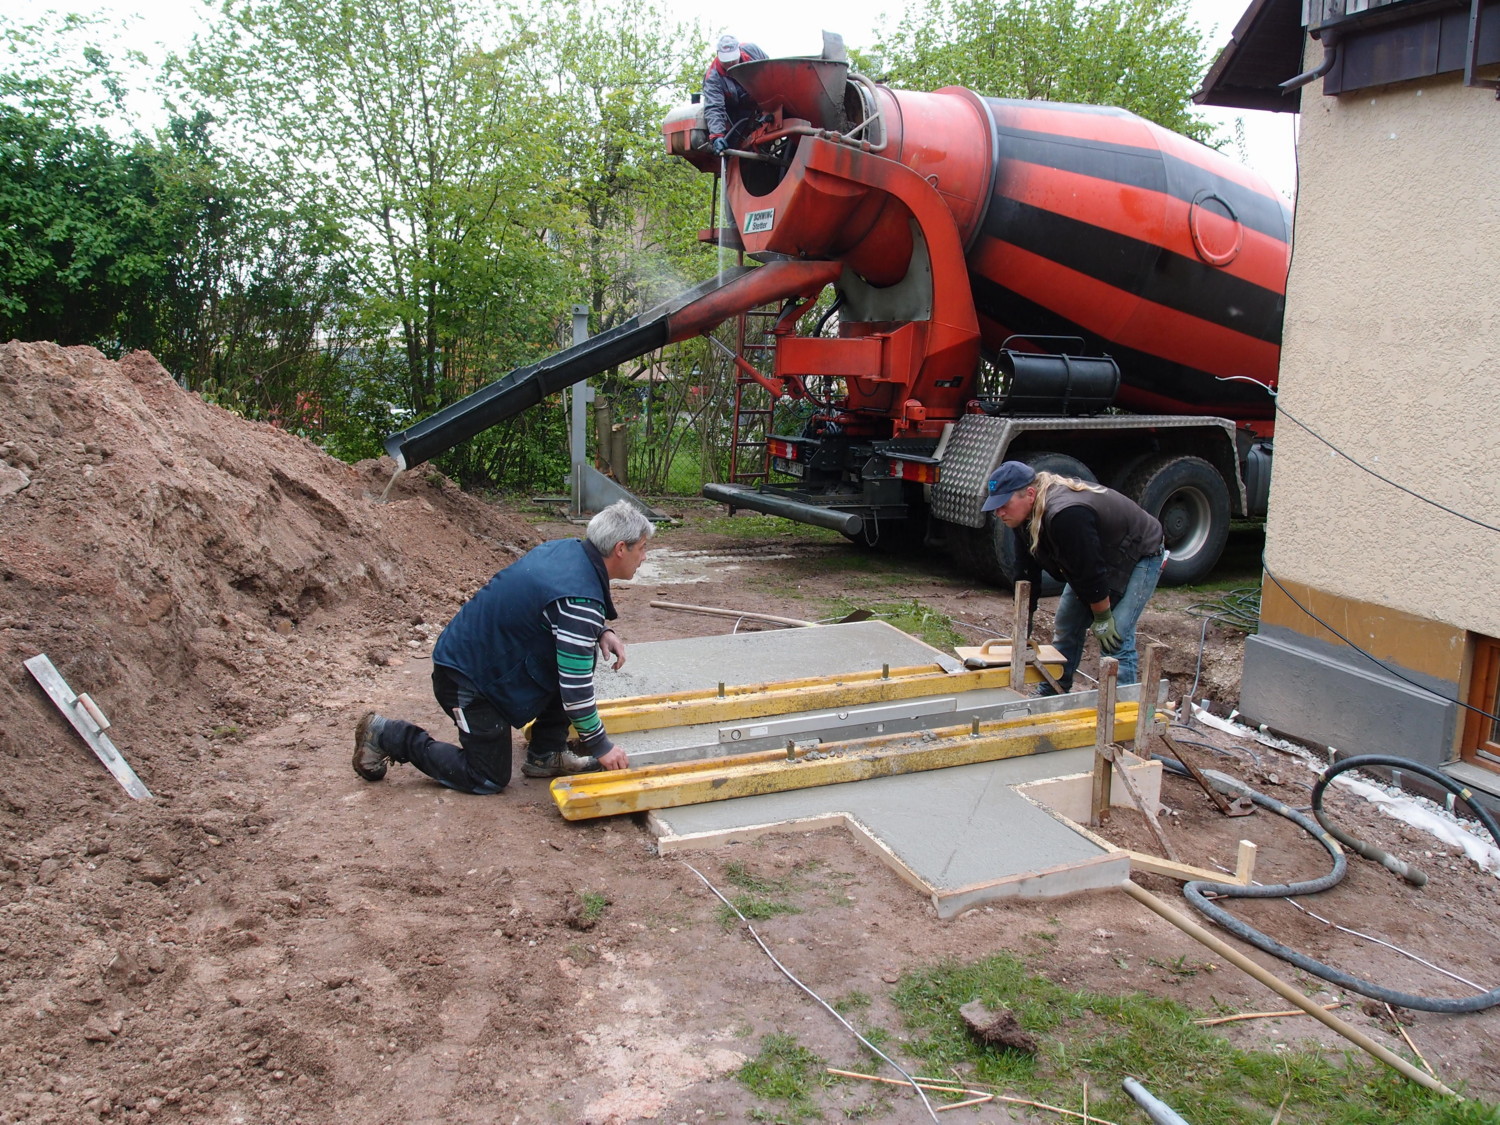
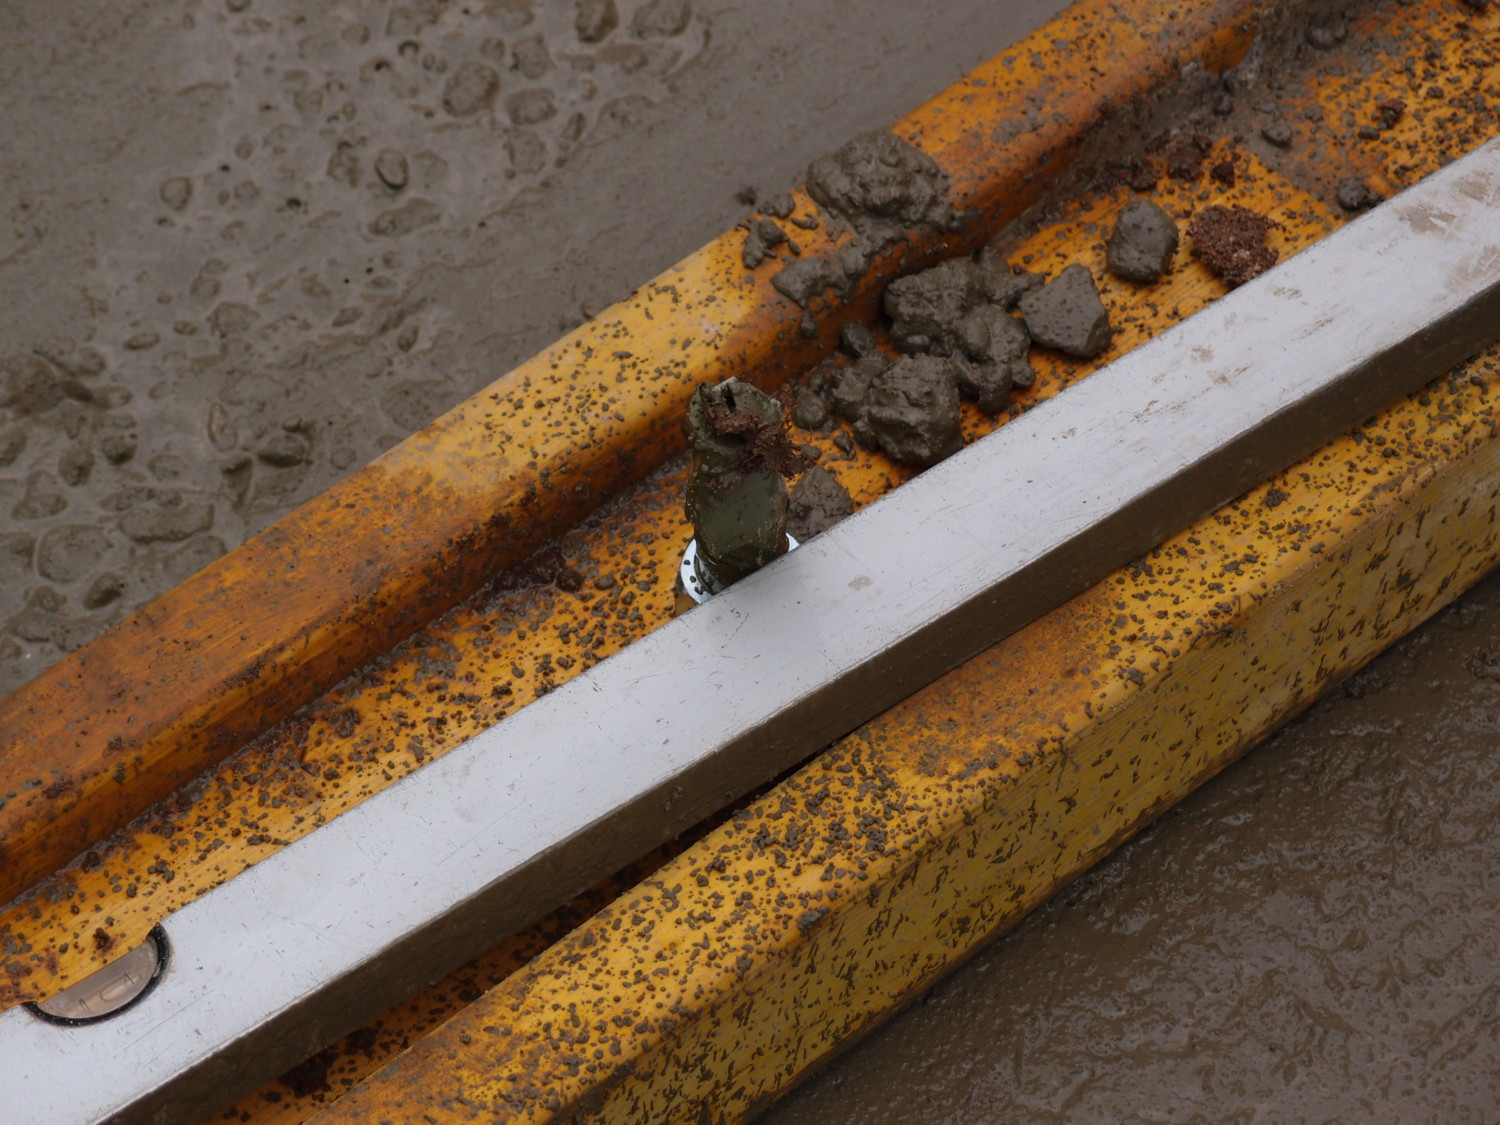
good that I put some tape around the screw thread to protect it
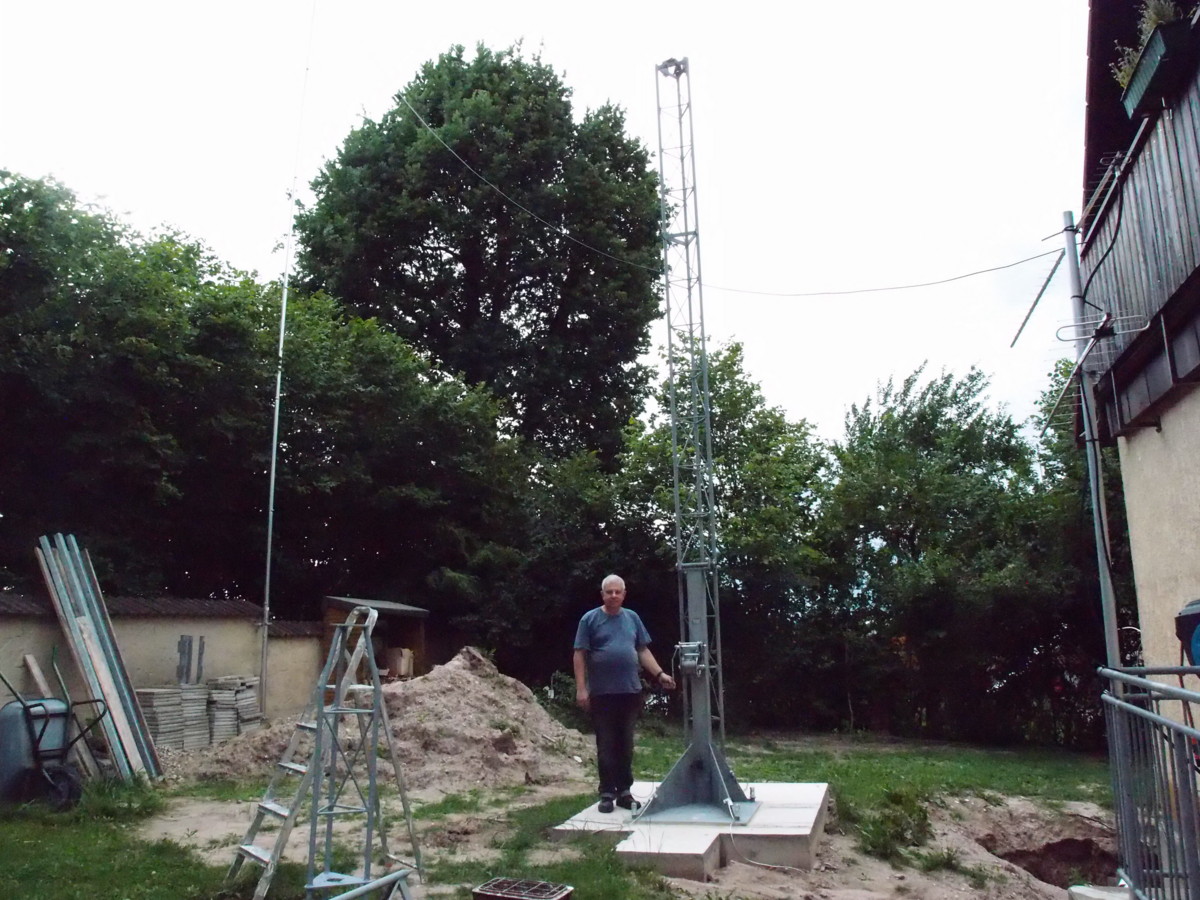
A dream comes true !
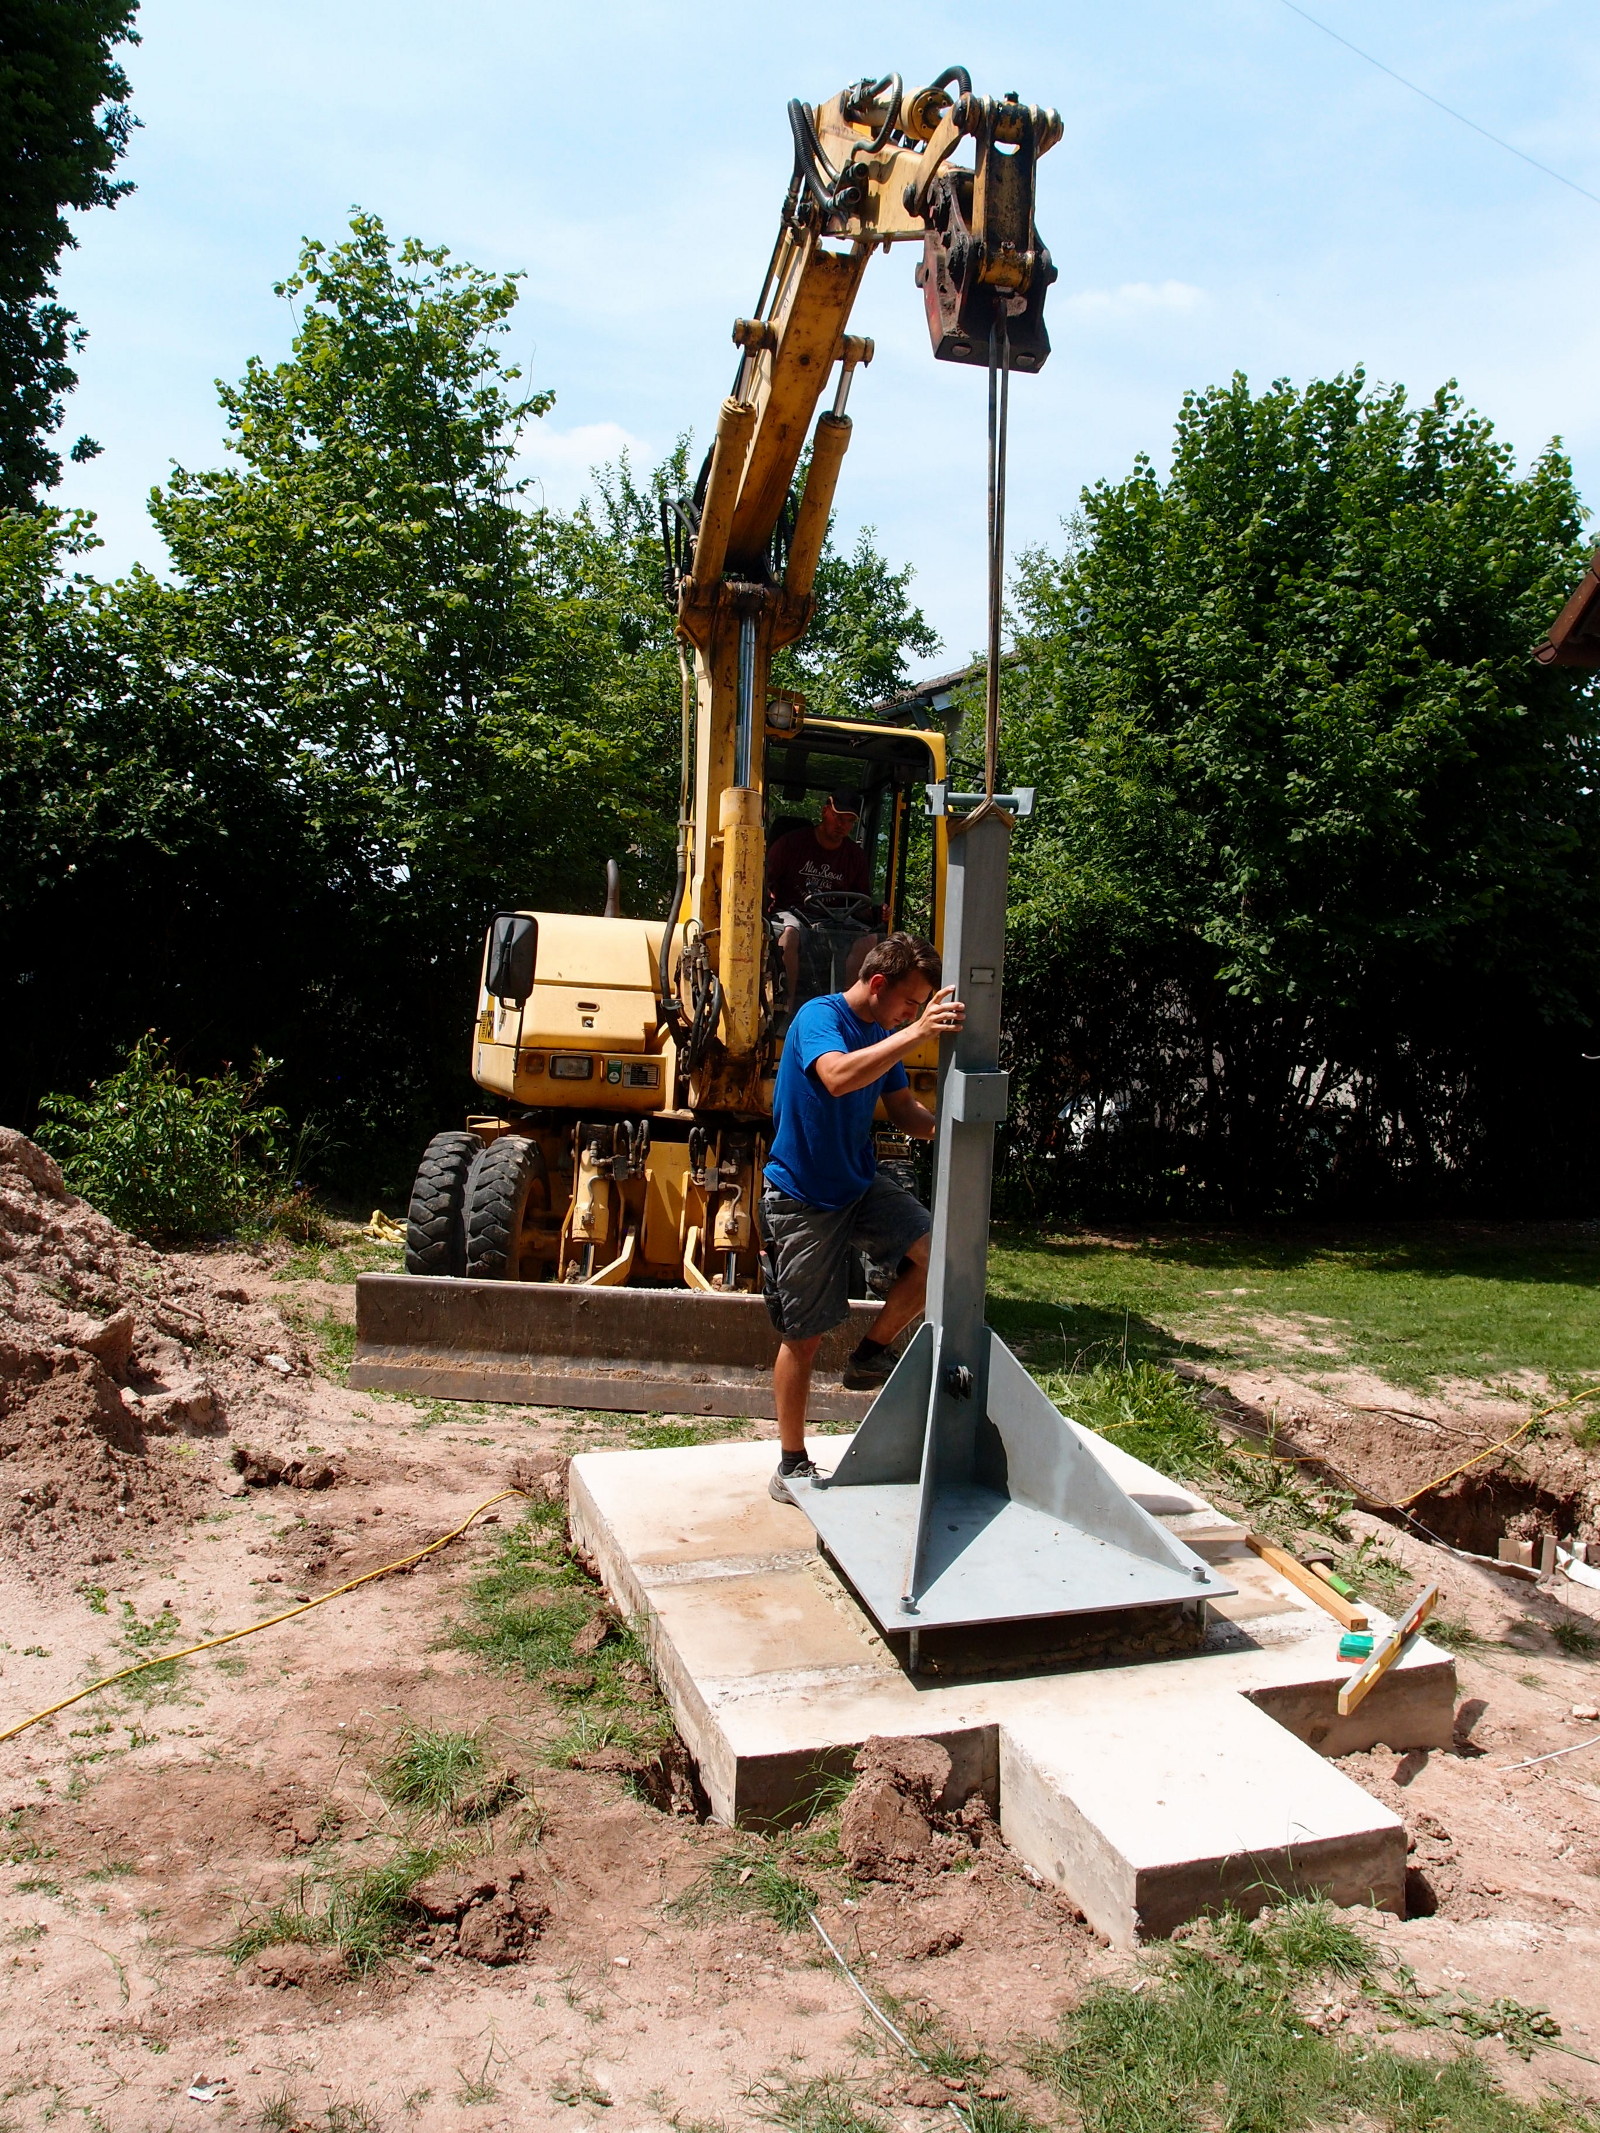
Now some patience before we can put the tower on the base. :-)
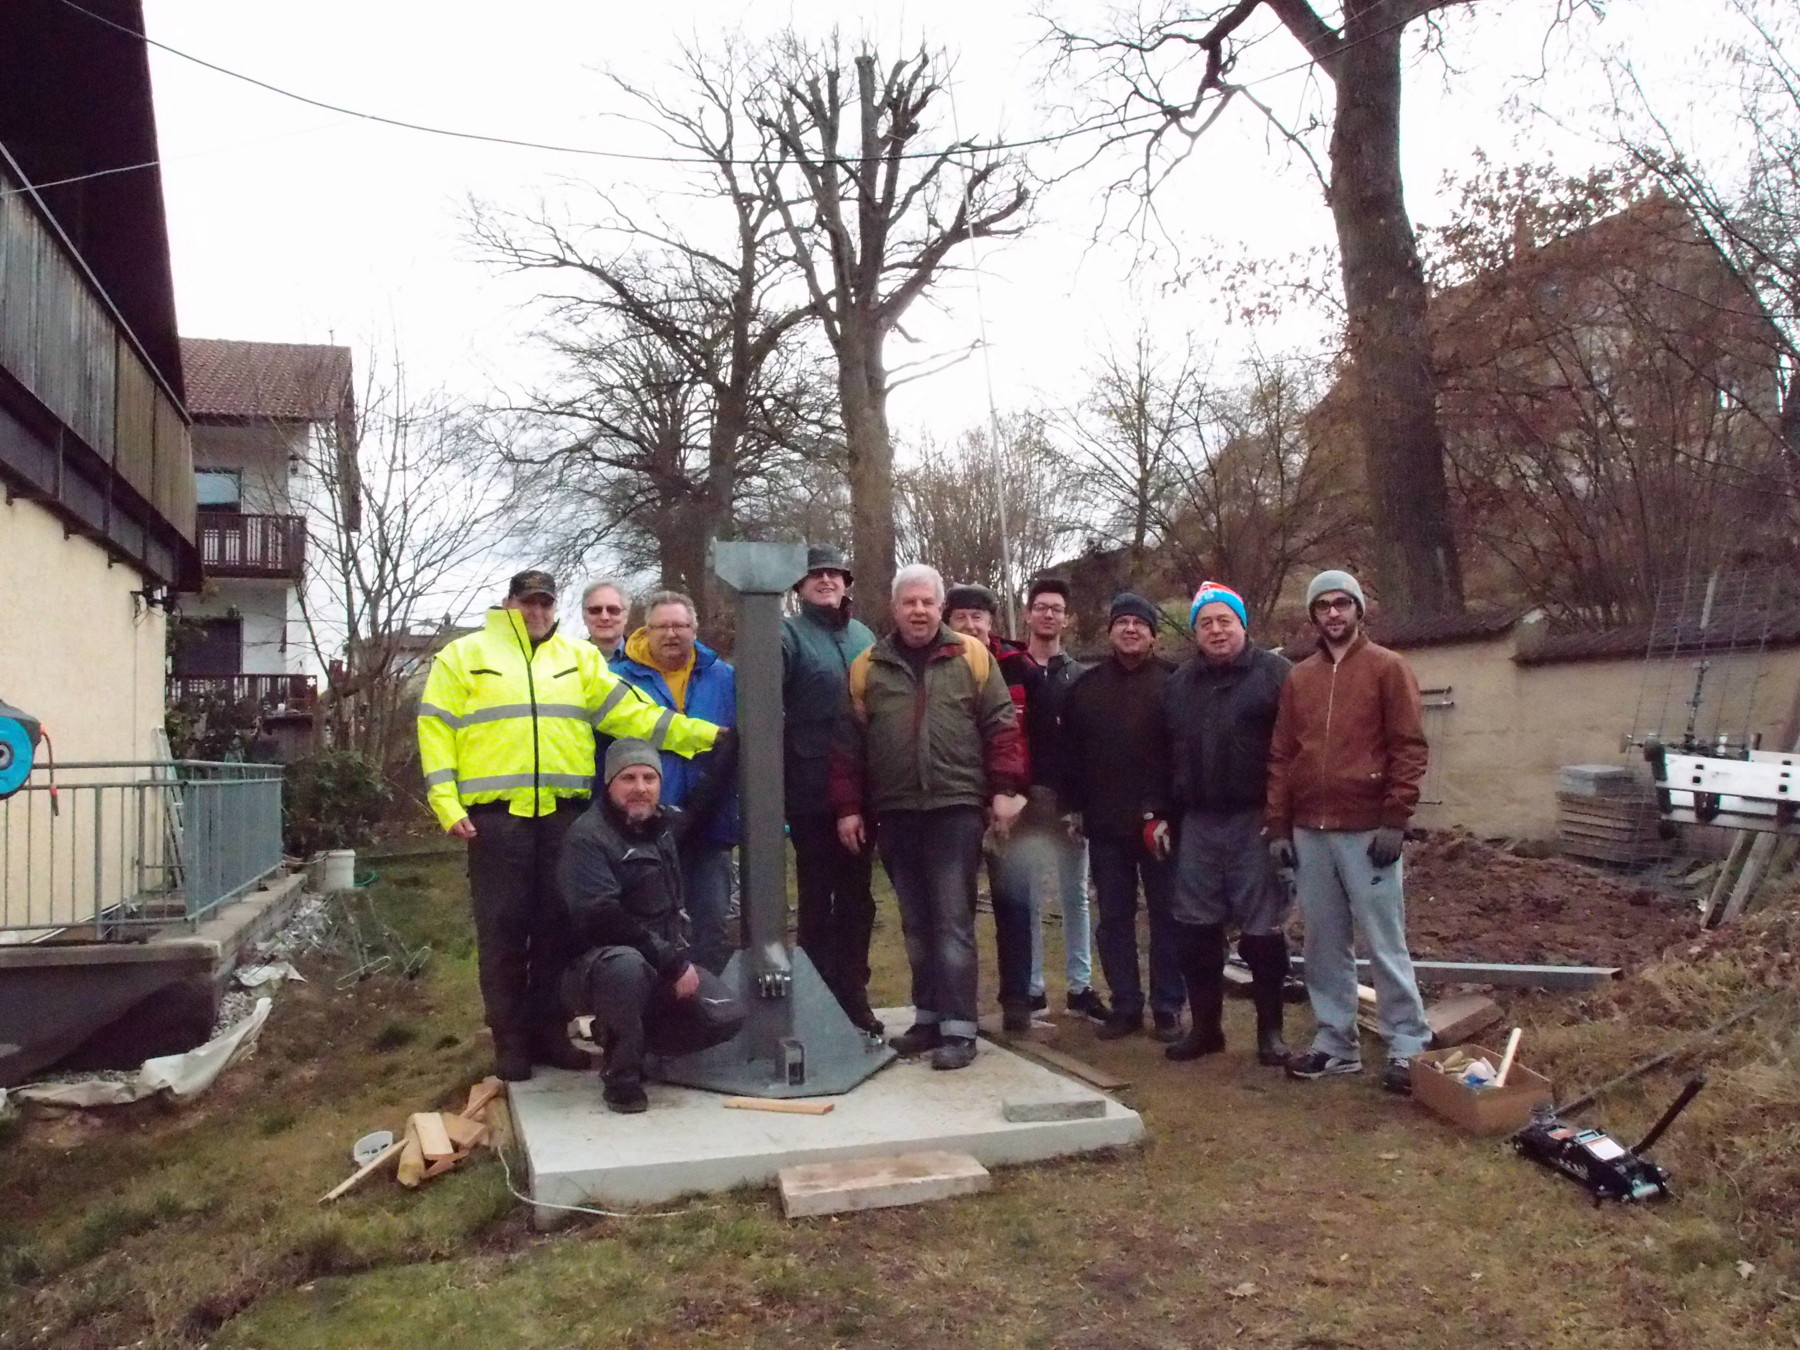
22nd June 2017 the next step!
 Mörtelbett
 Aufsetzen des Mastfußes
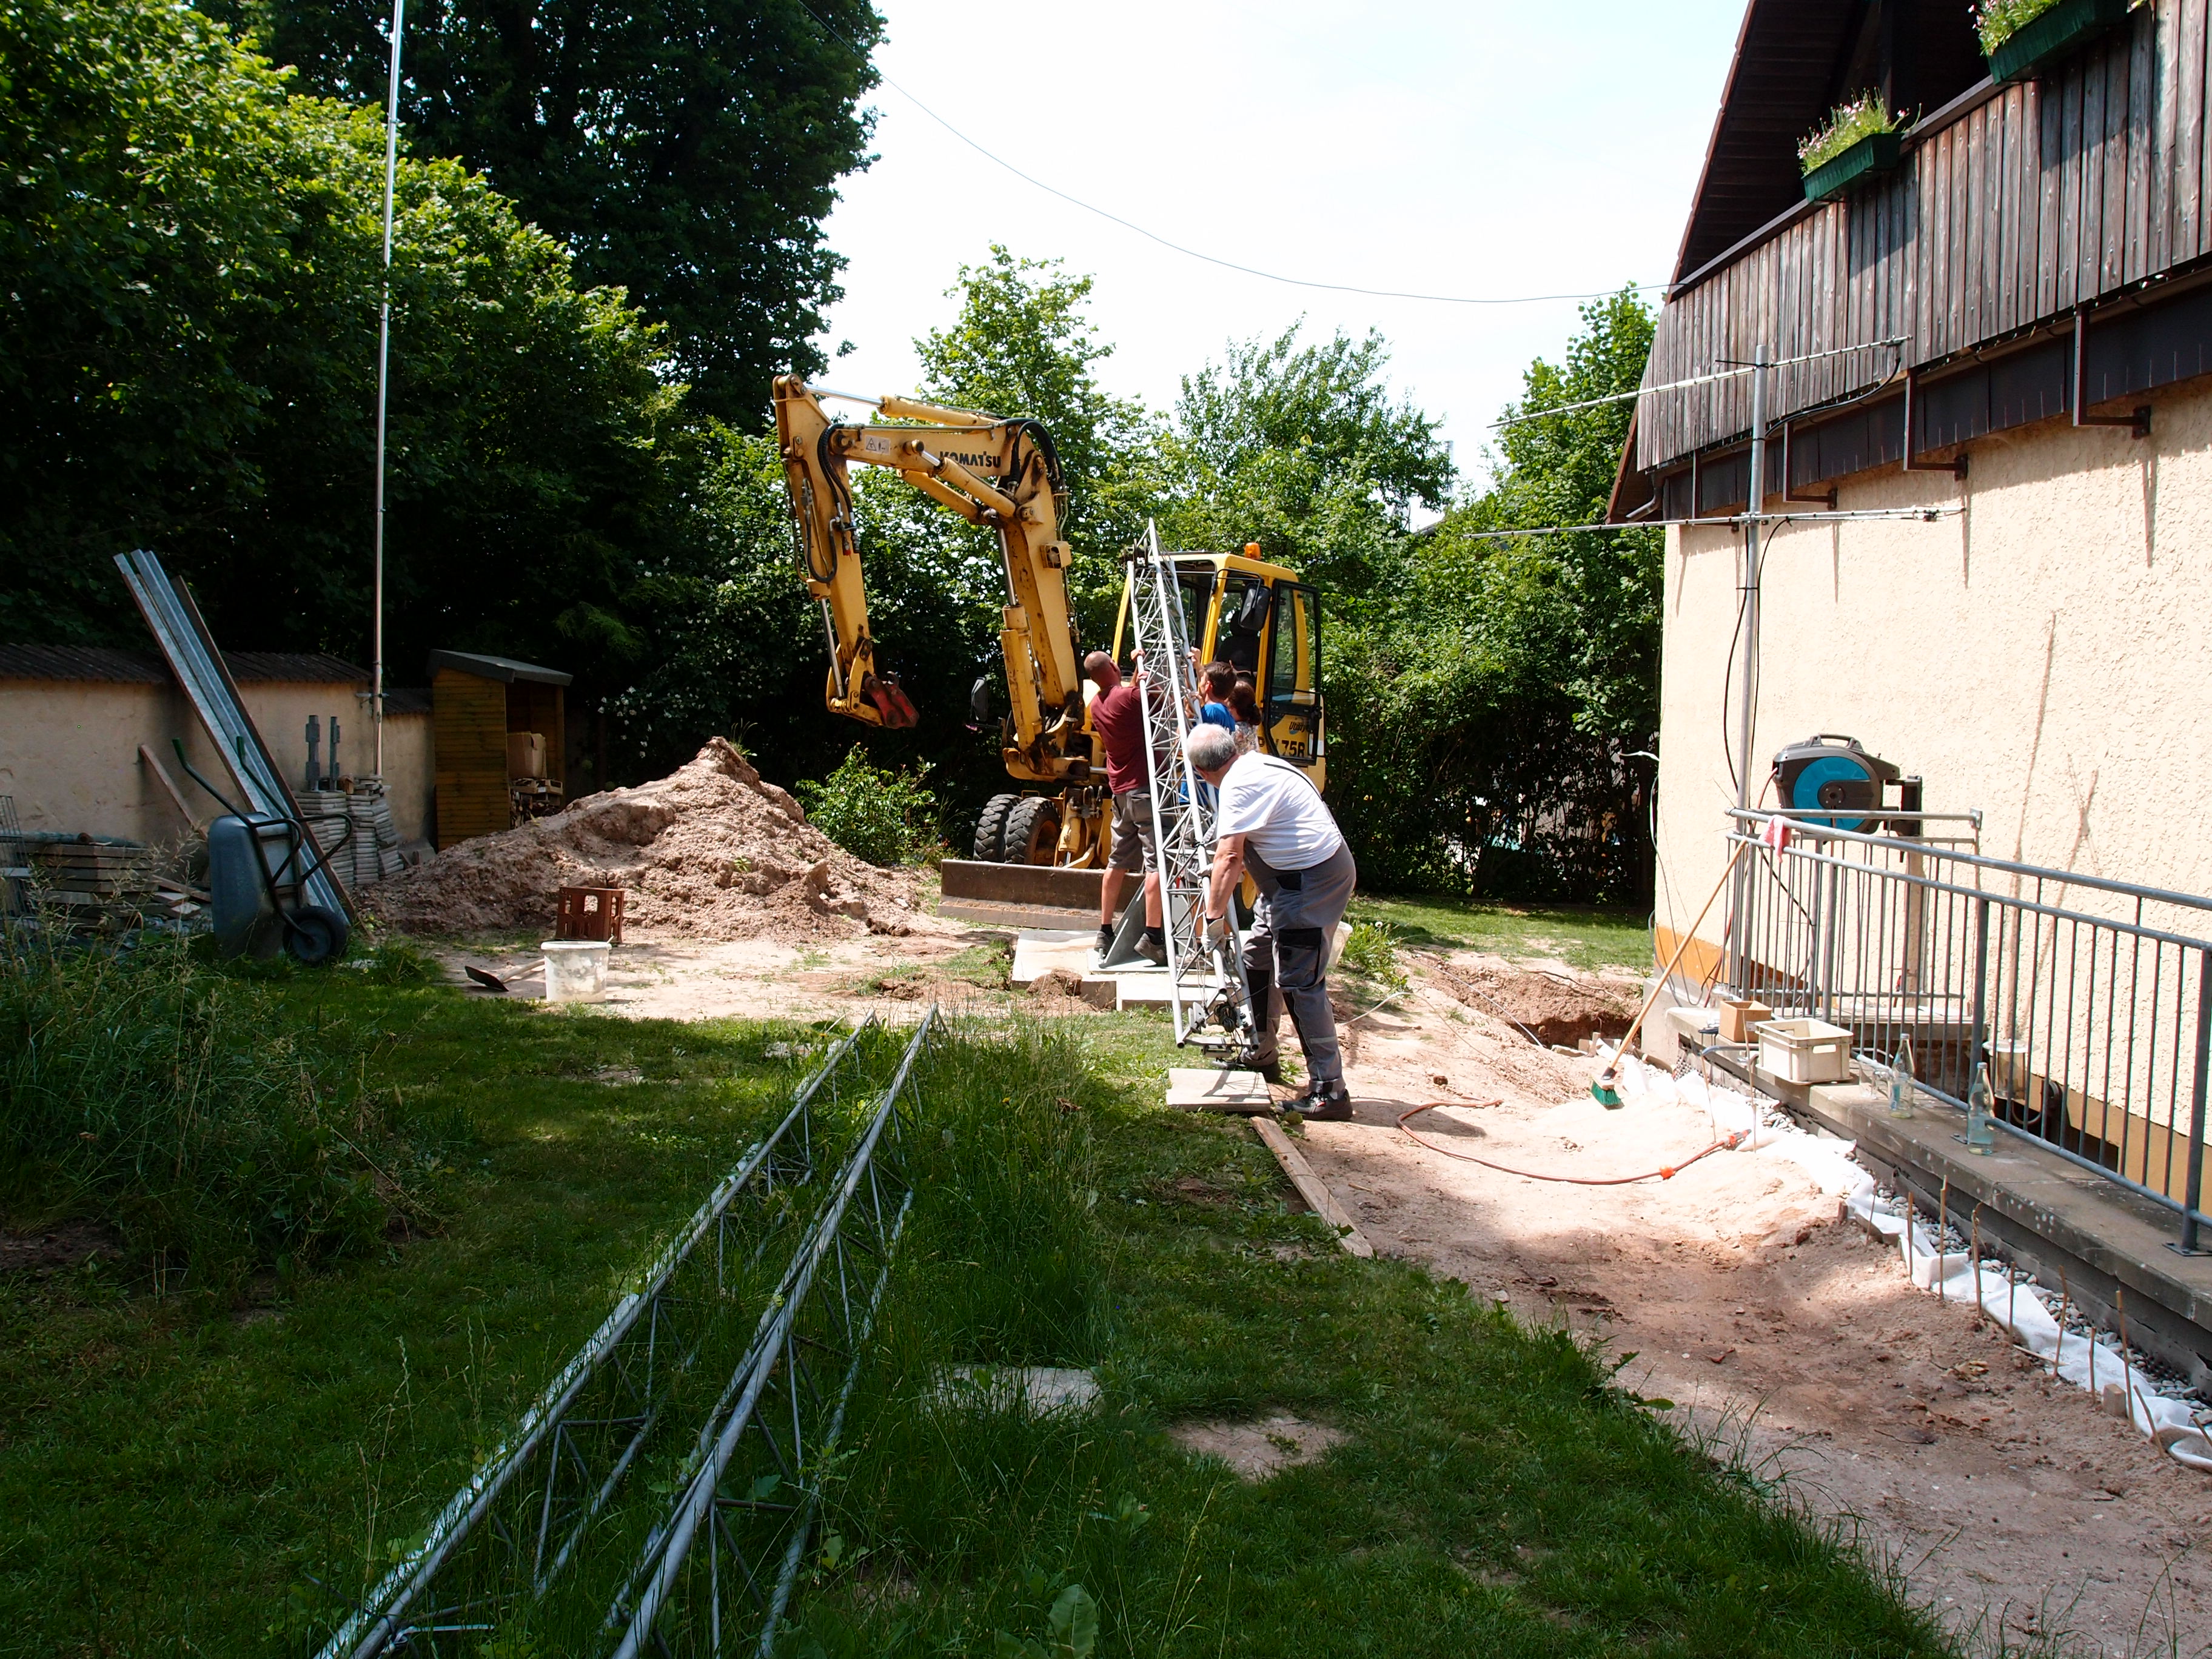 Aufsetzen des 1. Mastschusses

Still a lot of work, but a lot is done.
President Trump wants us to buy american, but when we do, he does not deliver!
Already in April 2017 I ordered two Fulton winches from the US at AMAZON.com because I did not find those strong ones in EU, but I still wait for them - bad bad bad President Trump !
3rd July I got a message that new estimated delivery will be end of August or in September. So I cancelled the order and ordered the same day at ebay. Already at 4th July I got the message that both are on the way, maybe a present for Independence Day?
12th July I got the first winch, fine and fast, but without a 1/2" -13 locker nut, which is a strange nut in continental Europe where we use centimeters and not inches. So for the first I used an old normal nut which I had. When i wanted to bring the box to the waste I heard a sound and found the missing nut between the folded parts of the box.
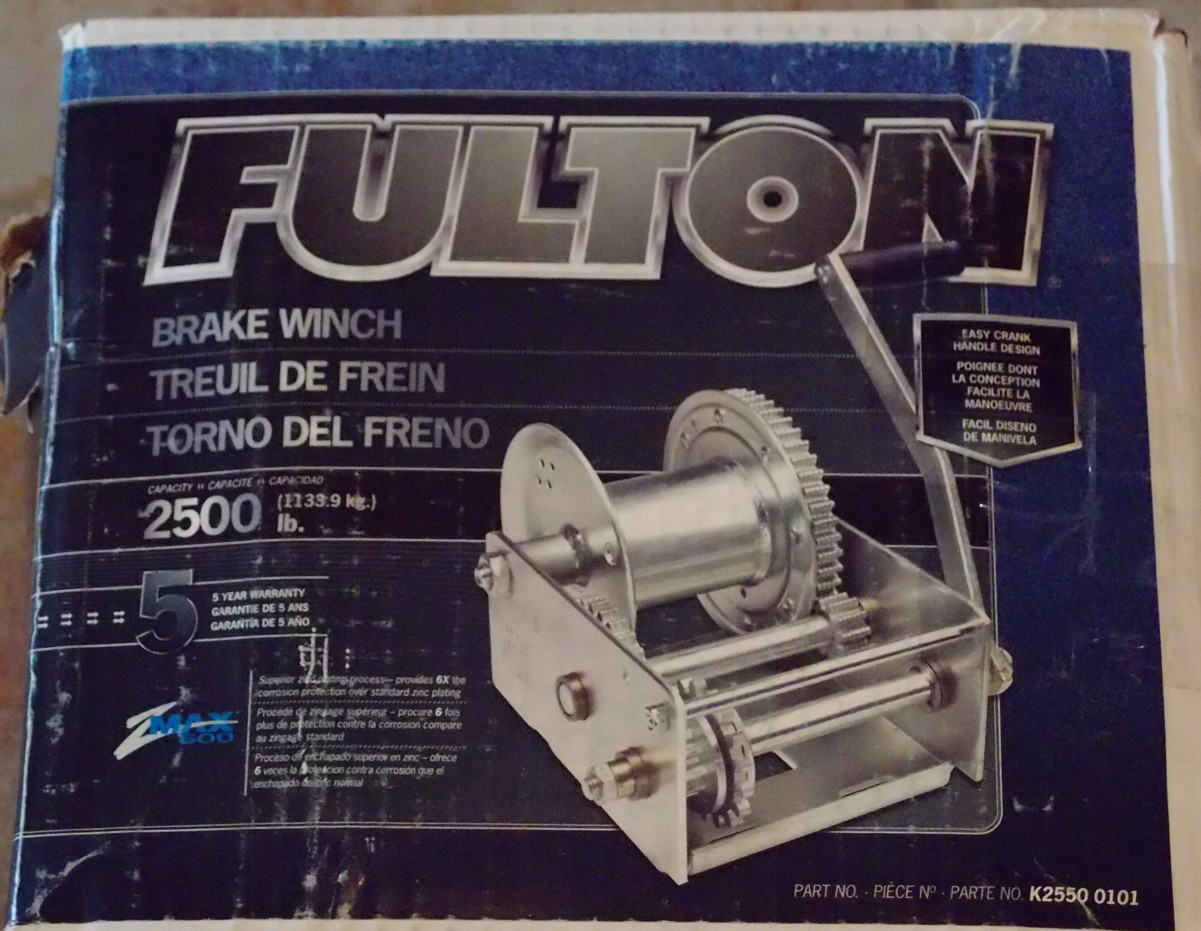 original box
I am really glad about this winch, but Mister President - why is this peace of US mastership marked as "Made in Mexico" ???? Bad bad bad President Trump !
Fulton 143200 Brake Winch 2,500 lbs. Replaces K2550 0101
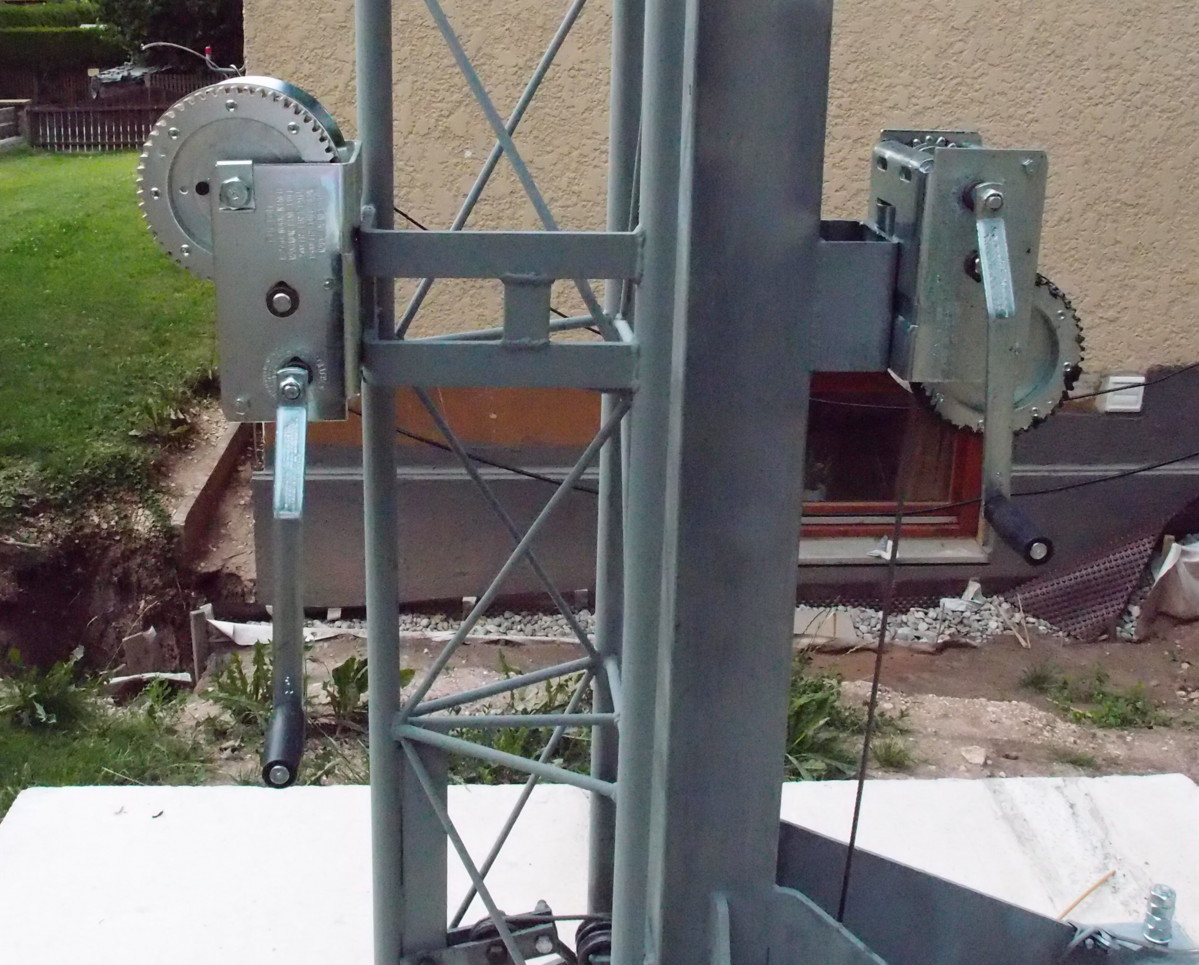
Here you see the great difference between the old original winch and the FULTON K2550 2500LB (about 1134 kg in continental Europe):
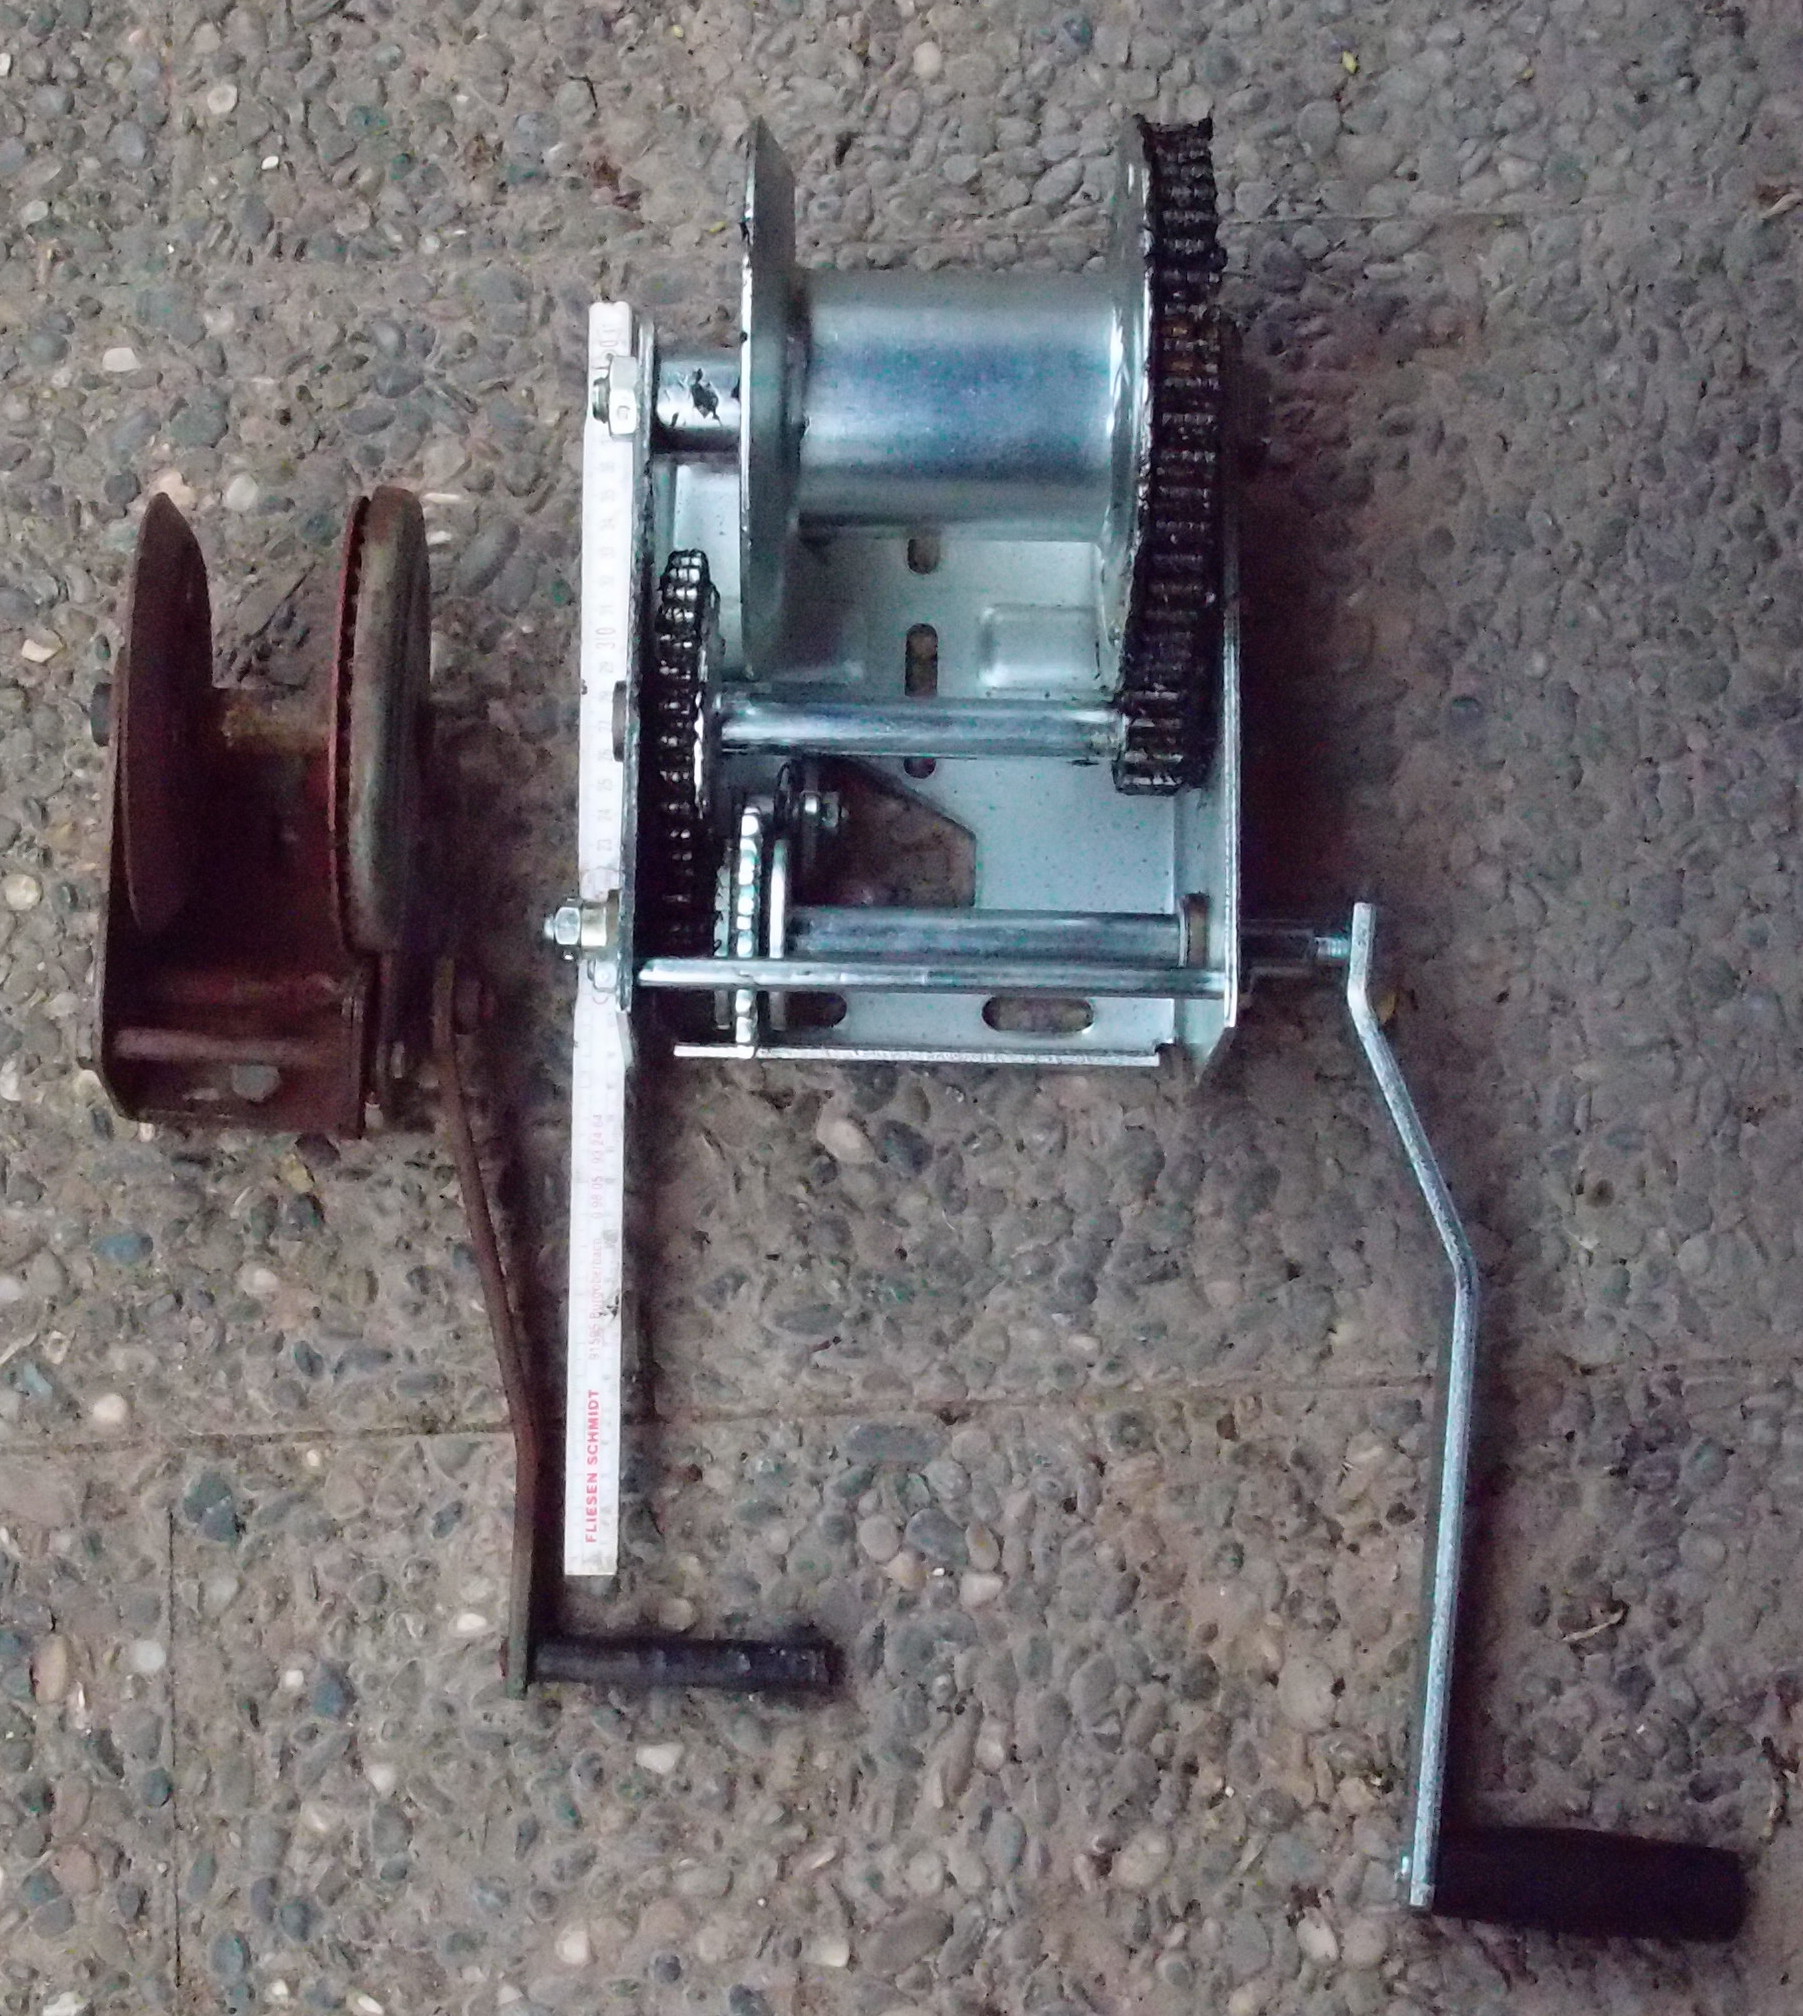 original winch and FULTON winch
Here how I attached the stainless steel cable to the drum:
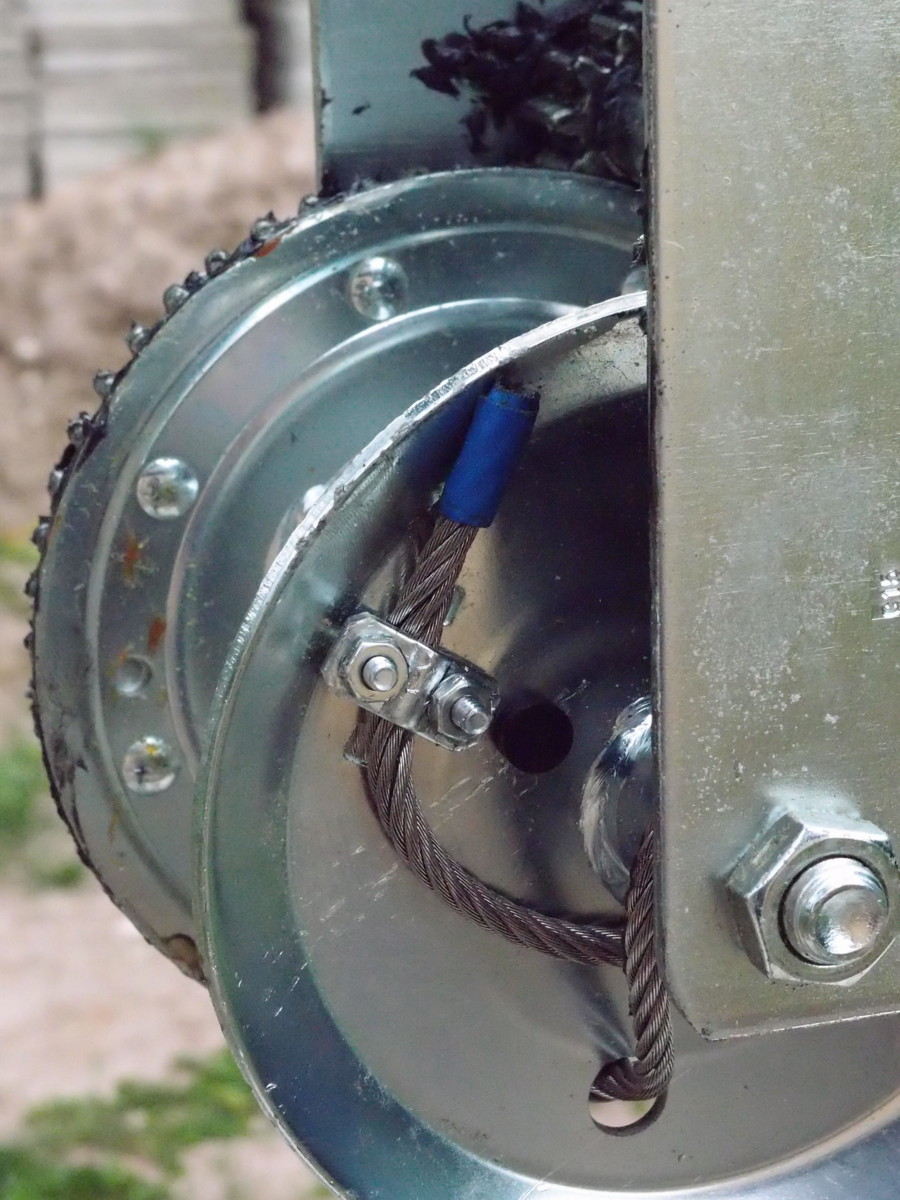 attachment of the cable
So first part is vertical now, waiting for the second winch:
... to be continued
15th July 2017 finally the second winch arrived:
 left winch for raising, right winch for tilting-over the tower
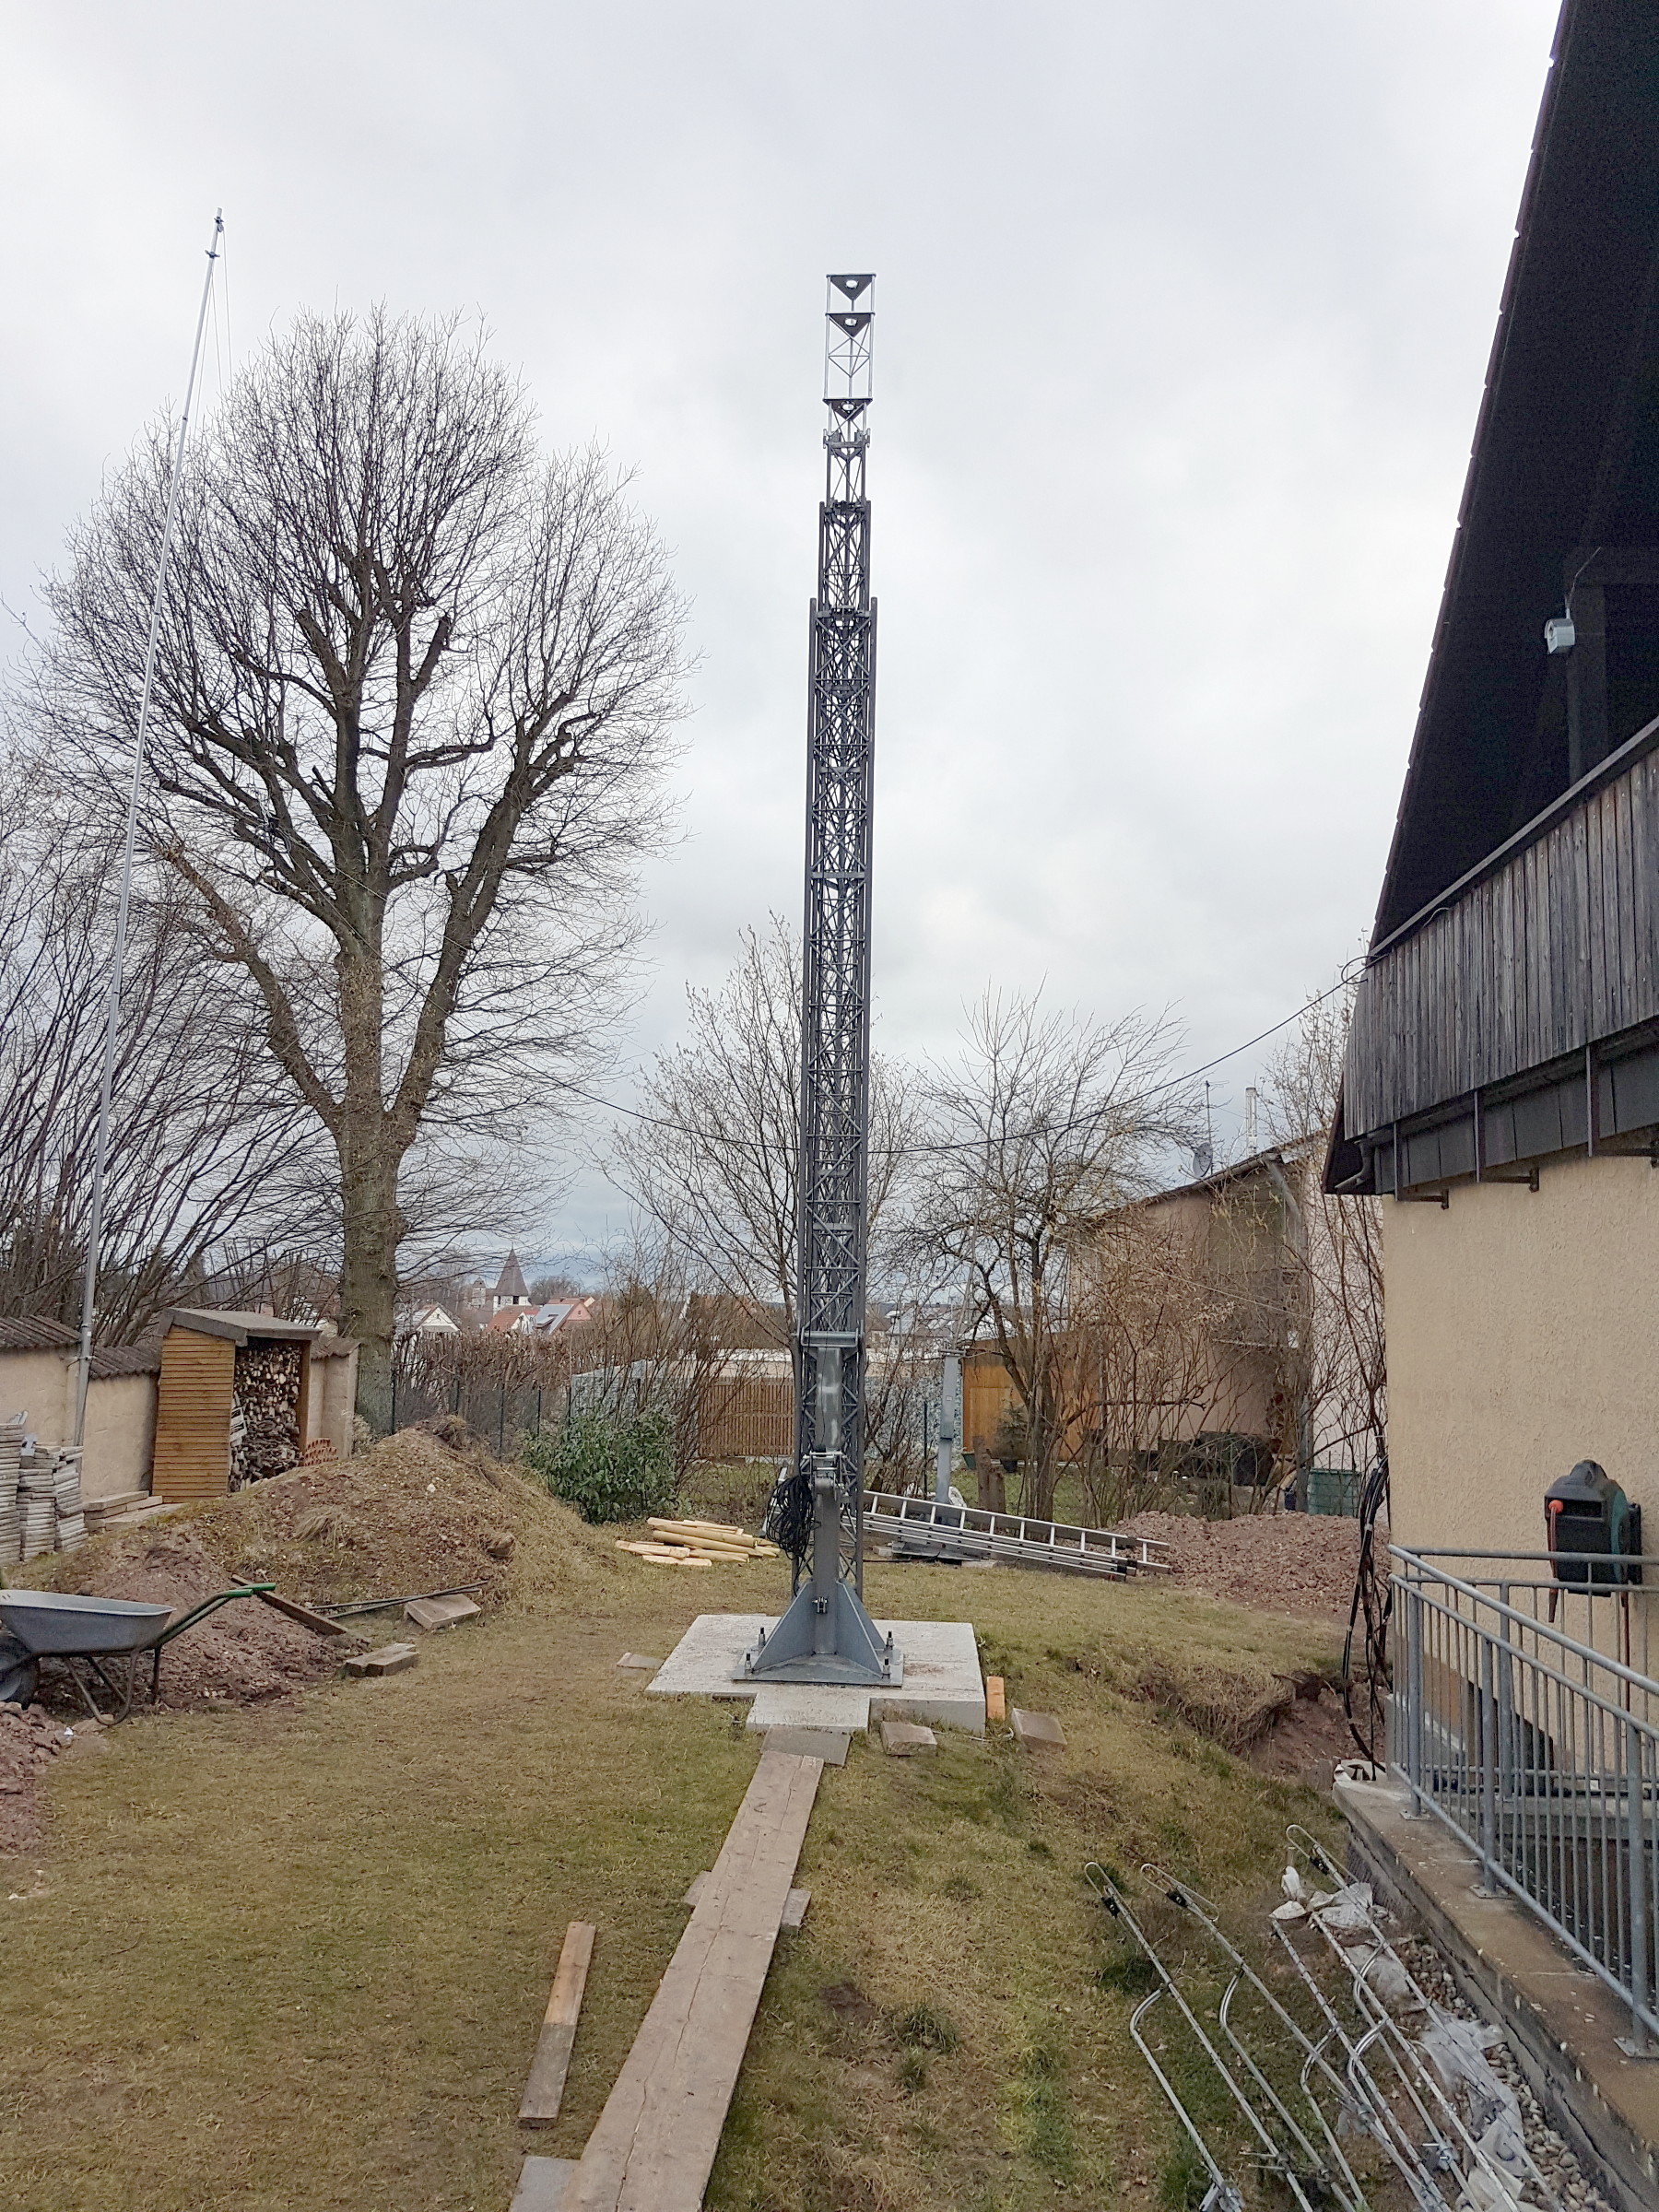
18th July 2017 step by step ...
19th July 2017 next step, mounting the head section
 head section
21st July despite of my wedding day (39 years) I further worked at the tower (step by step ...):
 rotor, mast bearing and antenna mast mounted and the first 2 of 4 counter weights
rotor, mast bearing and antenna mast mounted and the first 2 of 4 counter weights
 Gegengewichte - Prinzip einer Schranke
22nd July 2017, now vertical rotor mounted and 2 of 3 H constructions:
24th July 2017 despite of some rain I managed to fix the first 3 (of 9) antennas at the tower
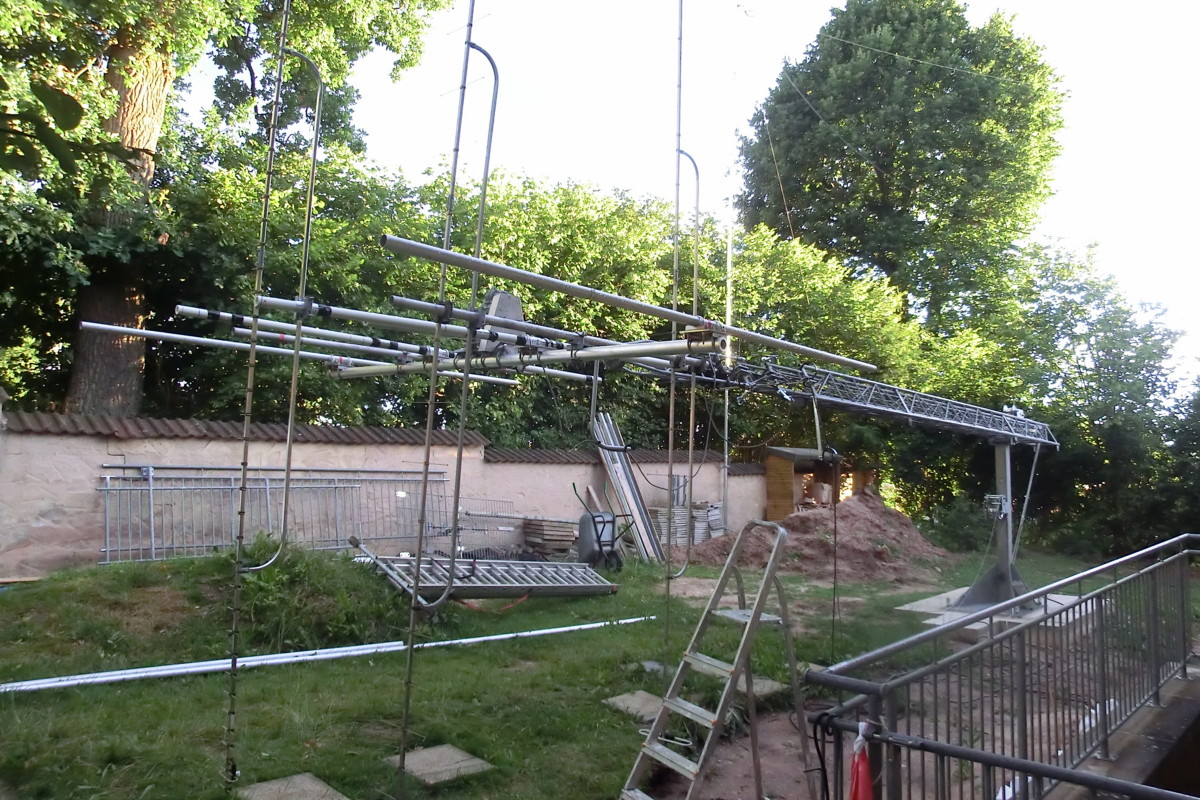 48el for 23cm and 2x23el for 70cm, all nuts secured with a second self locking nut
25th July 2017 despite of a rainy day I mounted the next 3 antennas, so already 6 (of 9) antennas are at the tower. step by step ...
 1x48 for 23cm, 4x23 for 70cm and 1x11 (out of 4) for 2m
By the way, all antennas are Flexa-Yagis, for me they are the ideal compromise of gain, length and wind load and have a high level quality of material. Some of my older antennas moved around with me since 1985 at several locations.
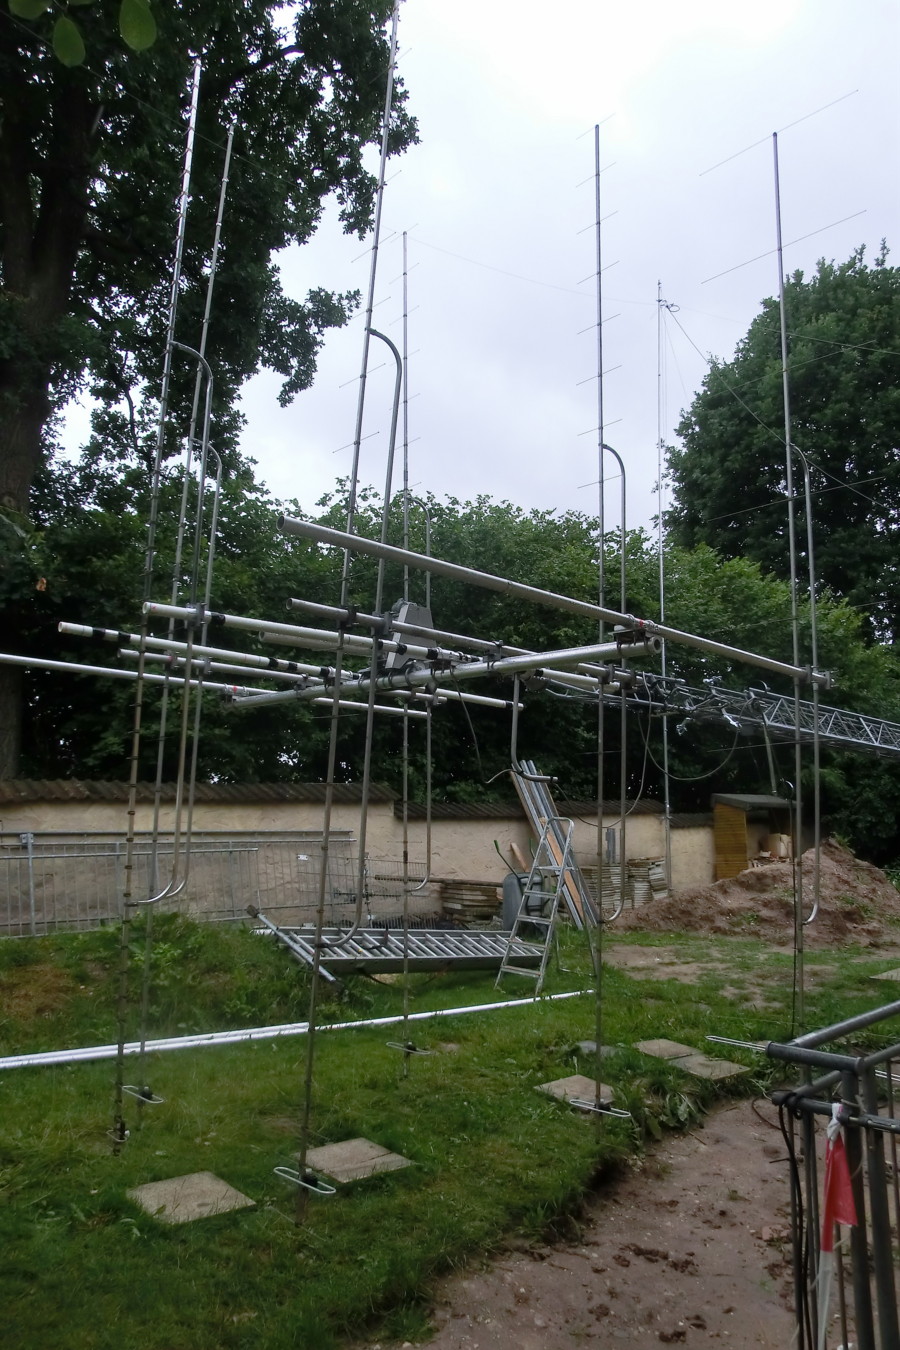
27th July 2017, after a really rainy day yesterday today i could work at the tower again.
So i fixed the rest of the counter weights, so I have 4x10kg weight at the lower side of the tower:
 4x10kg principle of a barrier
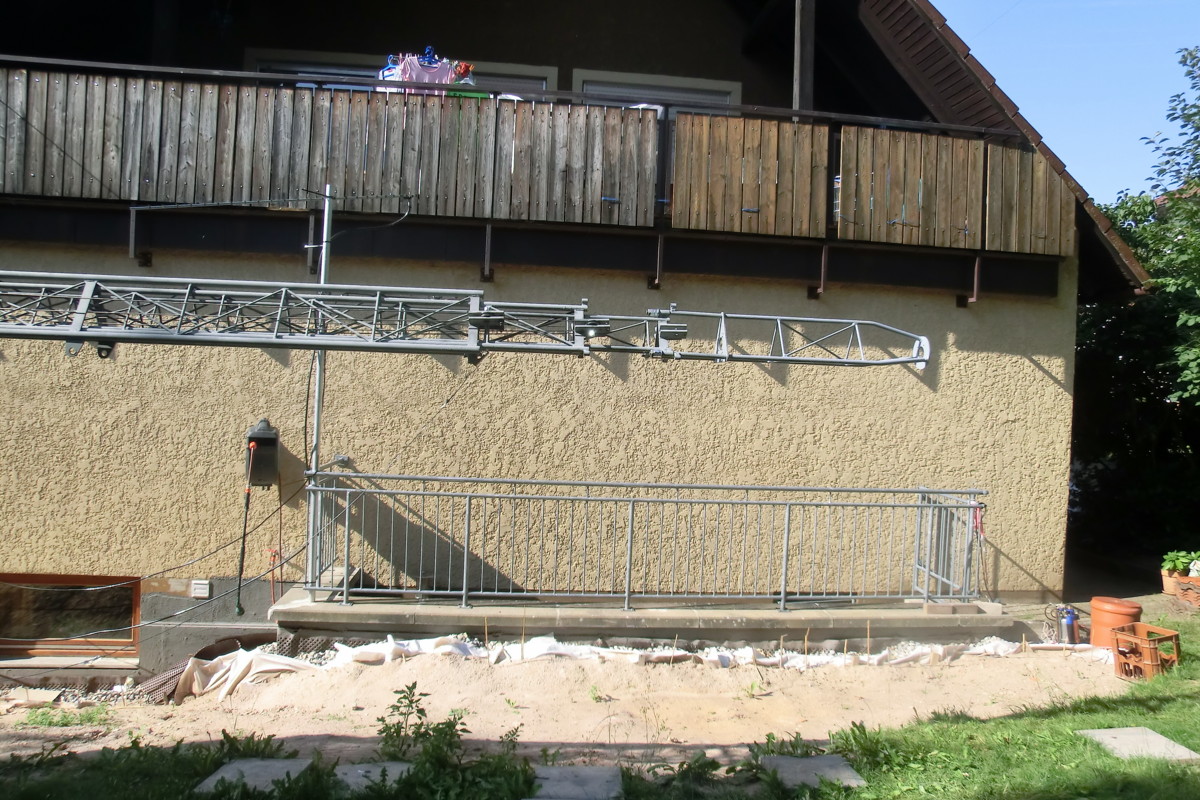
And I think I will not let the tower stand the whole time at maximum height of 17m, but 14m looks good as standard, antennas have a free look and from the middle part of the tower only 7 of 16 elements are out, so it should stand very stable.
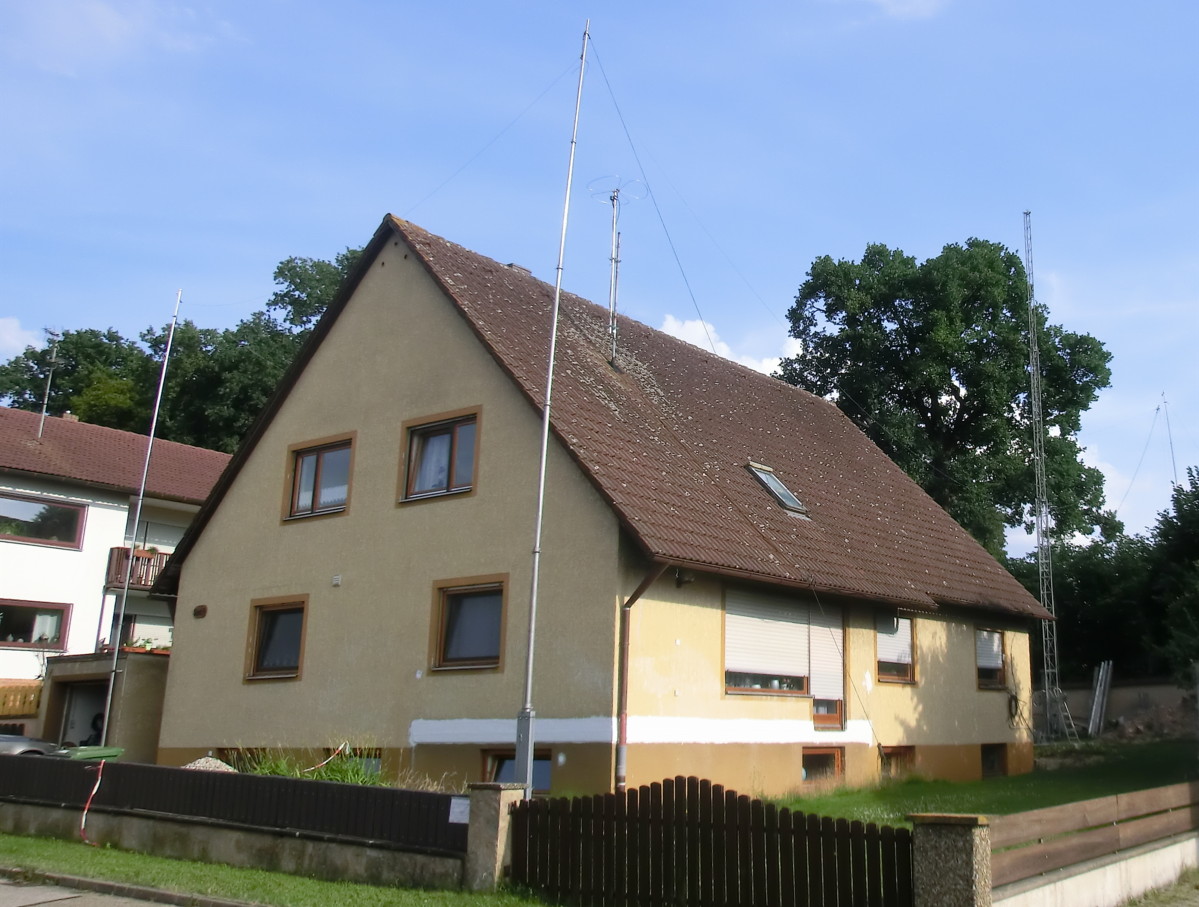
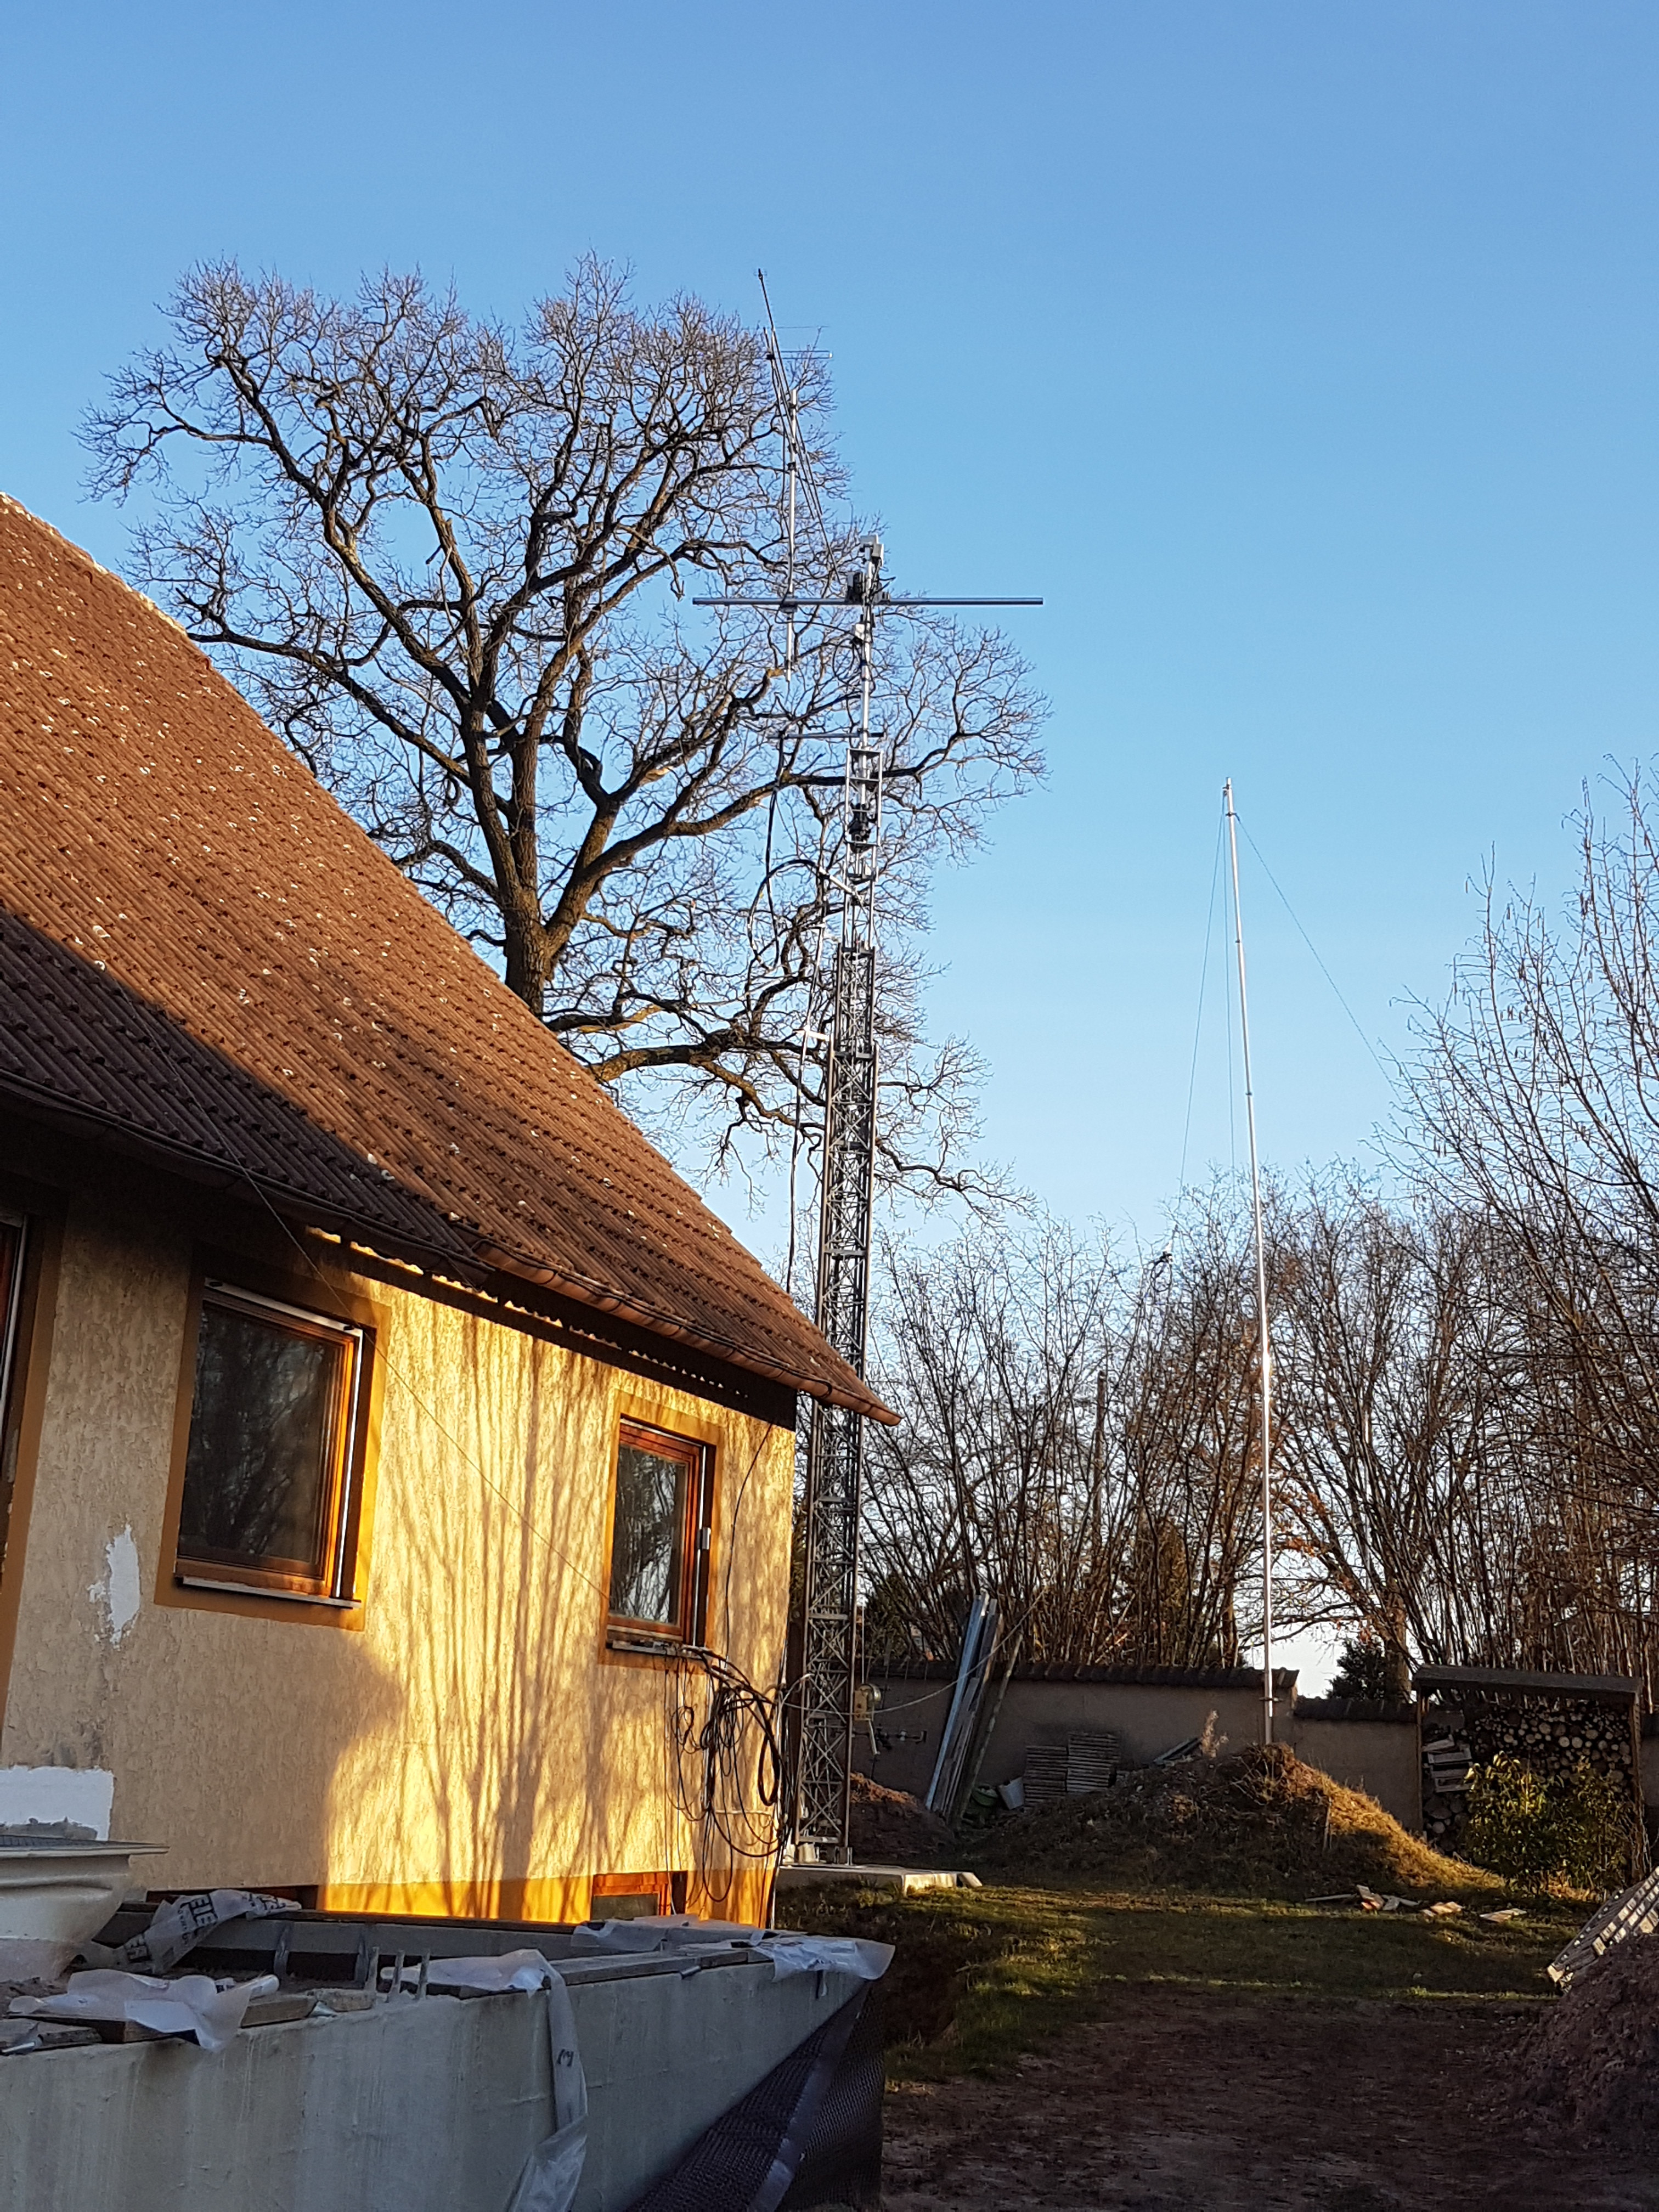
 ant at 14m above ground, qth is 420m above sea level
Still no cable at the antennas and no preamp up, I hope I can do it the next days, keep the fingers crossed!
28th July 2017: I mounted my 3 preamps for 2m, 70cm and 23cm and the splitter for 70cm at the tower, renewed the 12V Kabel for the 70cm preamp, fixed the antenna cables from the 23cm ant to the preamp and from the four 70cm ant to the splitter. Its exhausting how many single handgrips this are. I hope for first tests next week.
29th July 2017 READY and initial operation capability !!!!
Ok, I still have to do some smaller things and not everything went smooth, but I am qrv! First qso on 2m and 70cm with the new antenna system in the eve of 29th with DL2AAZ.
So a dream came true!
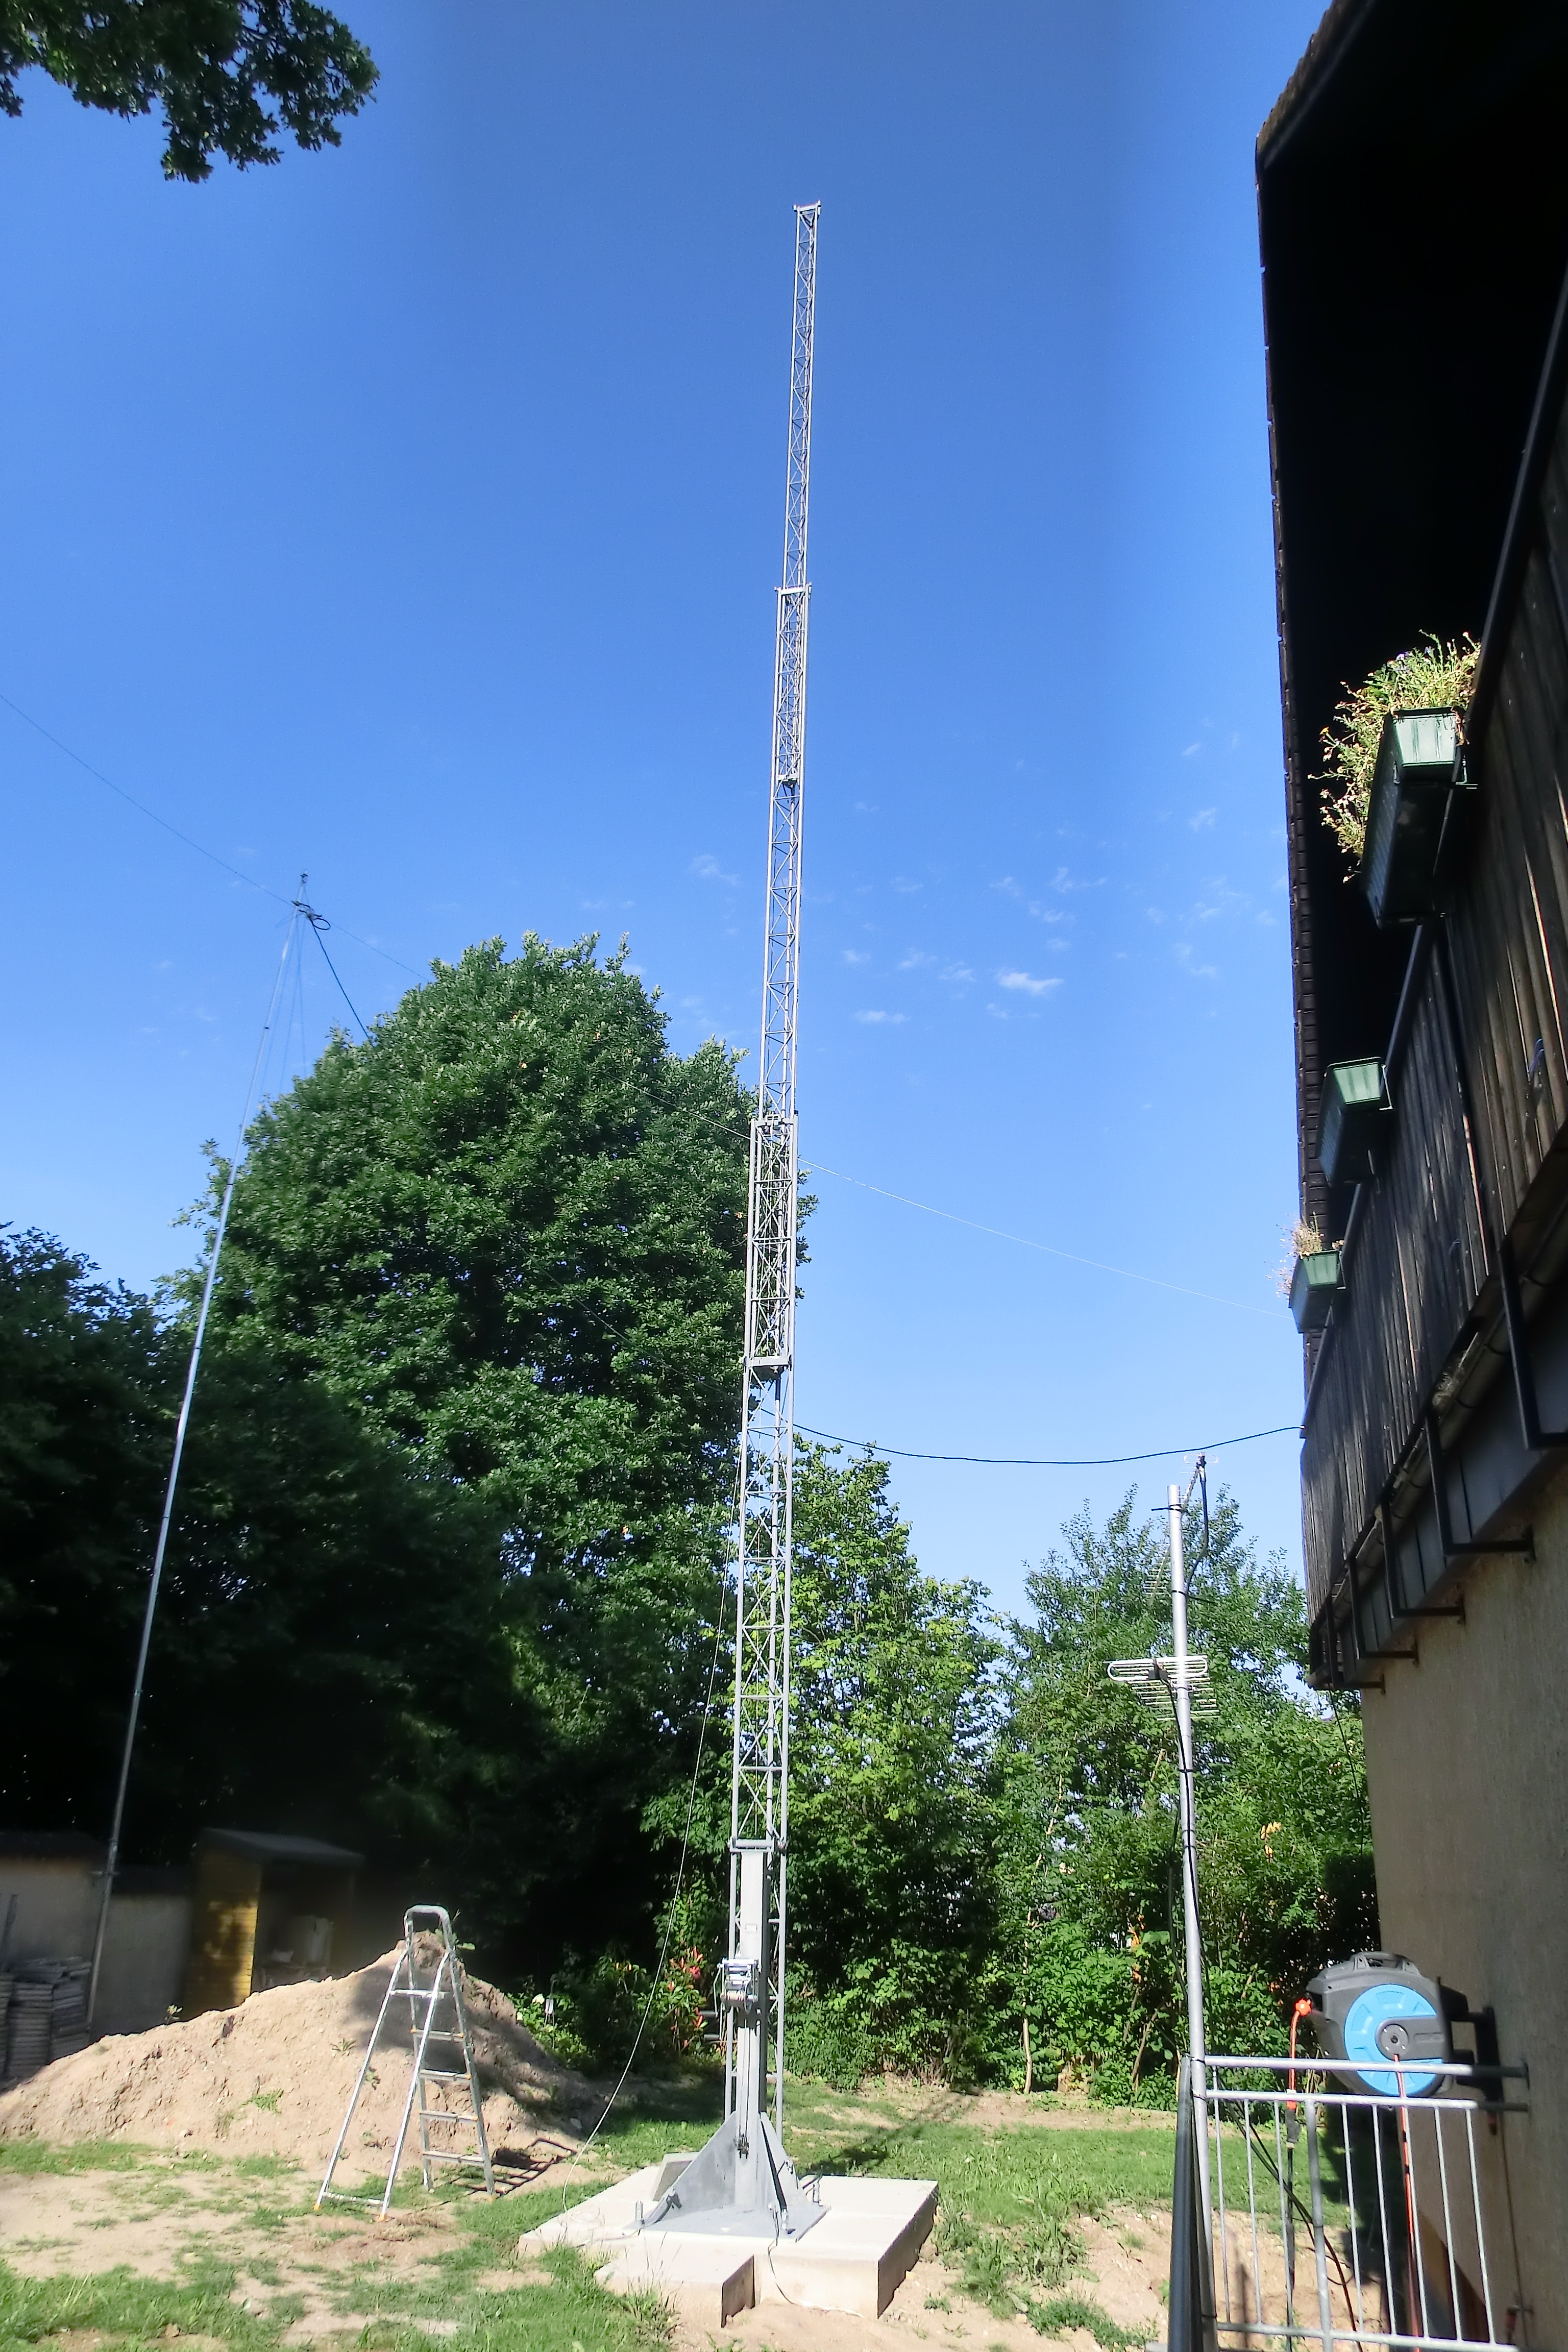
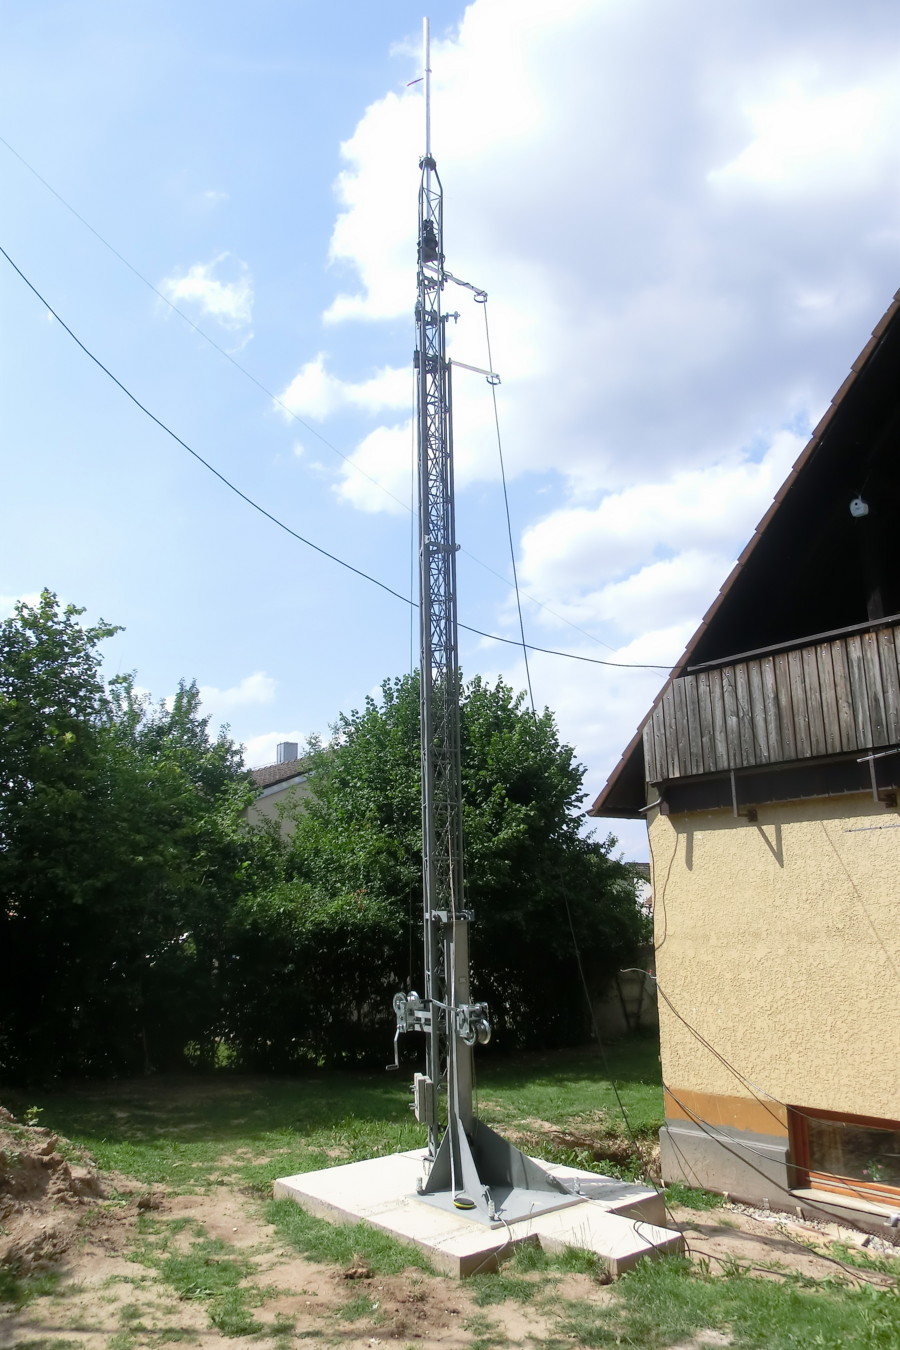
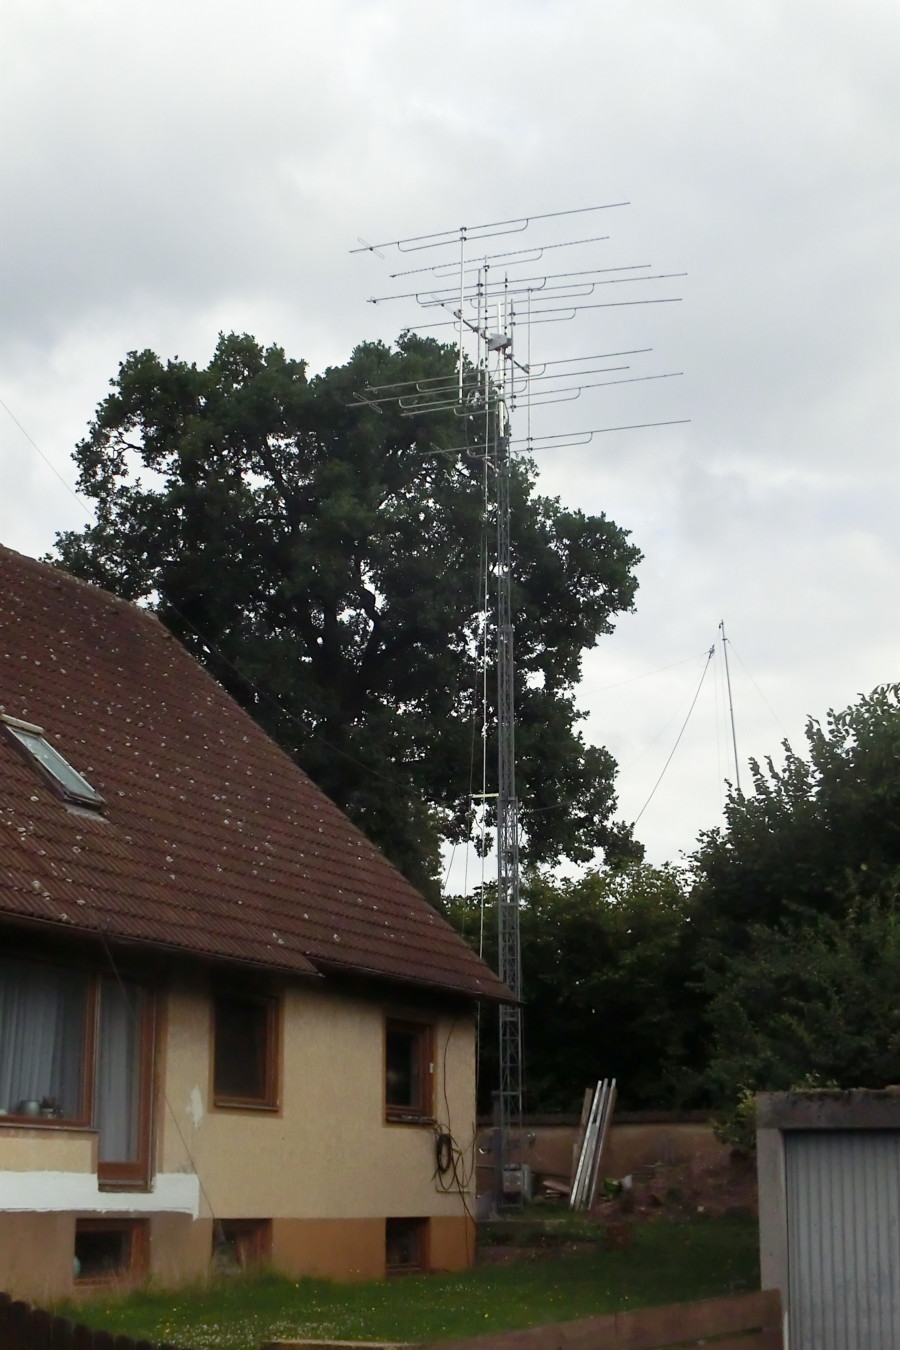
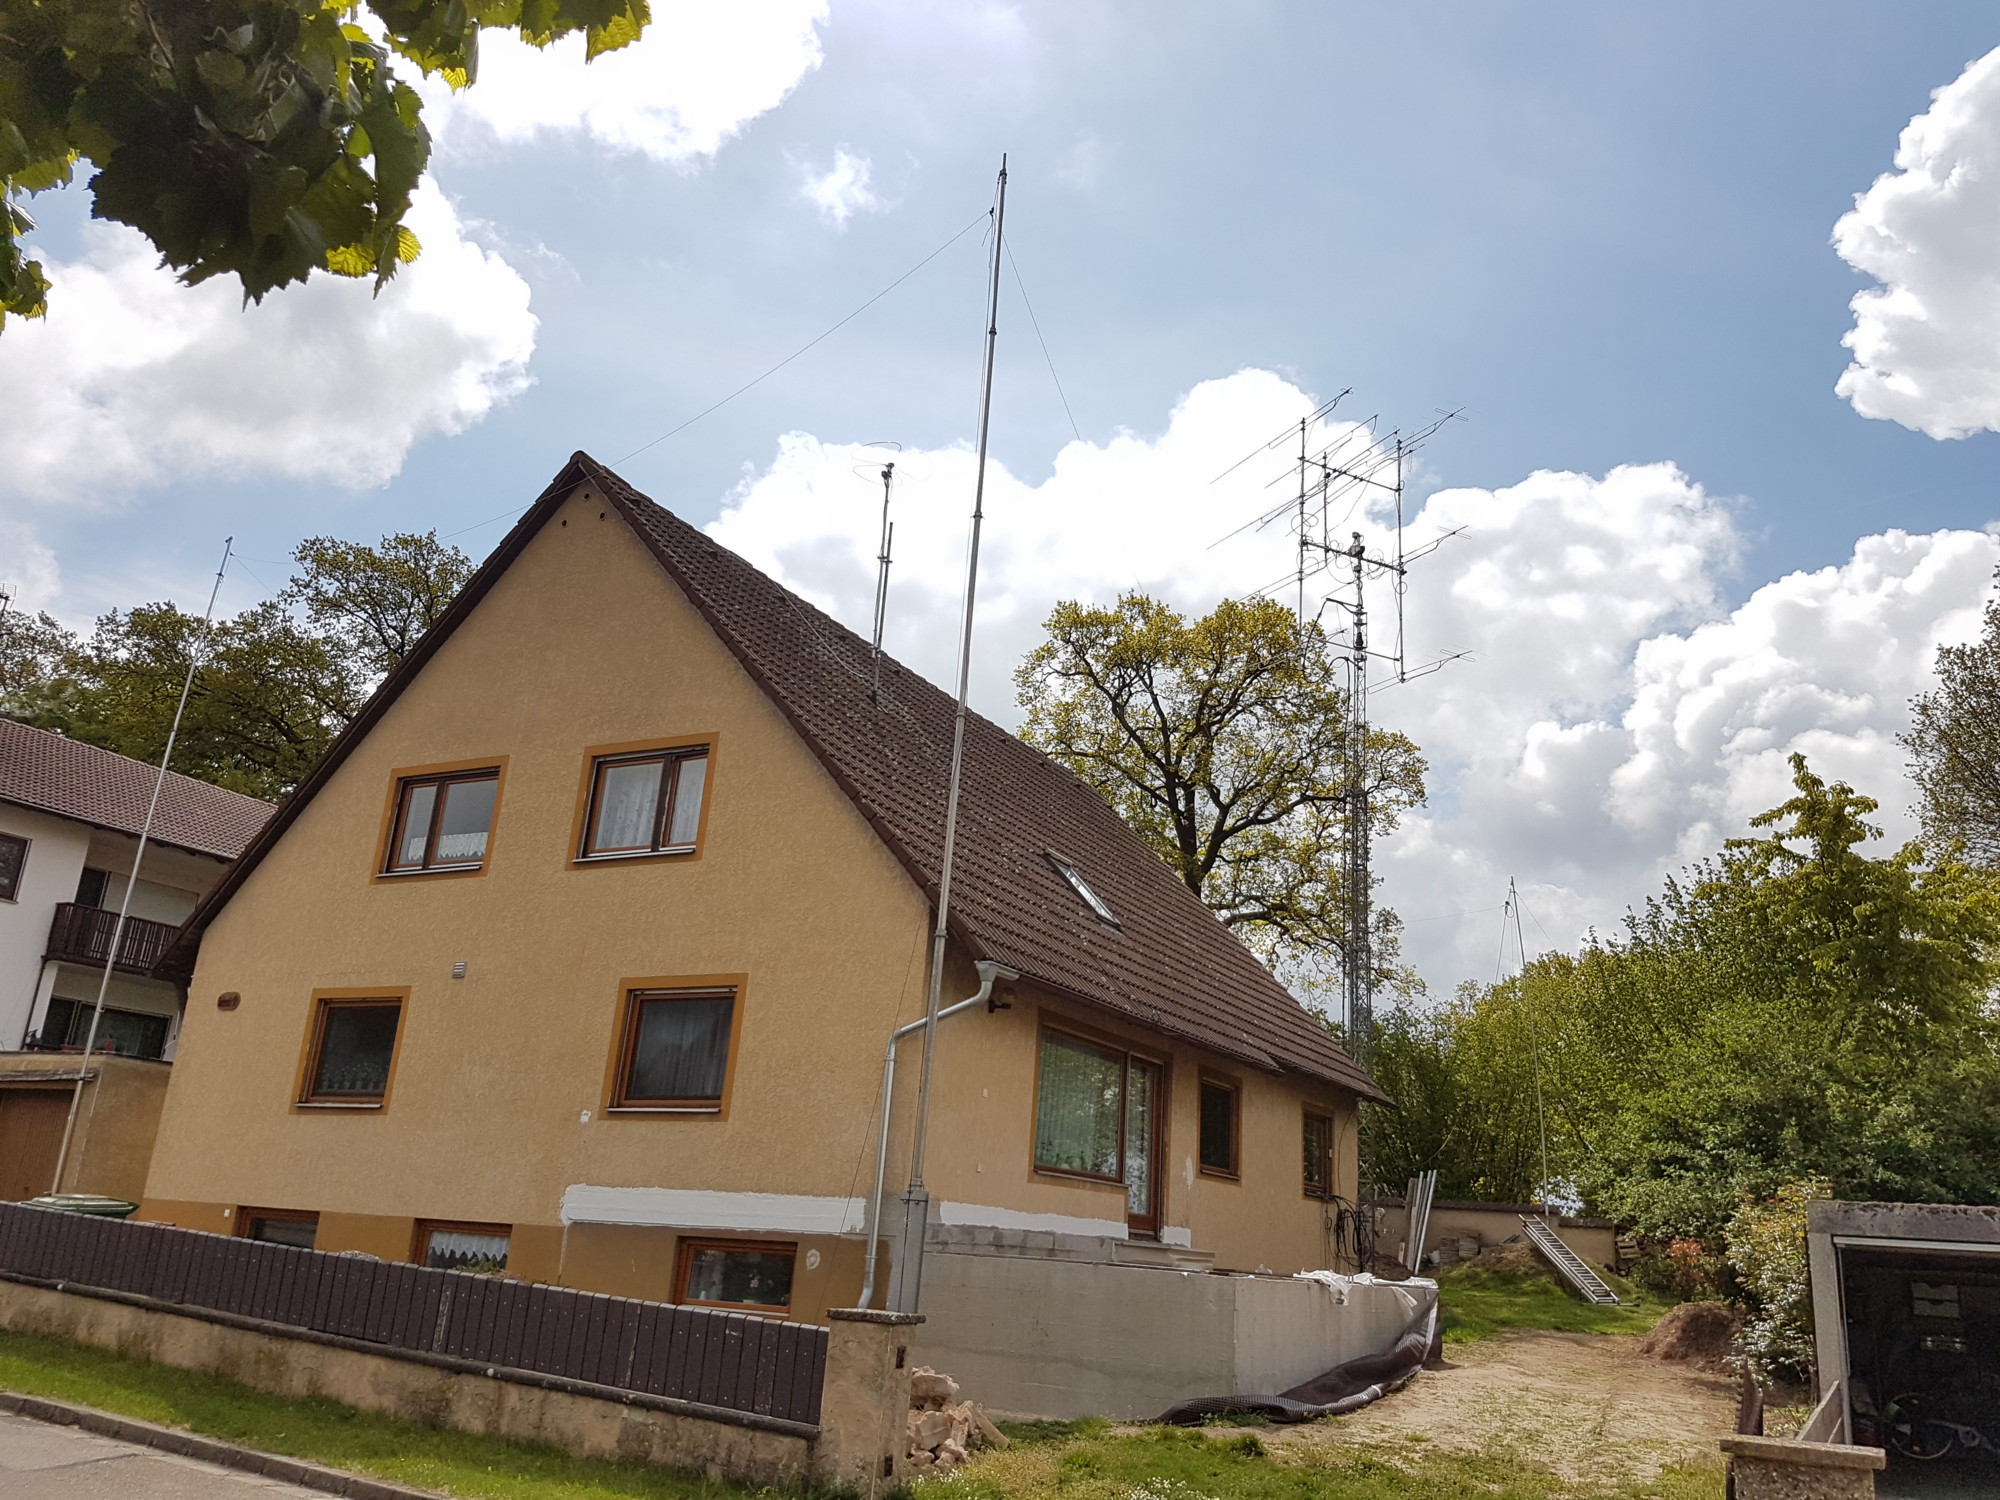
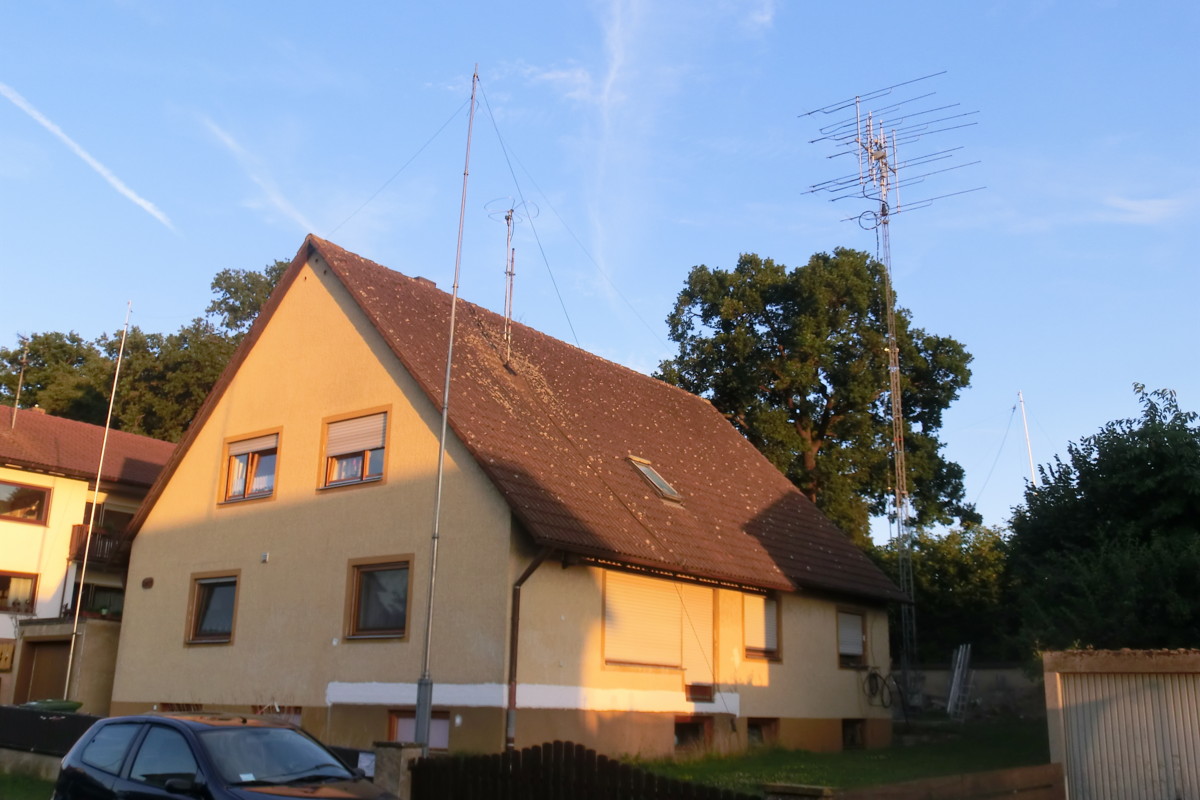 Versatower BP60 at 17m, I will use him at 14m as standard height.
A dream was destroyed - storm
24th December 2018 at 02:45 local time in the night my yl and I waked up by the noise of a big storm around our house. Wheatherforecast had been only for a rain-front and strong wind but no storm warning. My tower was at my standard height of 14m (of 17m). I got out of the house to lower the tower, but coming around the house my loved tower was already down, totally destroyed as well as my 3x4 VHF/UHF antennas.
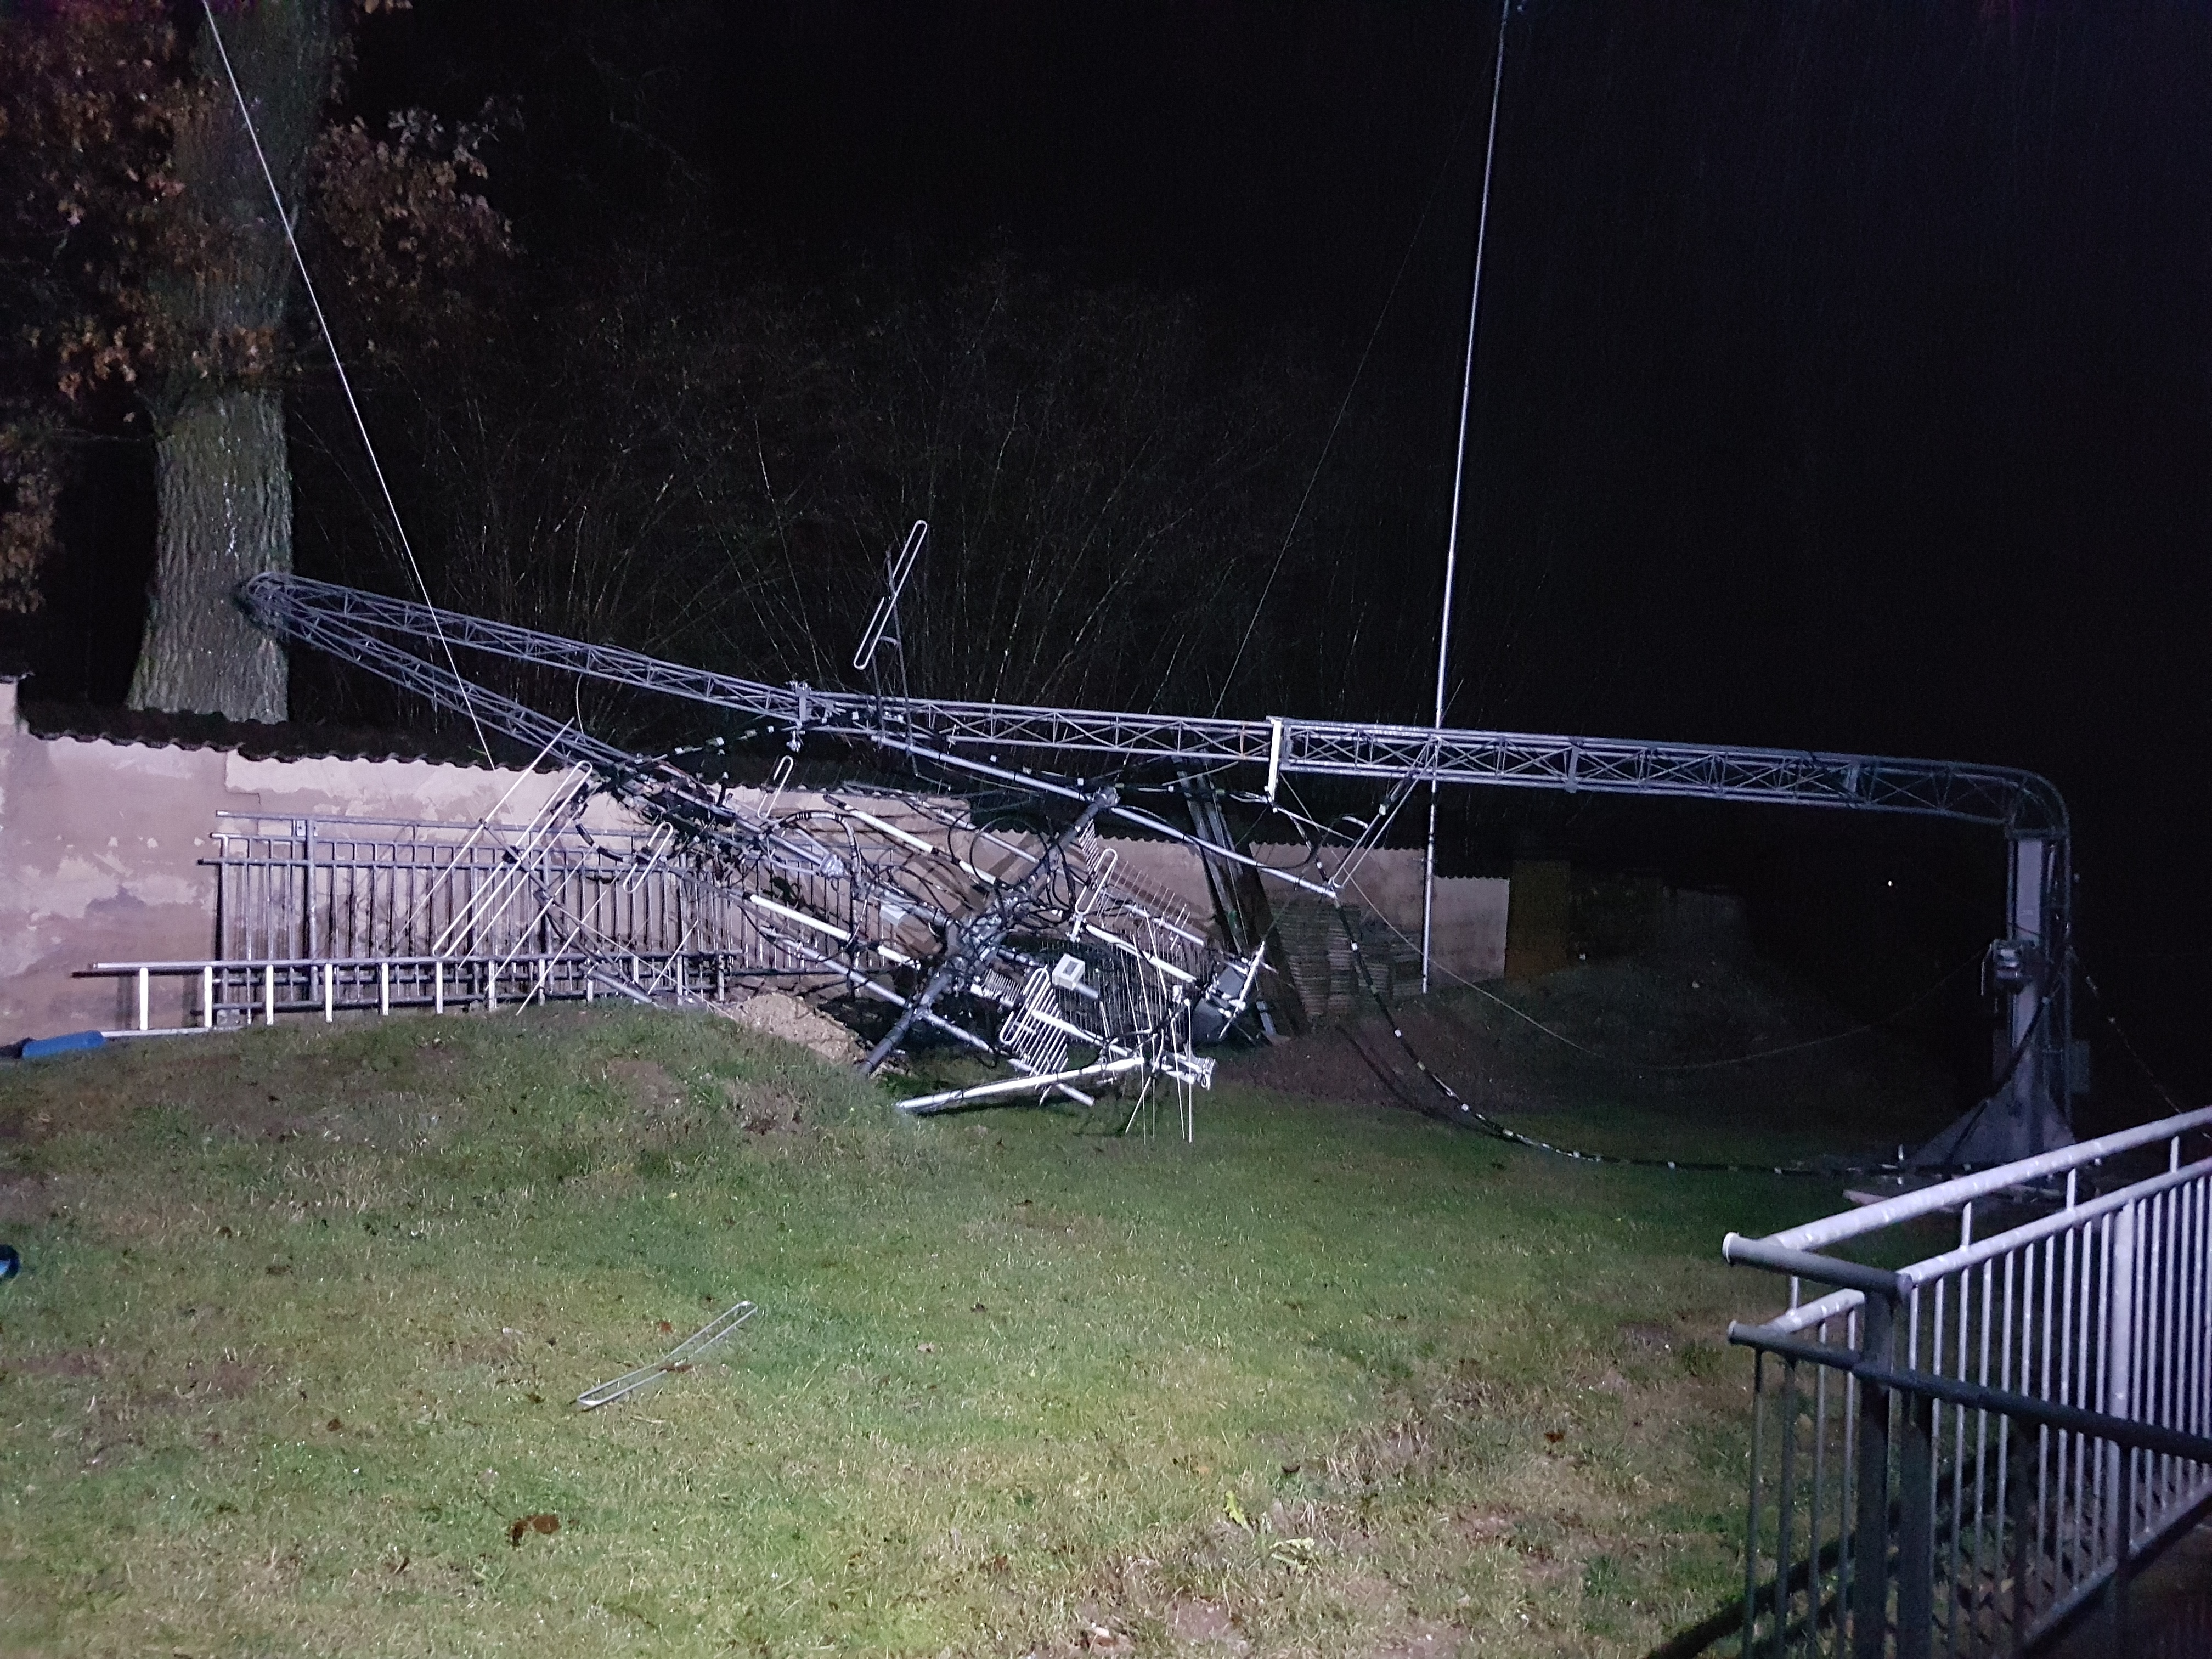
Photo taken in the night at 02:50 local time.
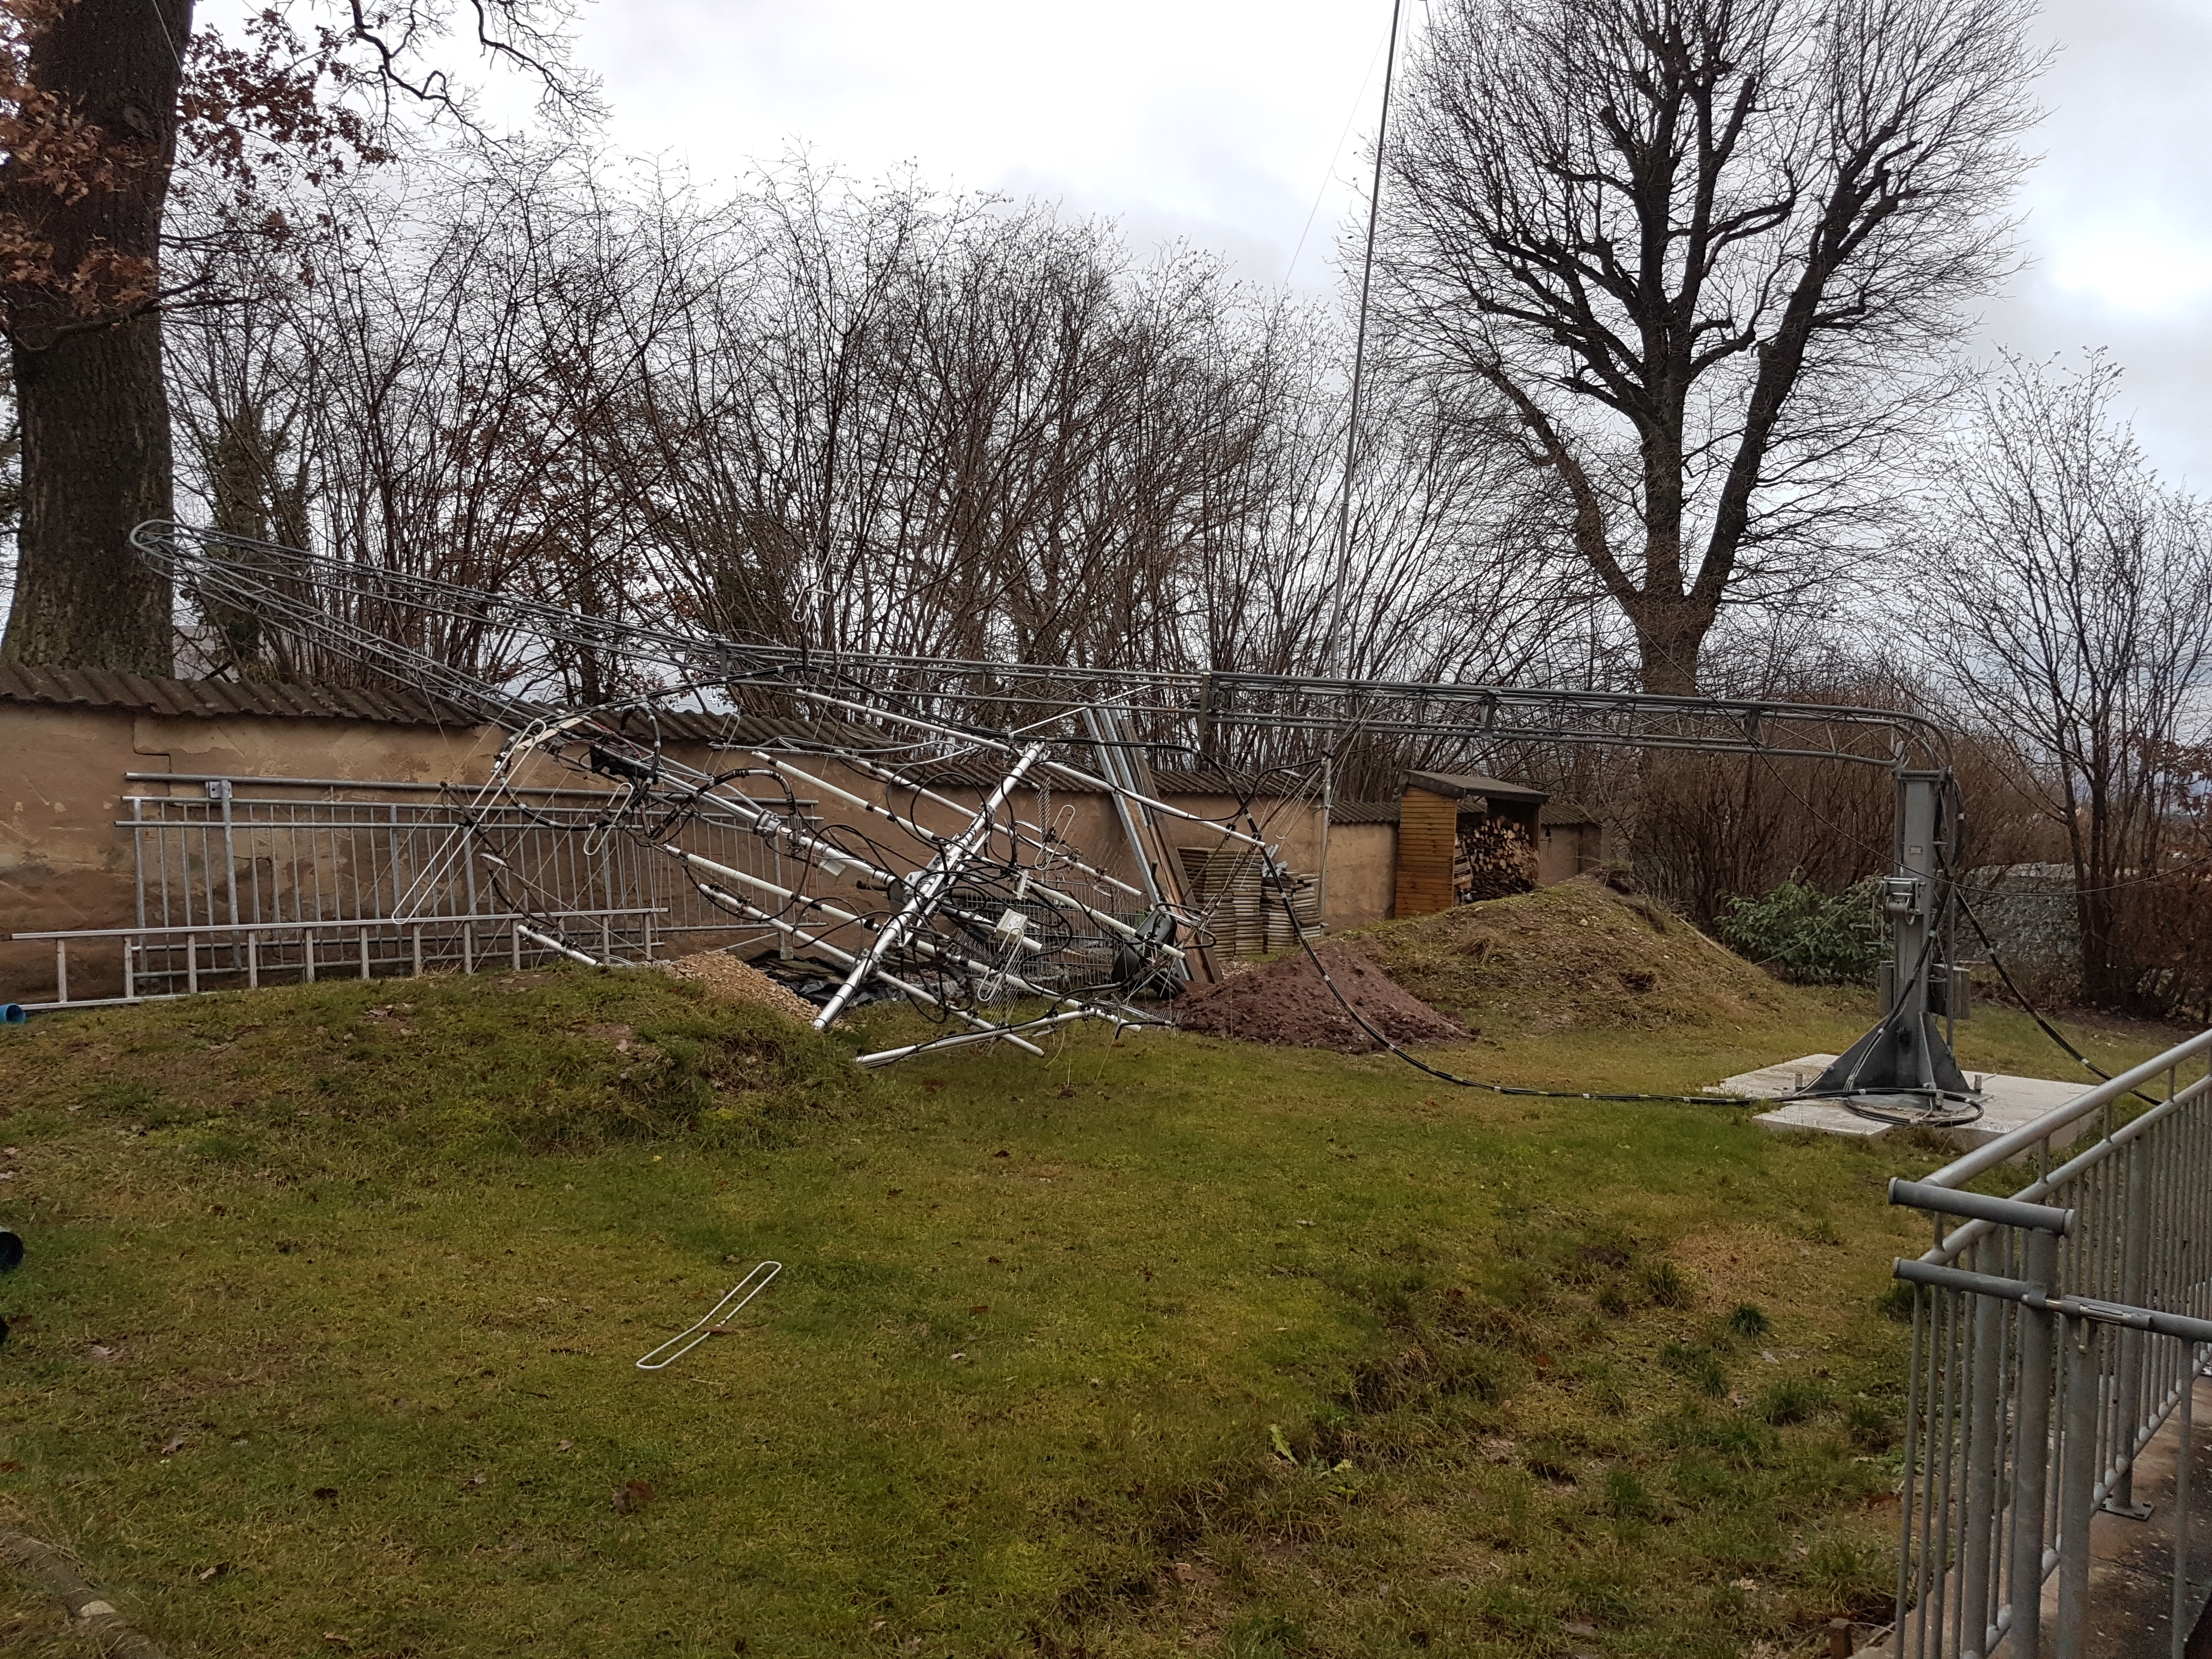
The same at daylight.
Now I hope that the insurance will pay for a new tower and I can be back soon. Keep the fingers crossed.
And it looks like I have a good insurace, after an official of the insurance has proofed the damage my insurance DBV/AXA paid within days, so I have the money to build up a new antenna system.
So then I could start to dissemble the tower.
Actually (27th of February 2019) this is the state: Awaiting the new tower :-)
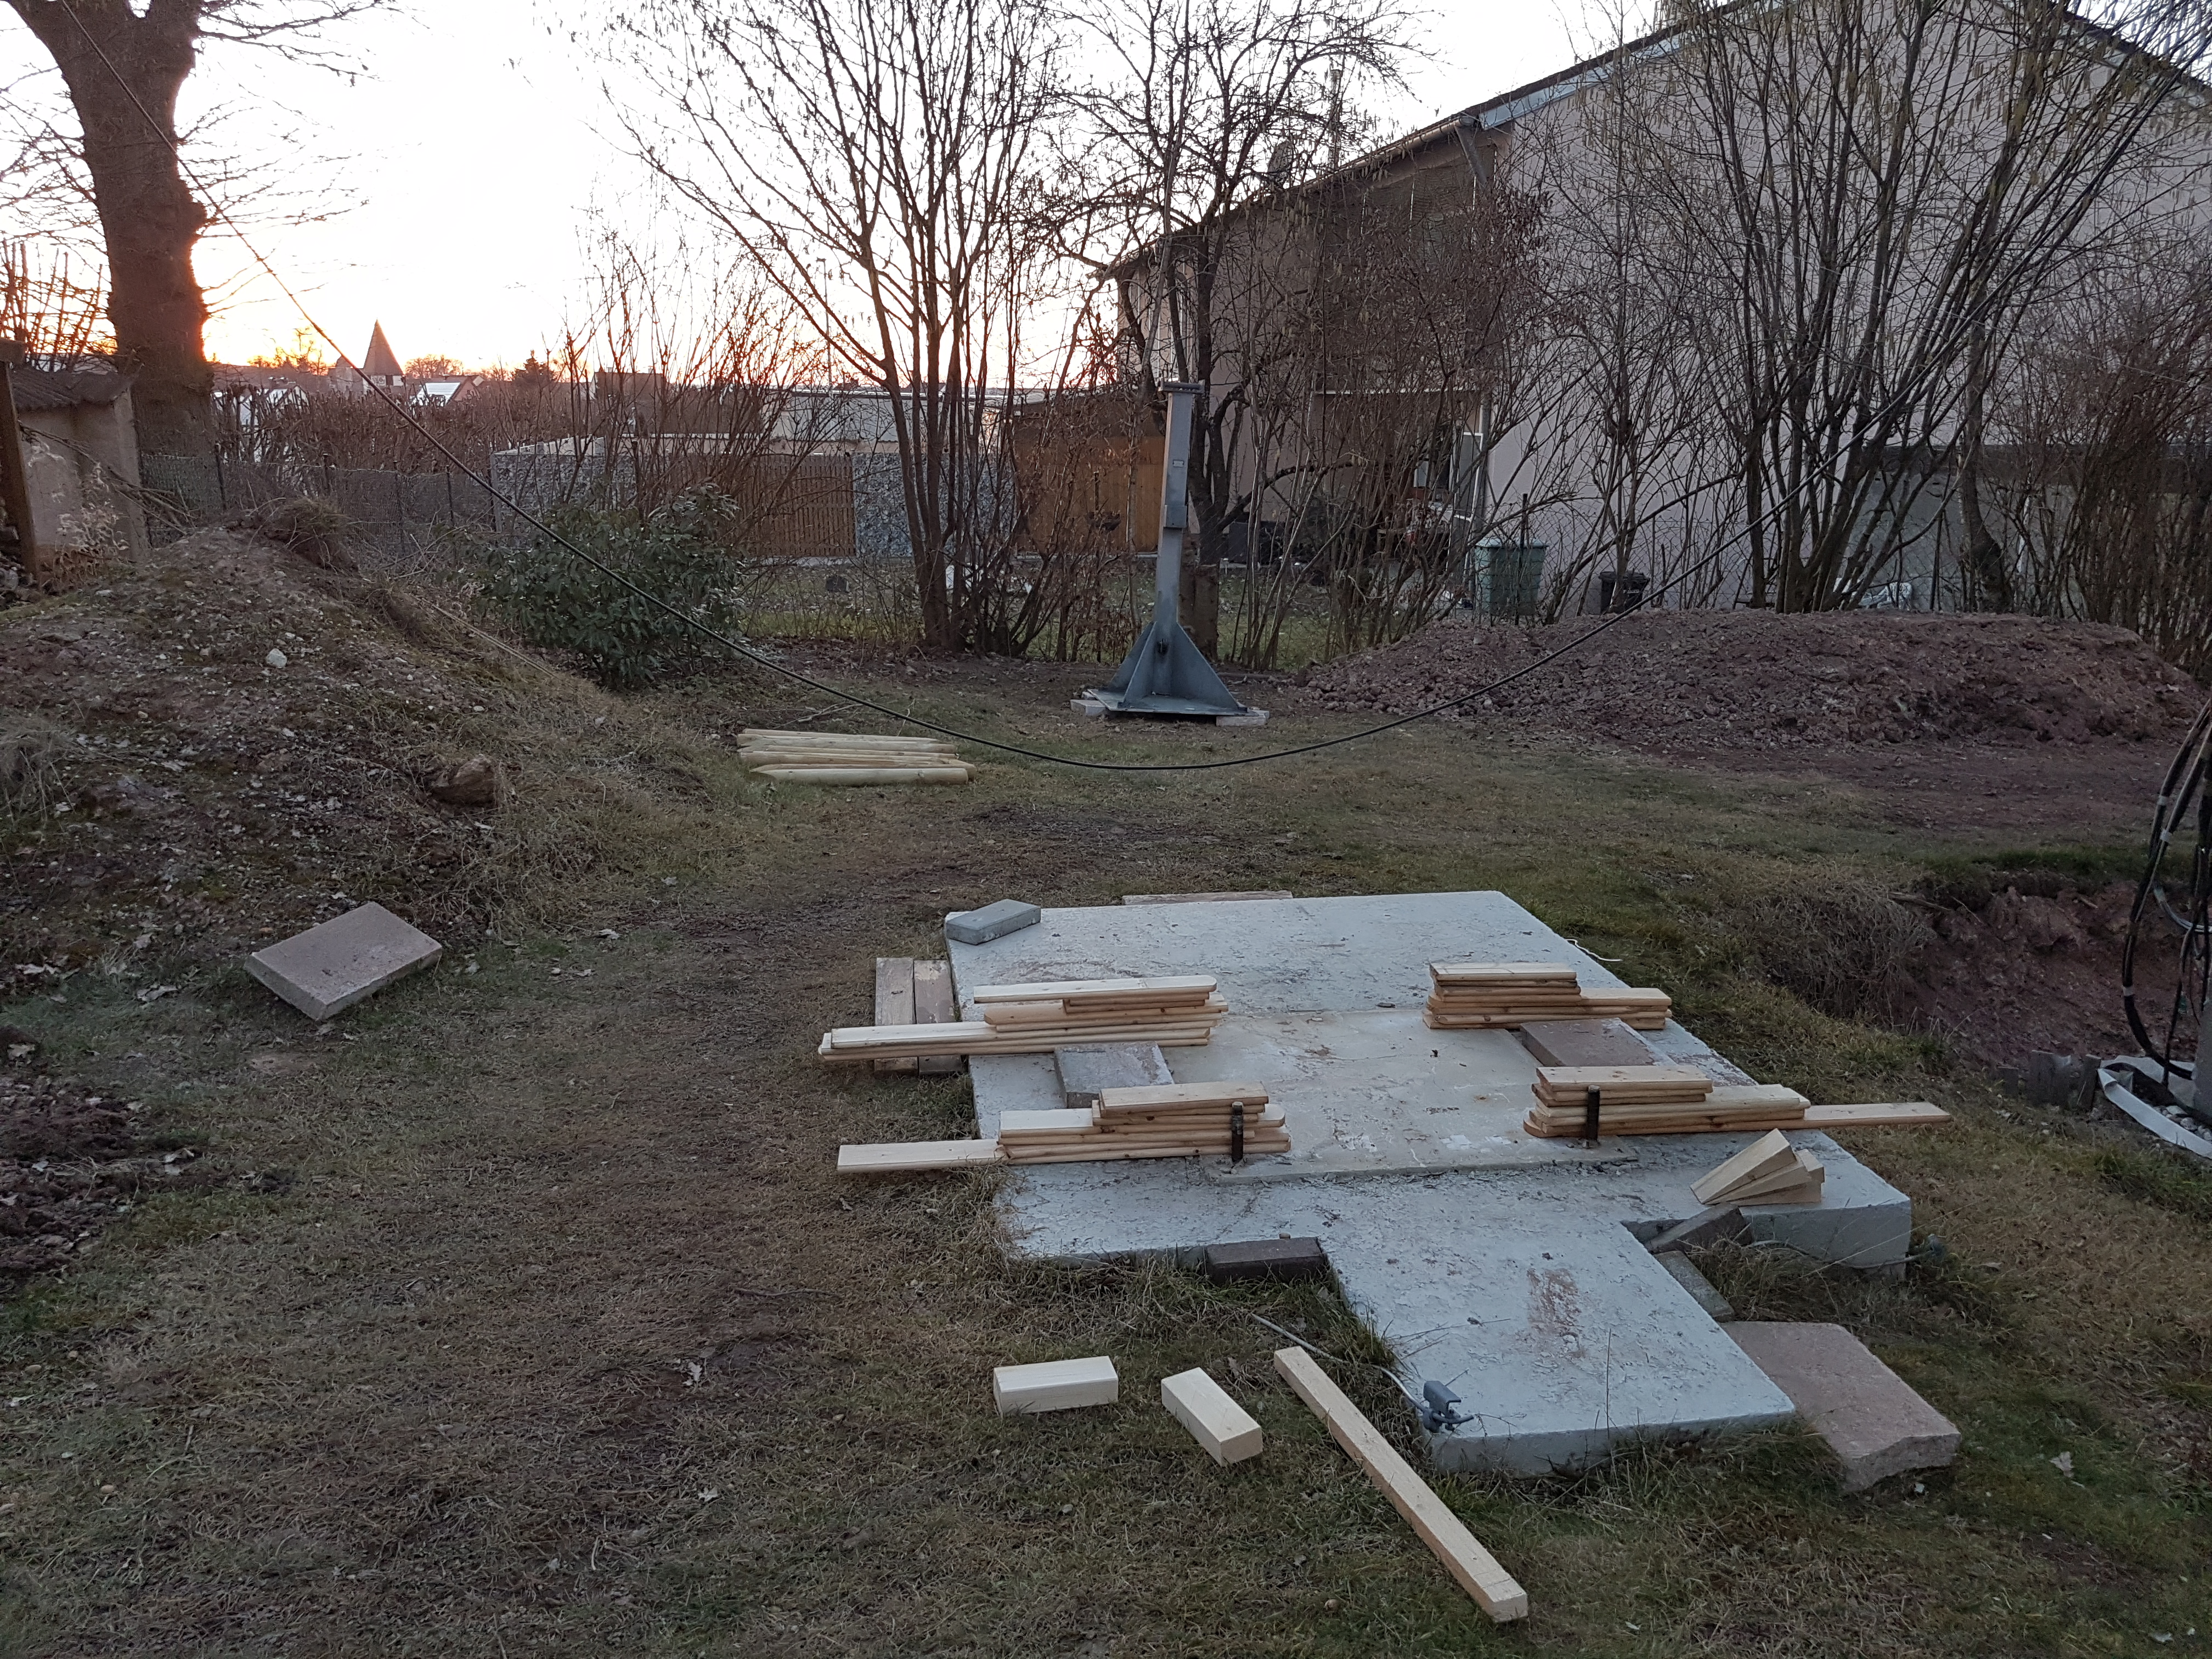 All prepared for the new tower
A dream never dies !!
09th March 2019 I got my new tower, a lightly used Versatower VT1700. This is about the same typ as the BP60, but thicker material (so stronger but heavier for transport), a second flap to relieve also the steel cable of the third telescop part and a slightly changed basement but with the same holes so the old bolts fit.
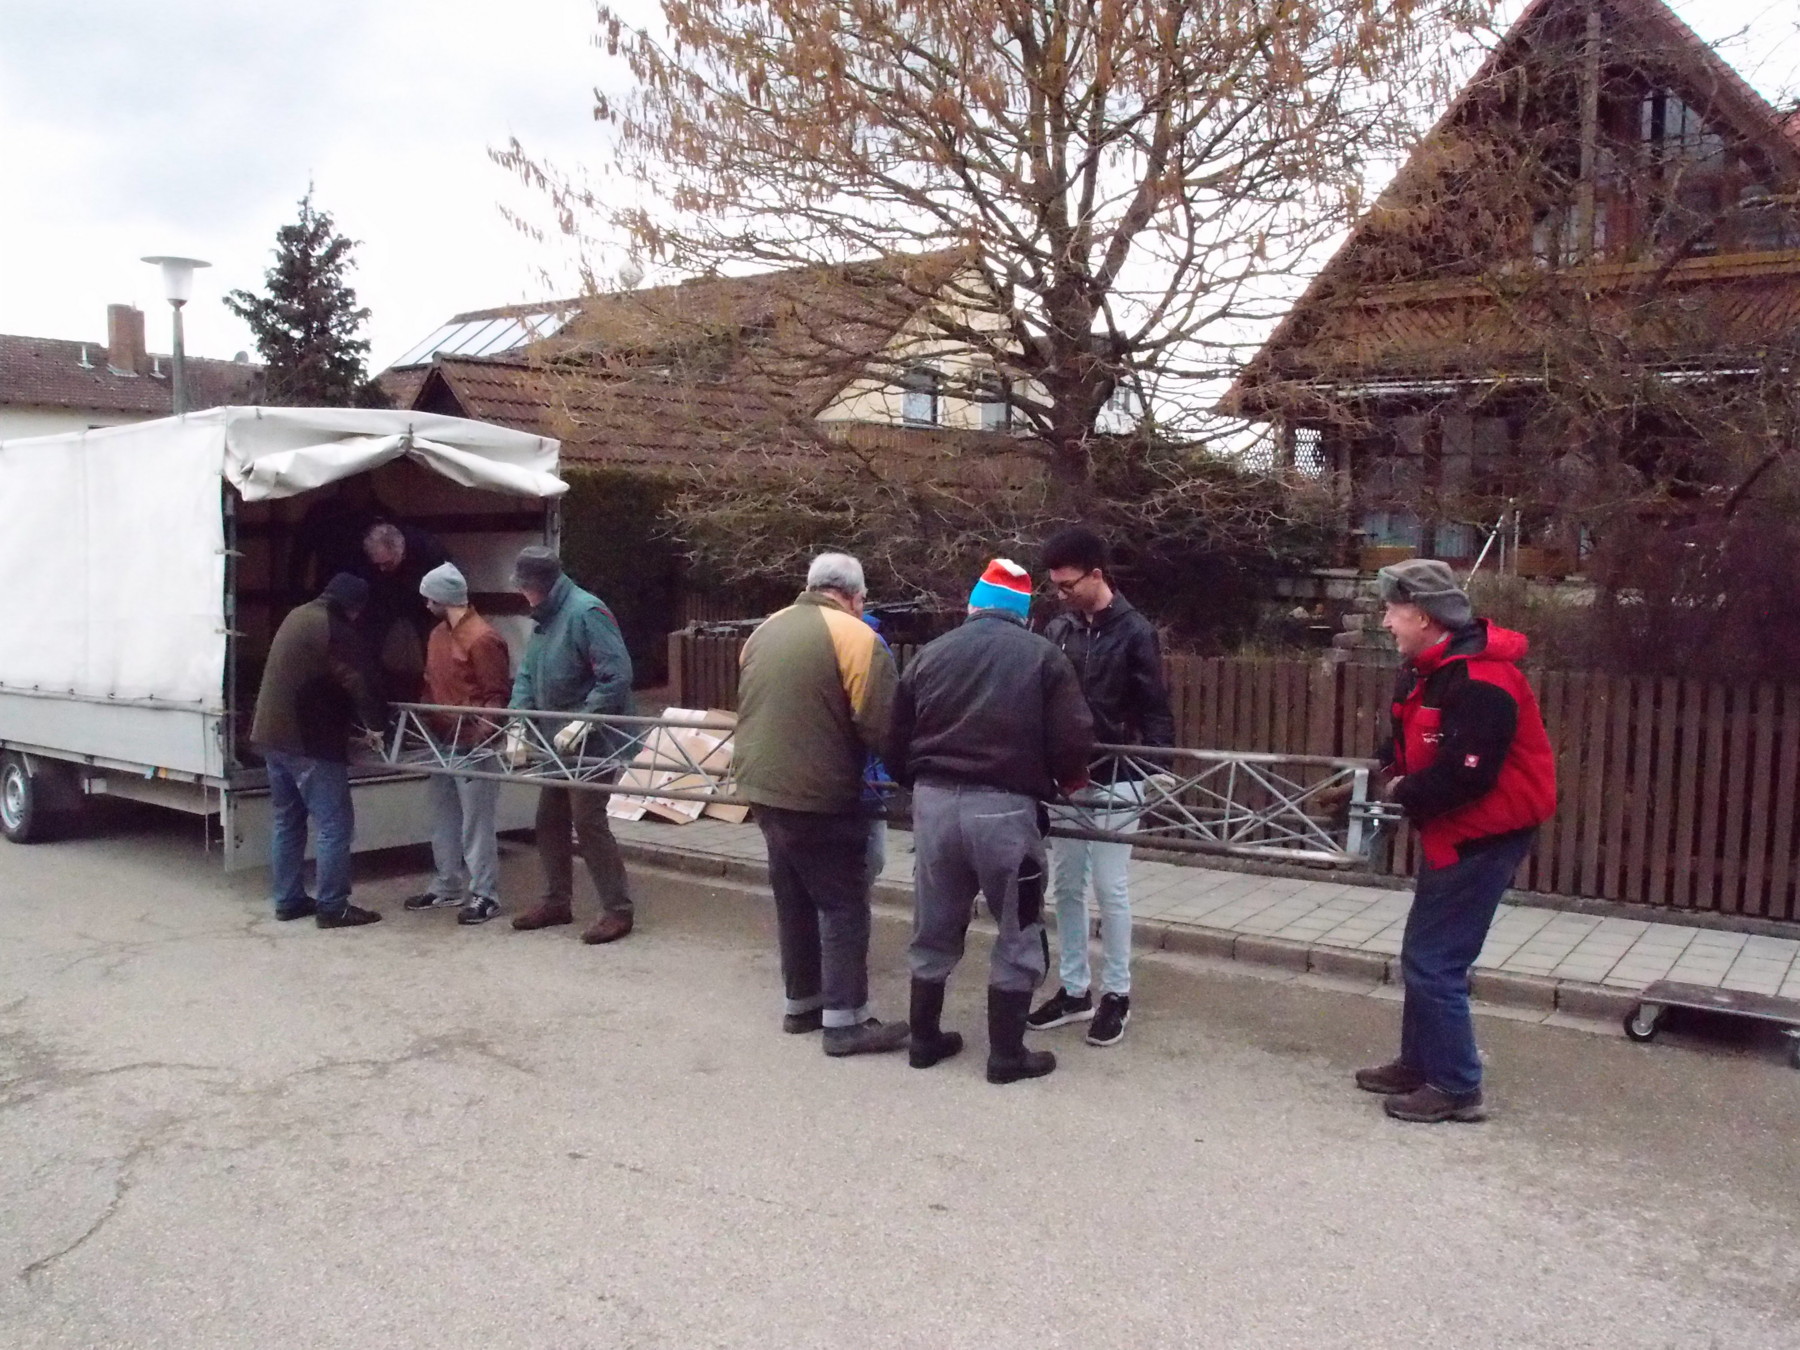
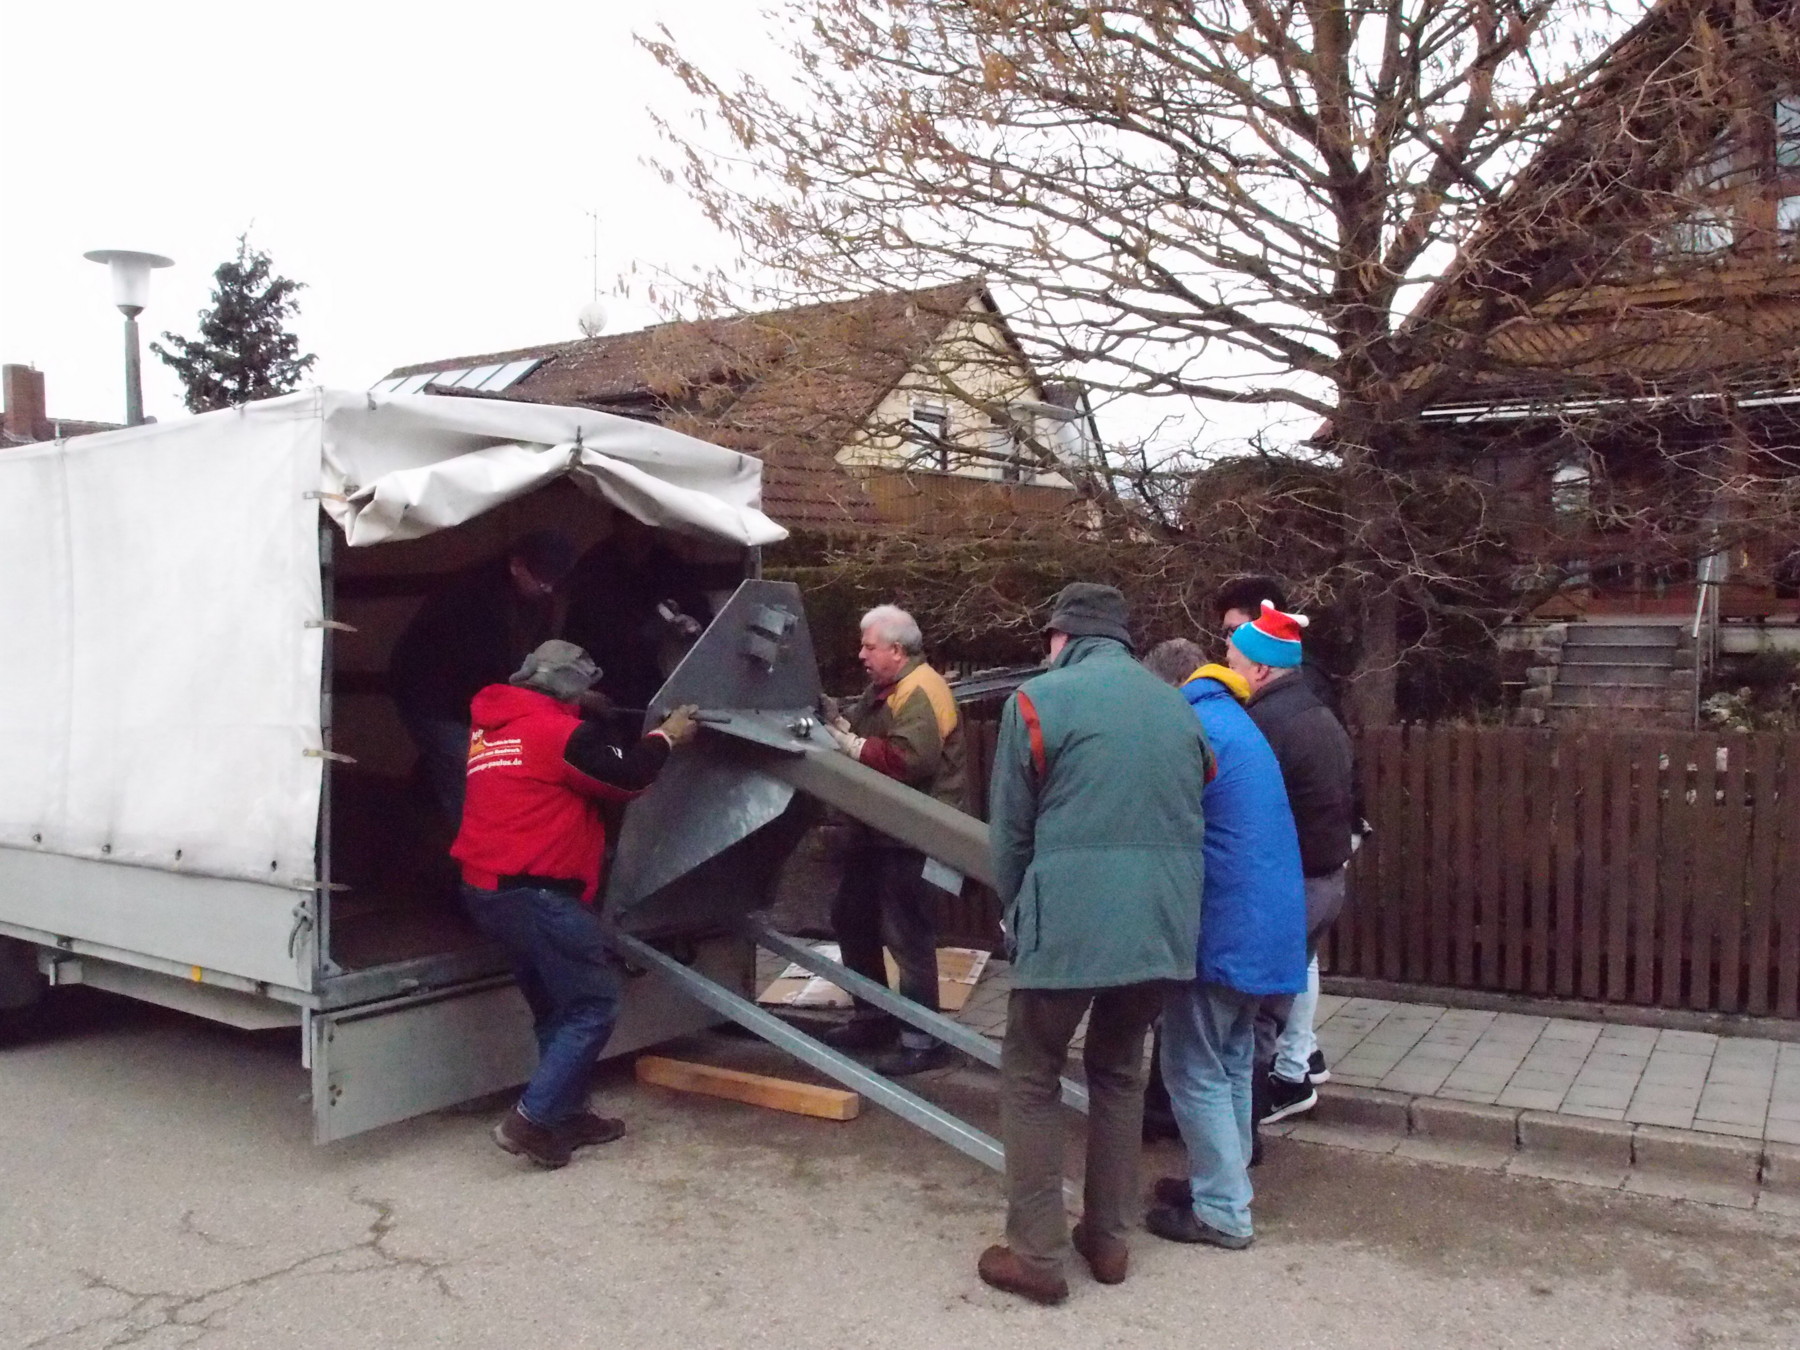
To get the basement down from the trailer was the difficault part but with the two strong square irons we could slip it down and the by using one of the square irons and three concrete reinforcing rods we could handle it. A long rod we could stick through the pivoted joint at the top of the basement and two downwards through the holes for the bolts, so we had a good grip for the basement to carry it.
![]()
Some pieces of wood beside the bolts so the basement was standing above the bolts. Then we could position the basement exactly above the four bolts. With a strong 120cm long jemmy we easyly lifted the basement at one side and removed only one or two planks at once so we could lower the basement smoothly on the bolts without tilting and damaging the thread of the bolts.
Eight hame radio operators and two neighbours helped to mange it and of course my xyl managed the "catering" afterwards.
So I still have a lot of work to do, but with the support of my friends my dream is realizing again. :-)
 VT1700
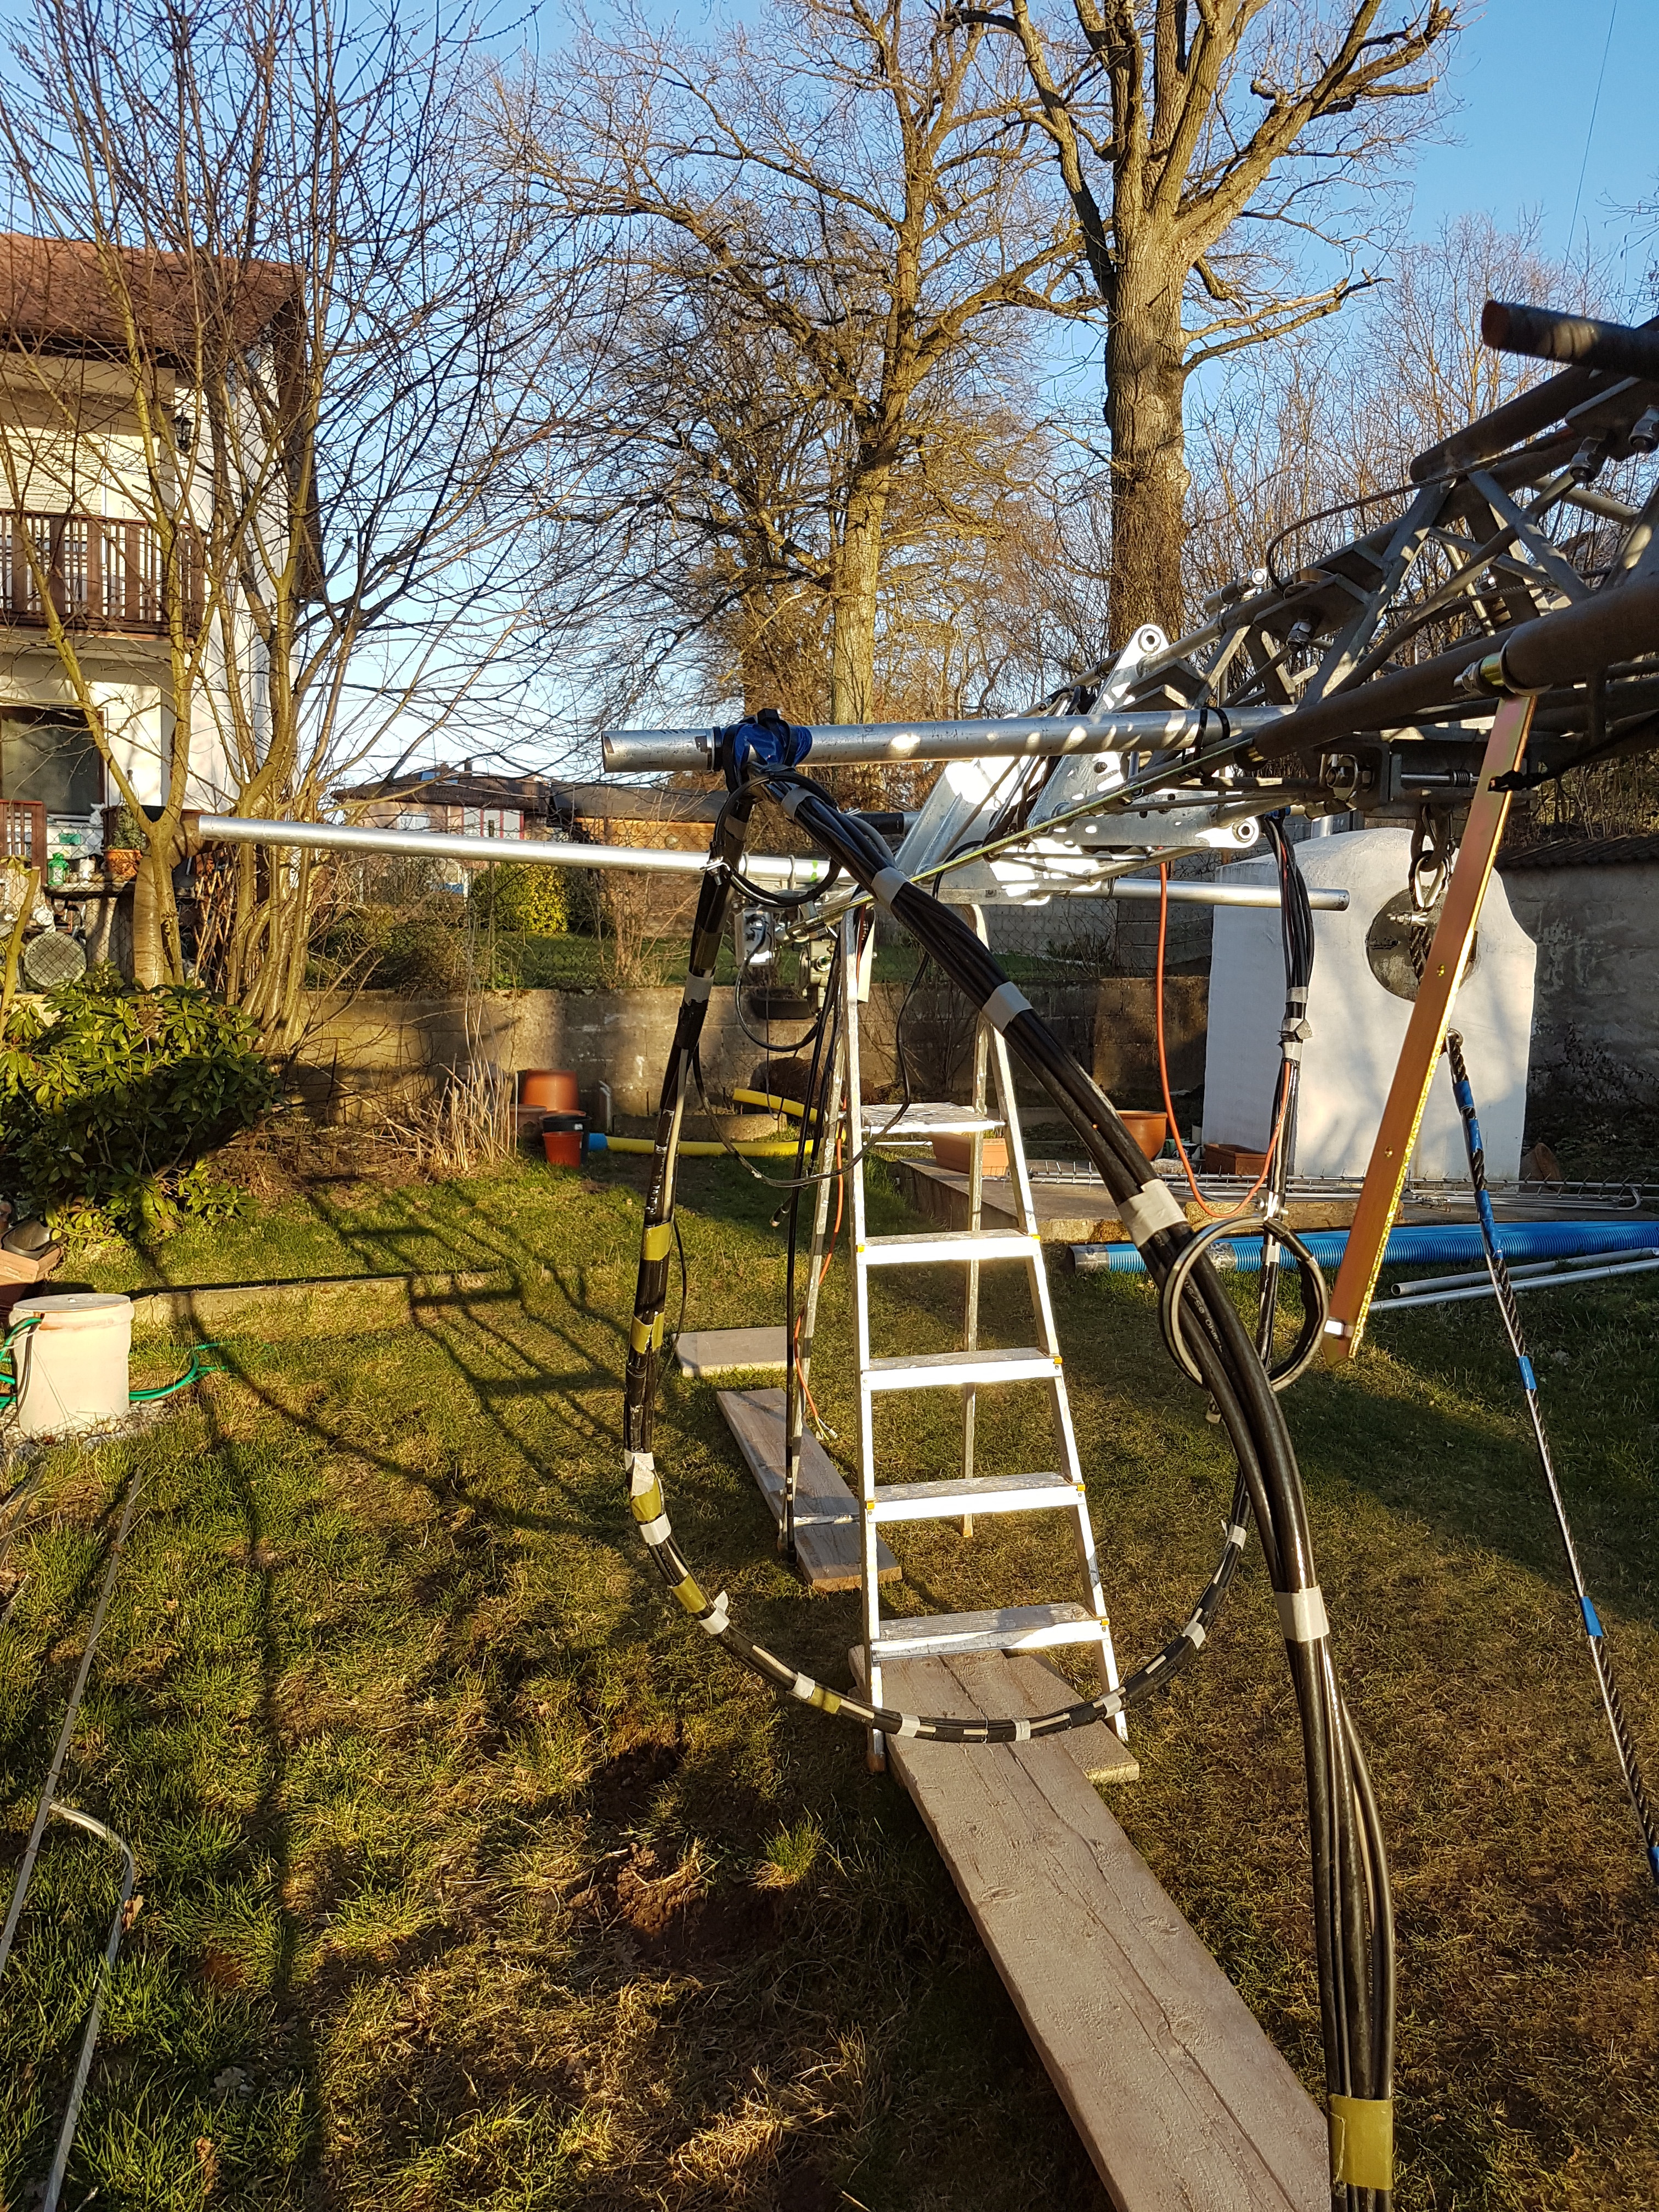
Cable management
March 21st 2019 my 1st ant for 2m is up but still waiting for some stuff.
PHOENIX has risen !!
May 04th 2019 finally, just in time for VHF/UHF/SHF Kontest (about) all was ready and I was qrv again on 2/70/23 - jipppeeeehhh !
I am still waiting for a switching relais for the 70cm vertical antenne and the preamp for 2m, but it works. This contest was also the first with my new (used) ELECRAFT K3 with the syntheziser upgrade. This was a dream. Only with a strong station 5km away with antennas pointing to each other I still needed to switch on my xtal filter, in all other constellations no more problems with strong stations. The receiver in praxis has the best intermodulation behavior of all I had before. The K3 is expensiv but worth every Euro.
 VT1700 with new setup
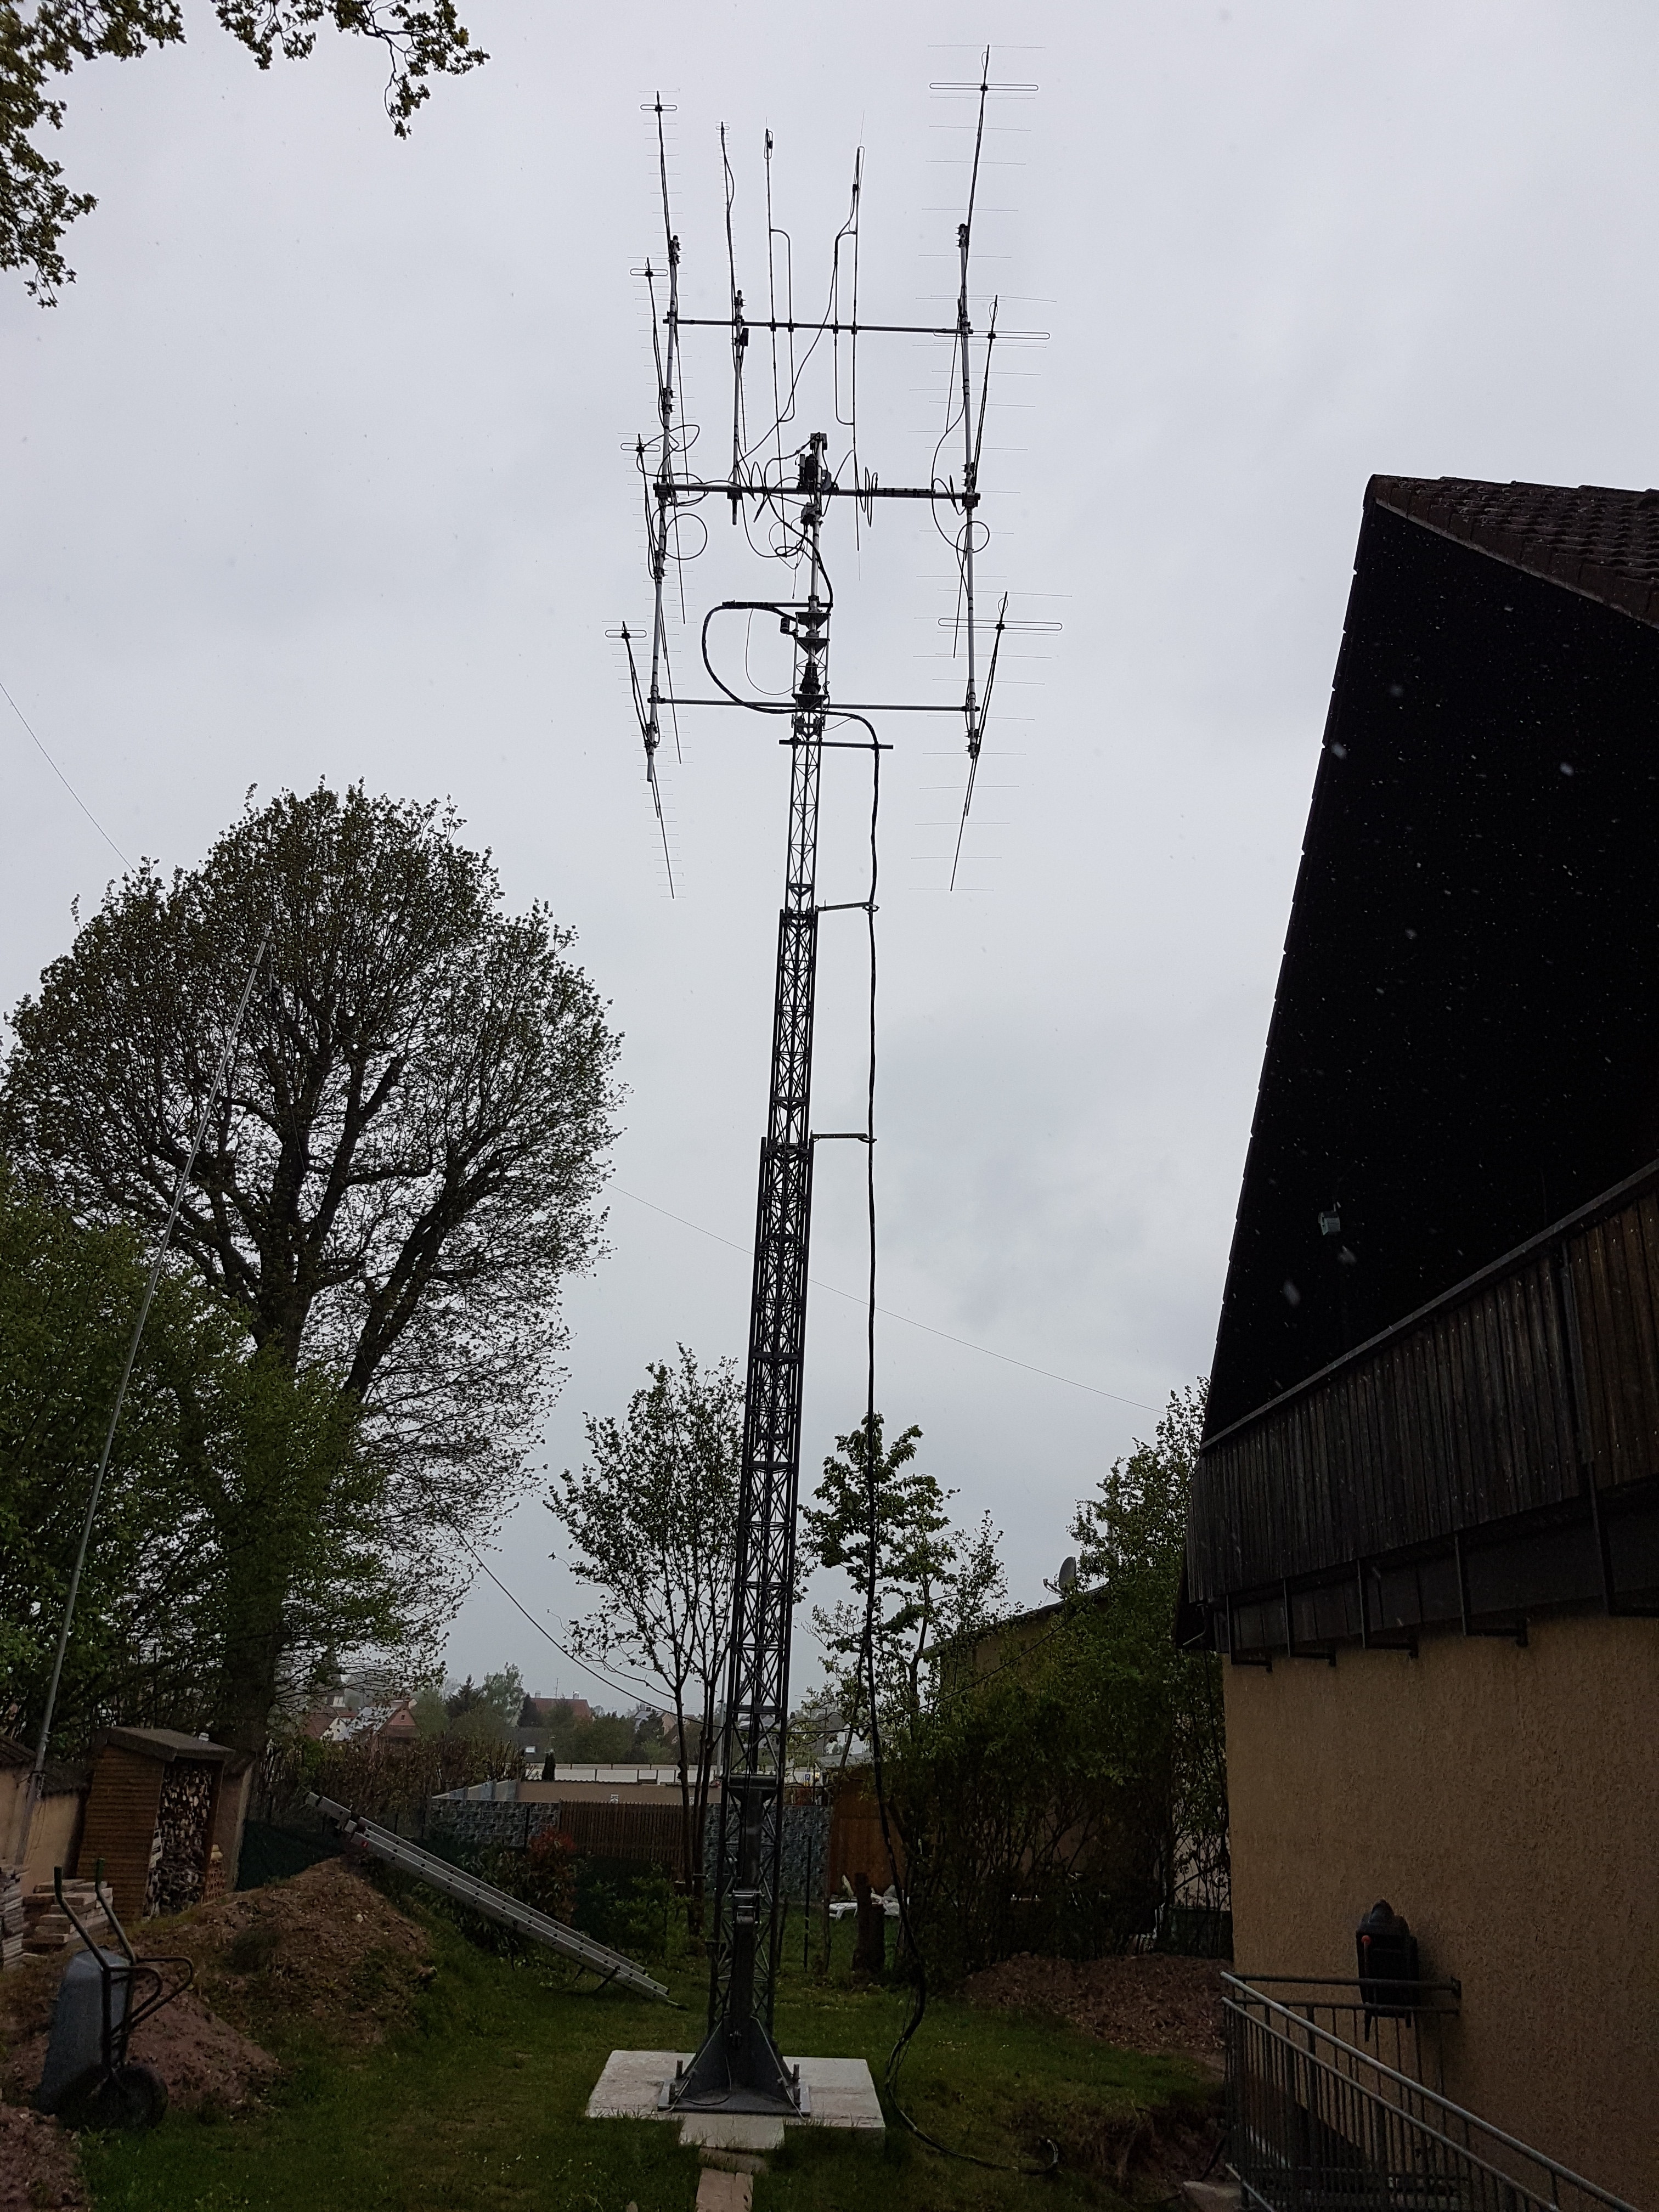 new antenna setup, no H but stocked vertical
I used the new buildup for a new setup. Instead of 3x H-construction into one another for 2m, 70cm and 23cm, I stacked 3x11el FlexaYagi for 2m at one side and 4x23el FlexaYagi at the other side. In the middle between only 1x48el for 23cm but an additional 1x11el vertical for 2m and 1x23el vertical for 70cm with a switching relay.
So see you again on the bands
:-)
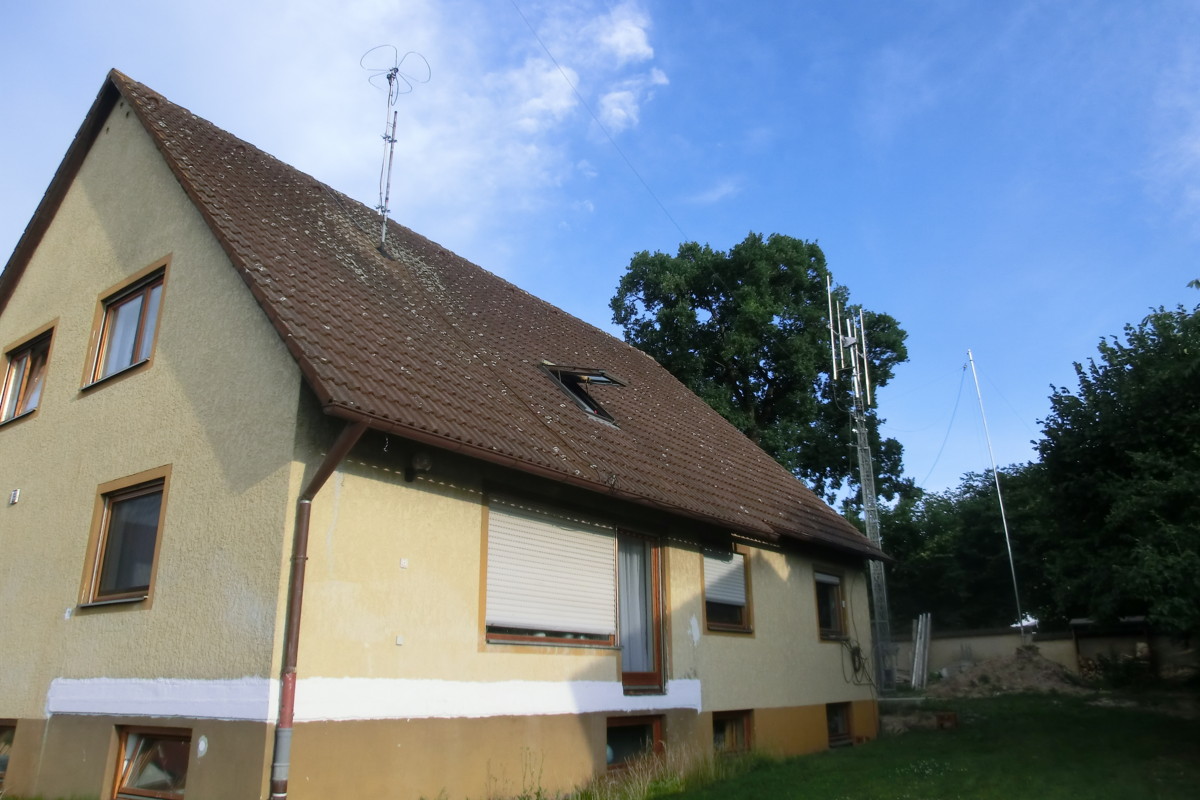
View from the other side of the mainroad (B13)
21st May 2019 fully operational again :-))
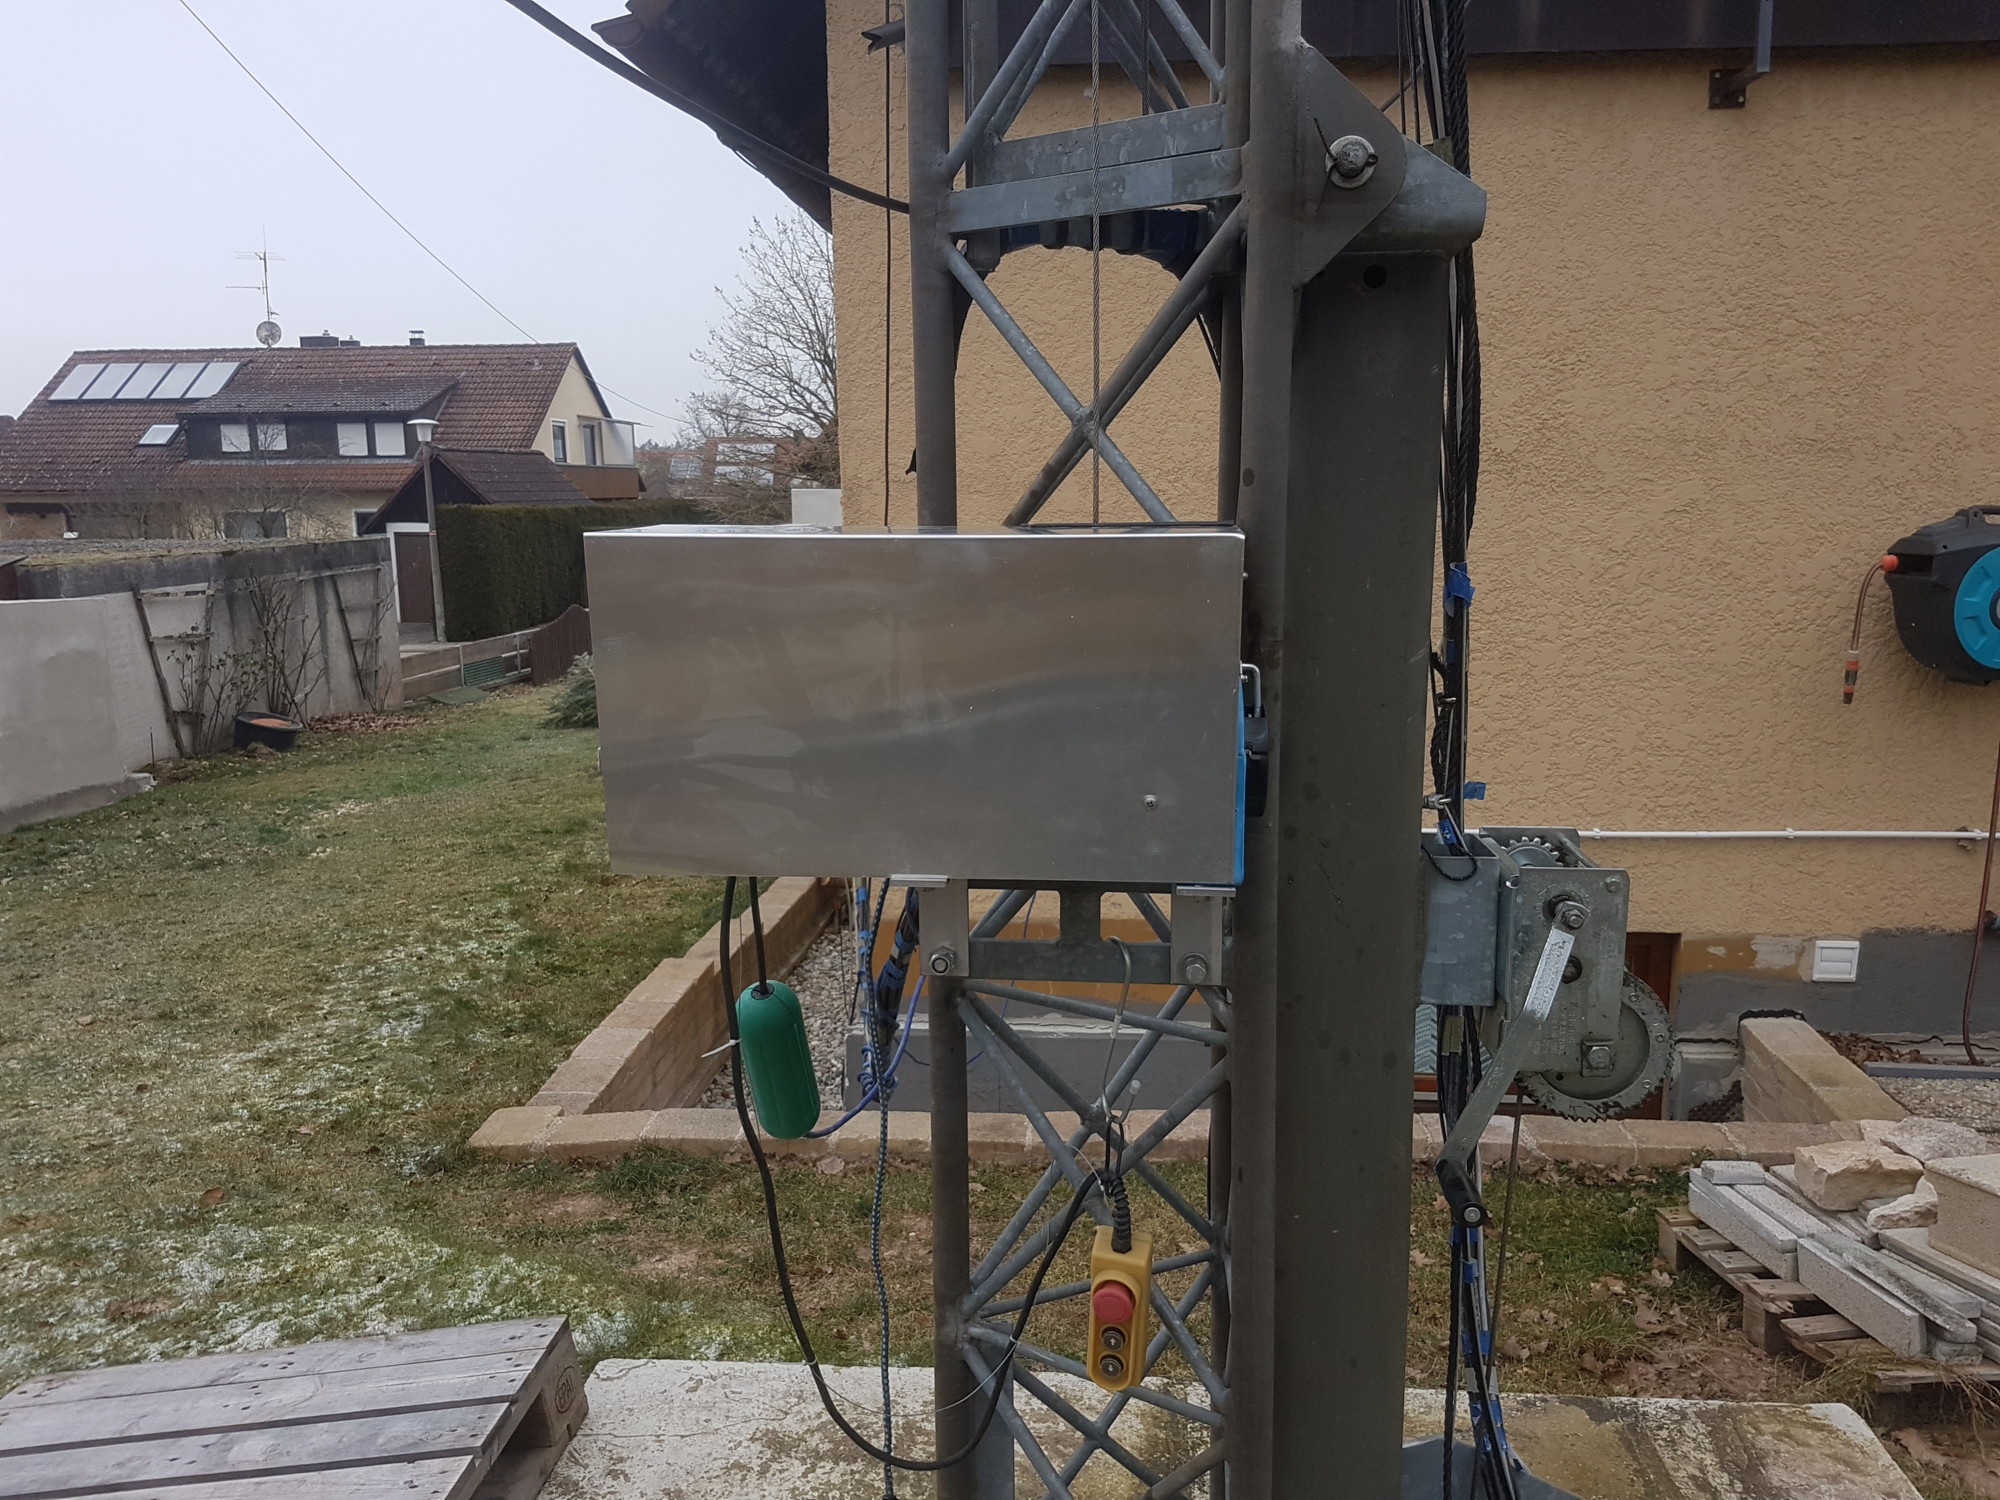
Fitting an Electric Winch
Even when I had fitted the good manual winches from FULTON to the tower, by pulling the tower up I felt that this is hard work for me and I dont get younger.
So I was looking for an opportunity to get an electric winch fixed to my tower without too much effort because I am not a mechanic.
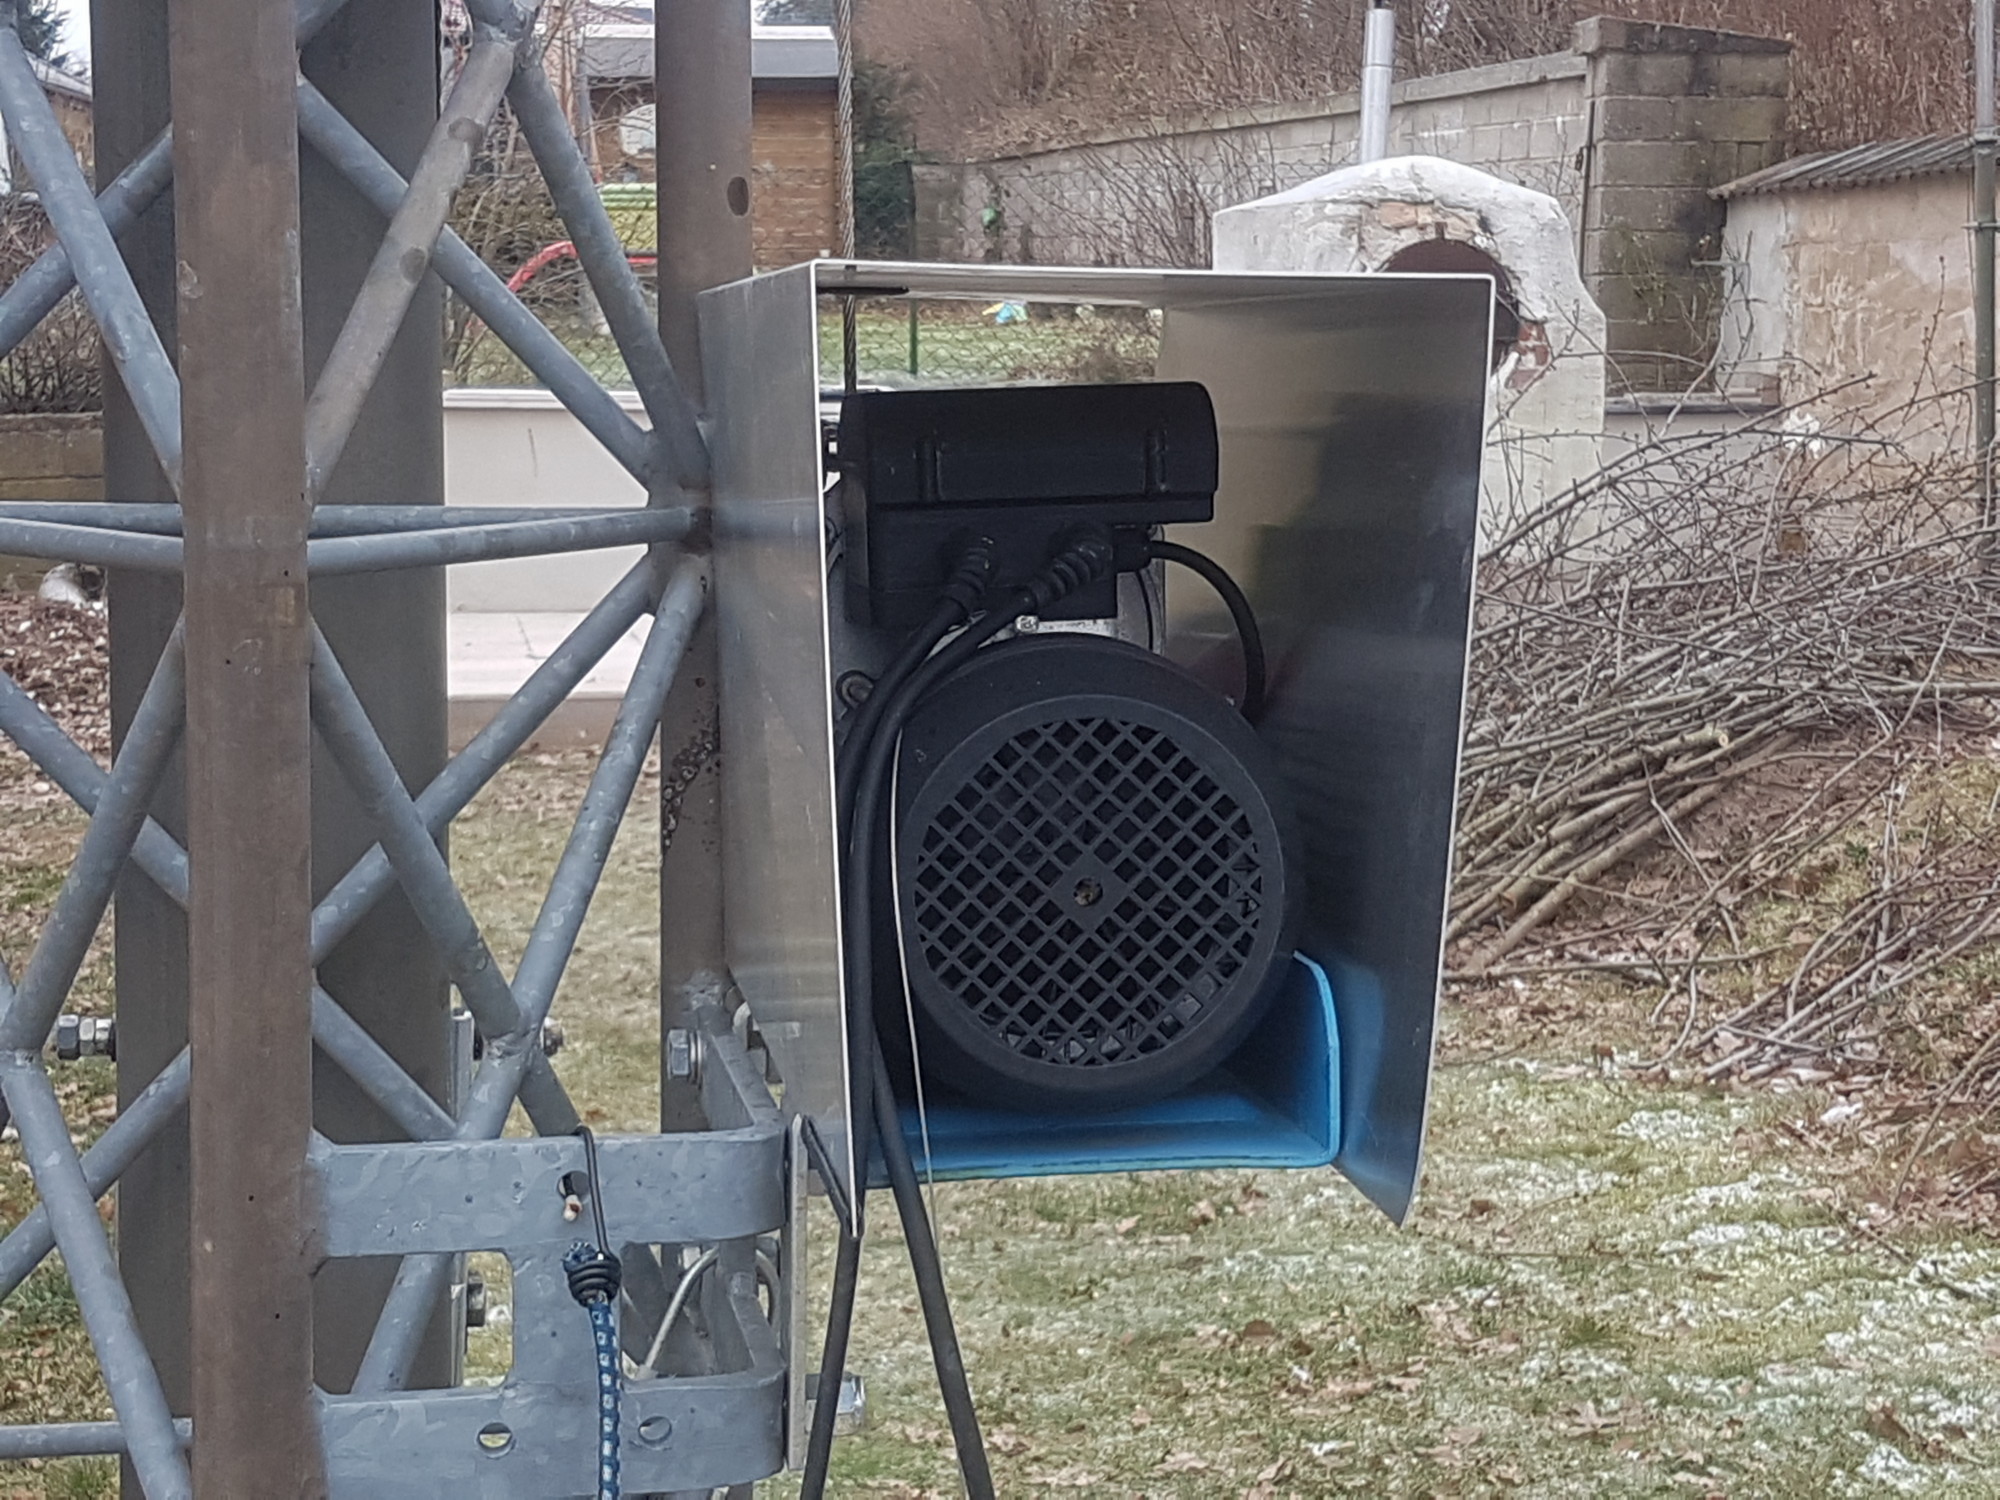
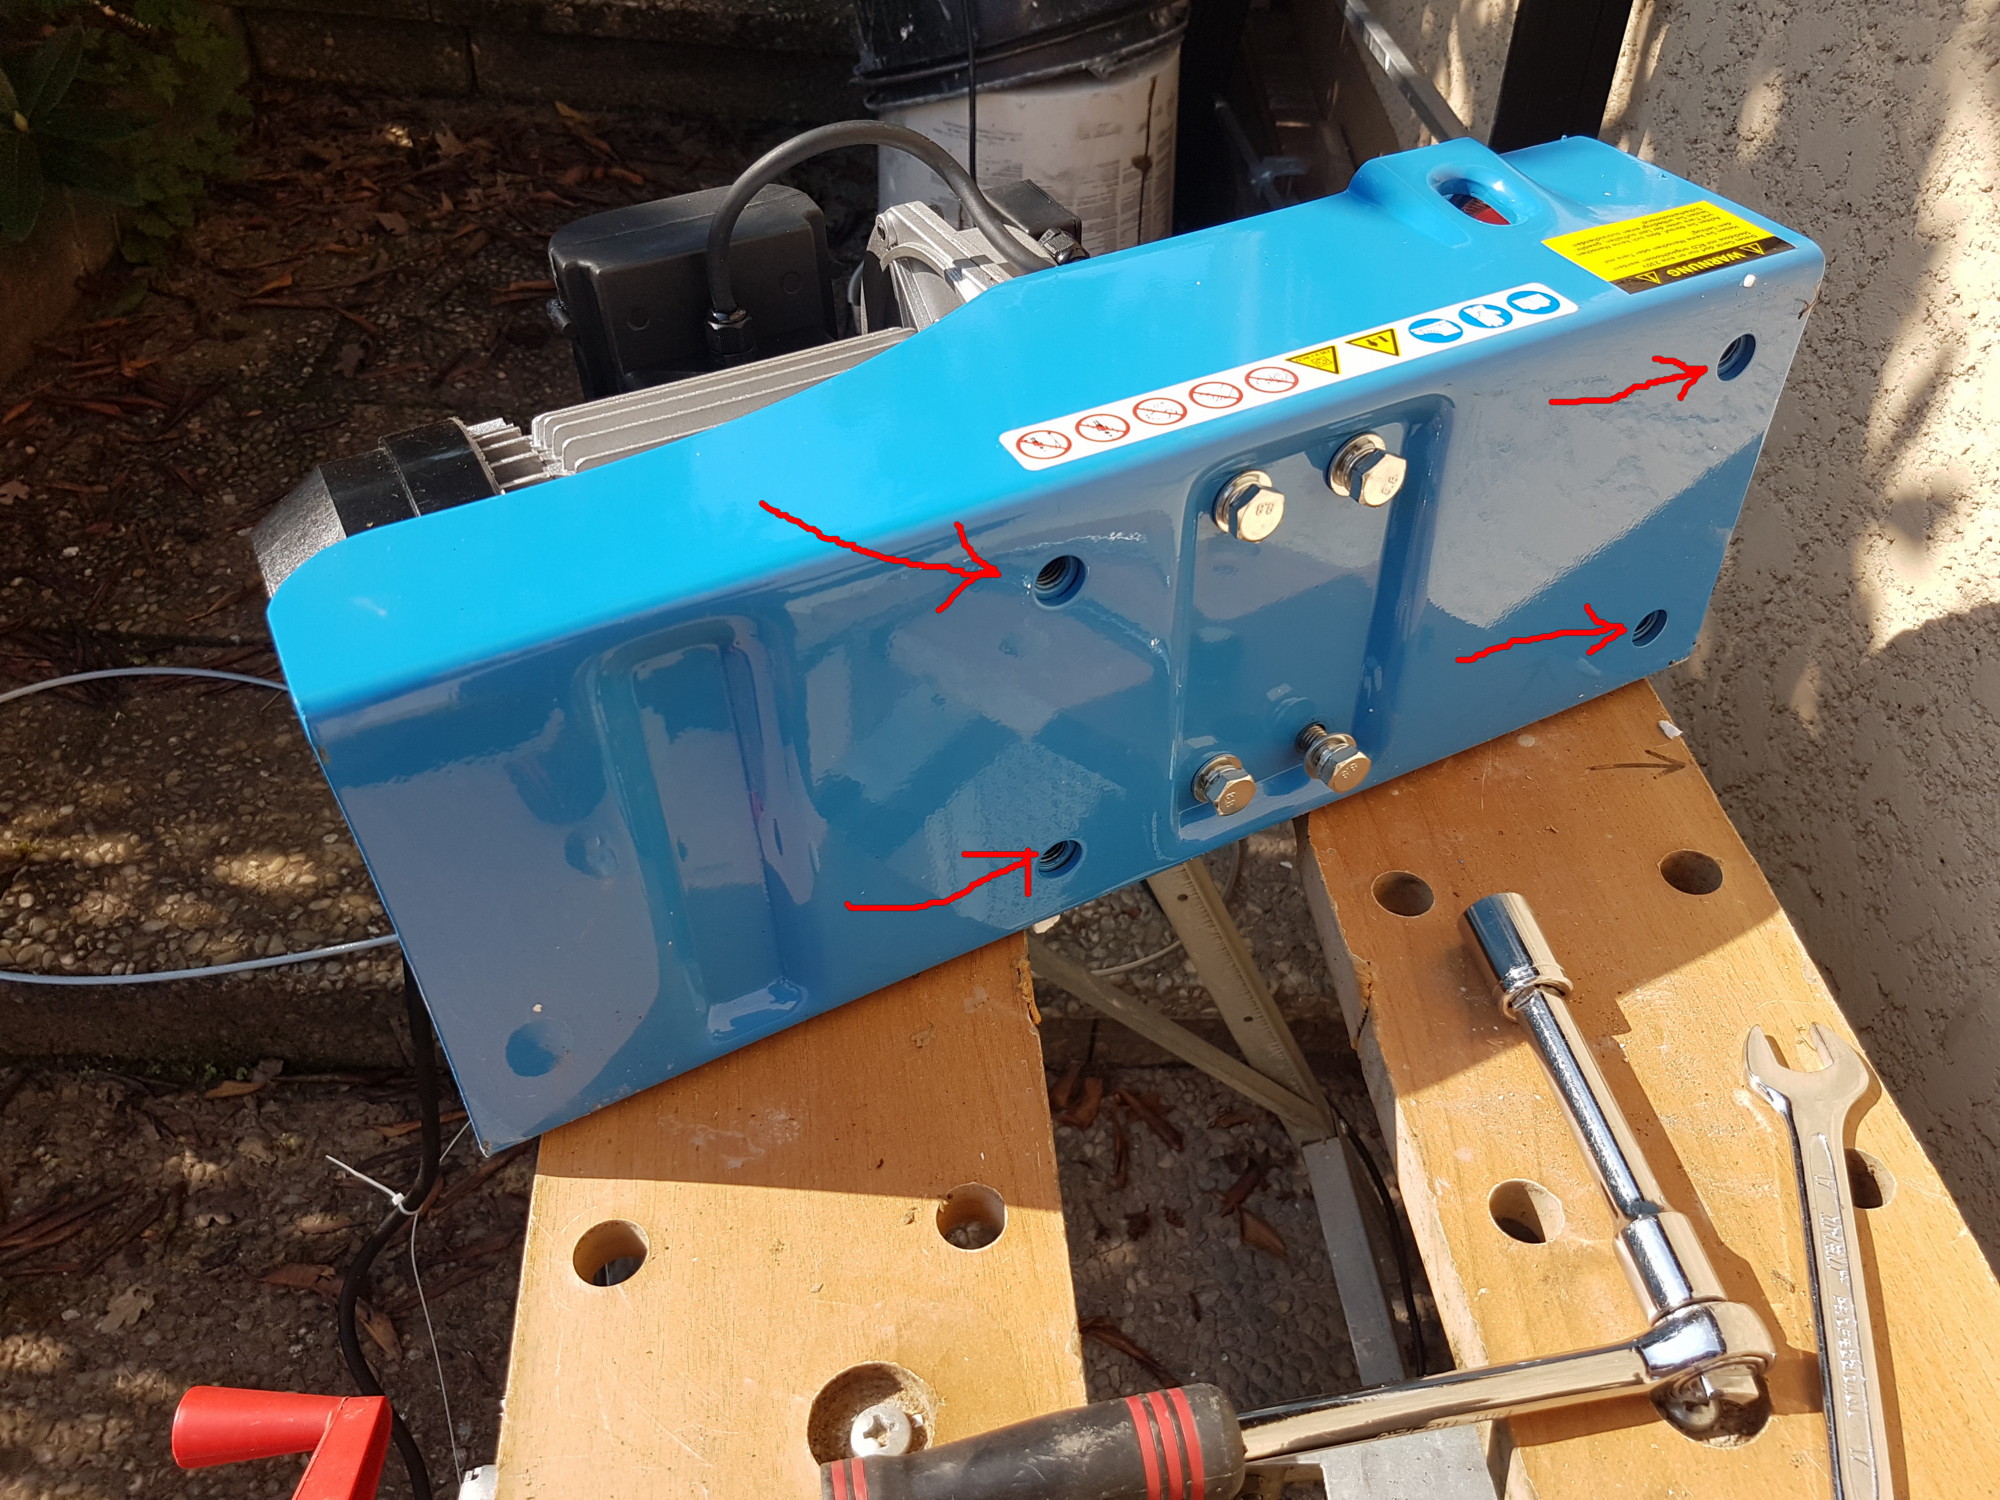
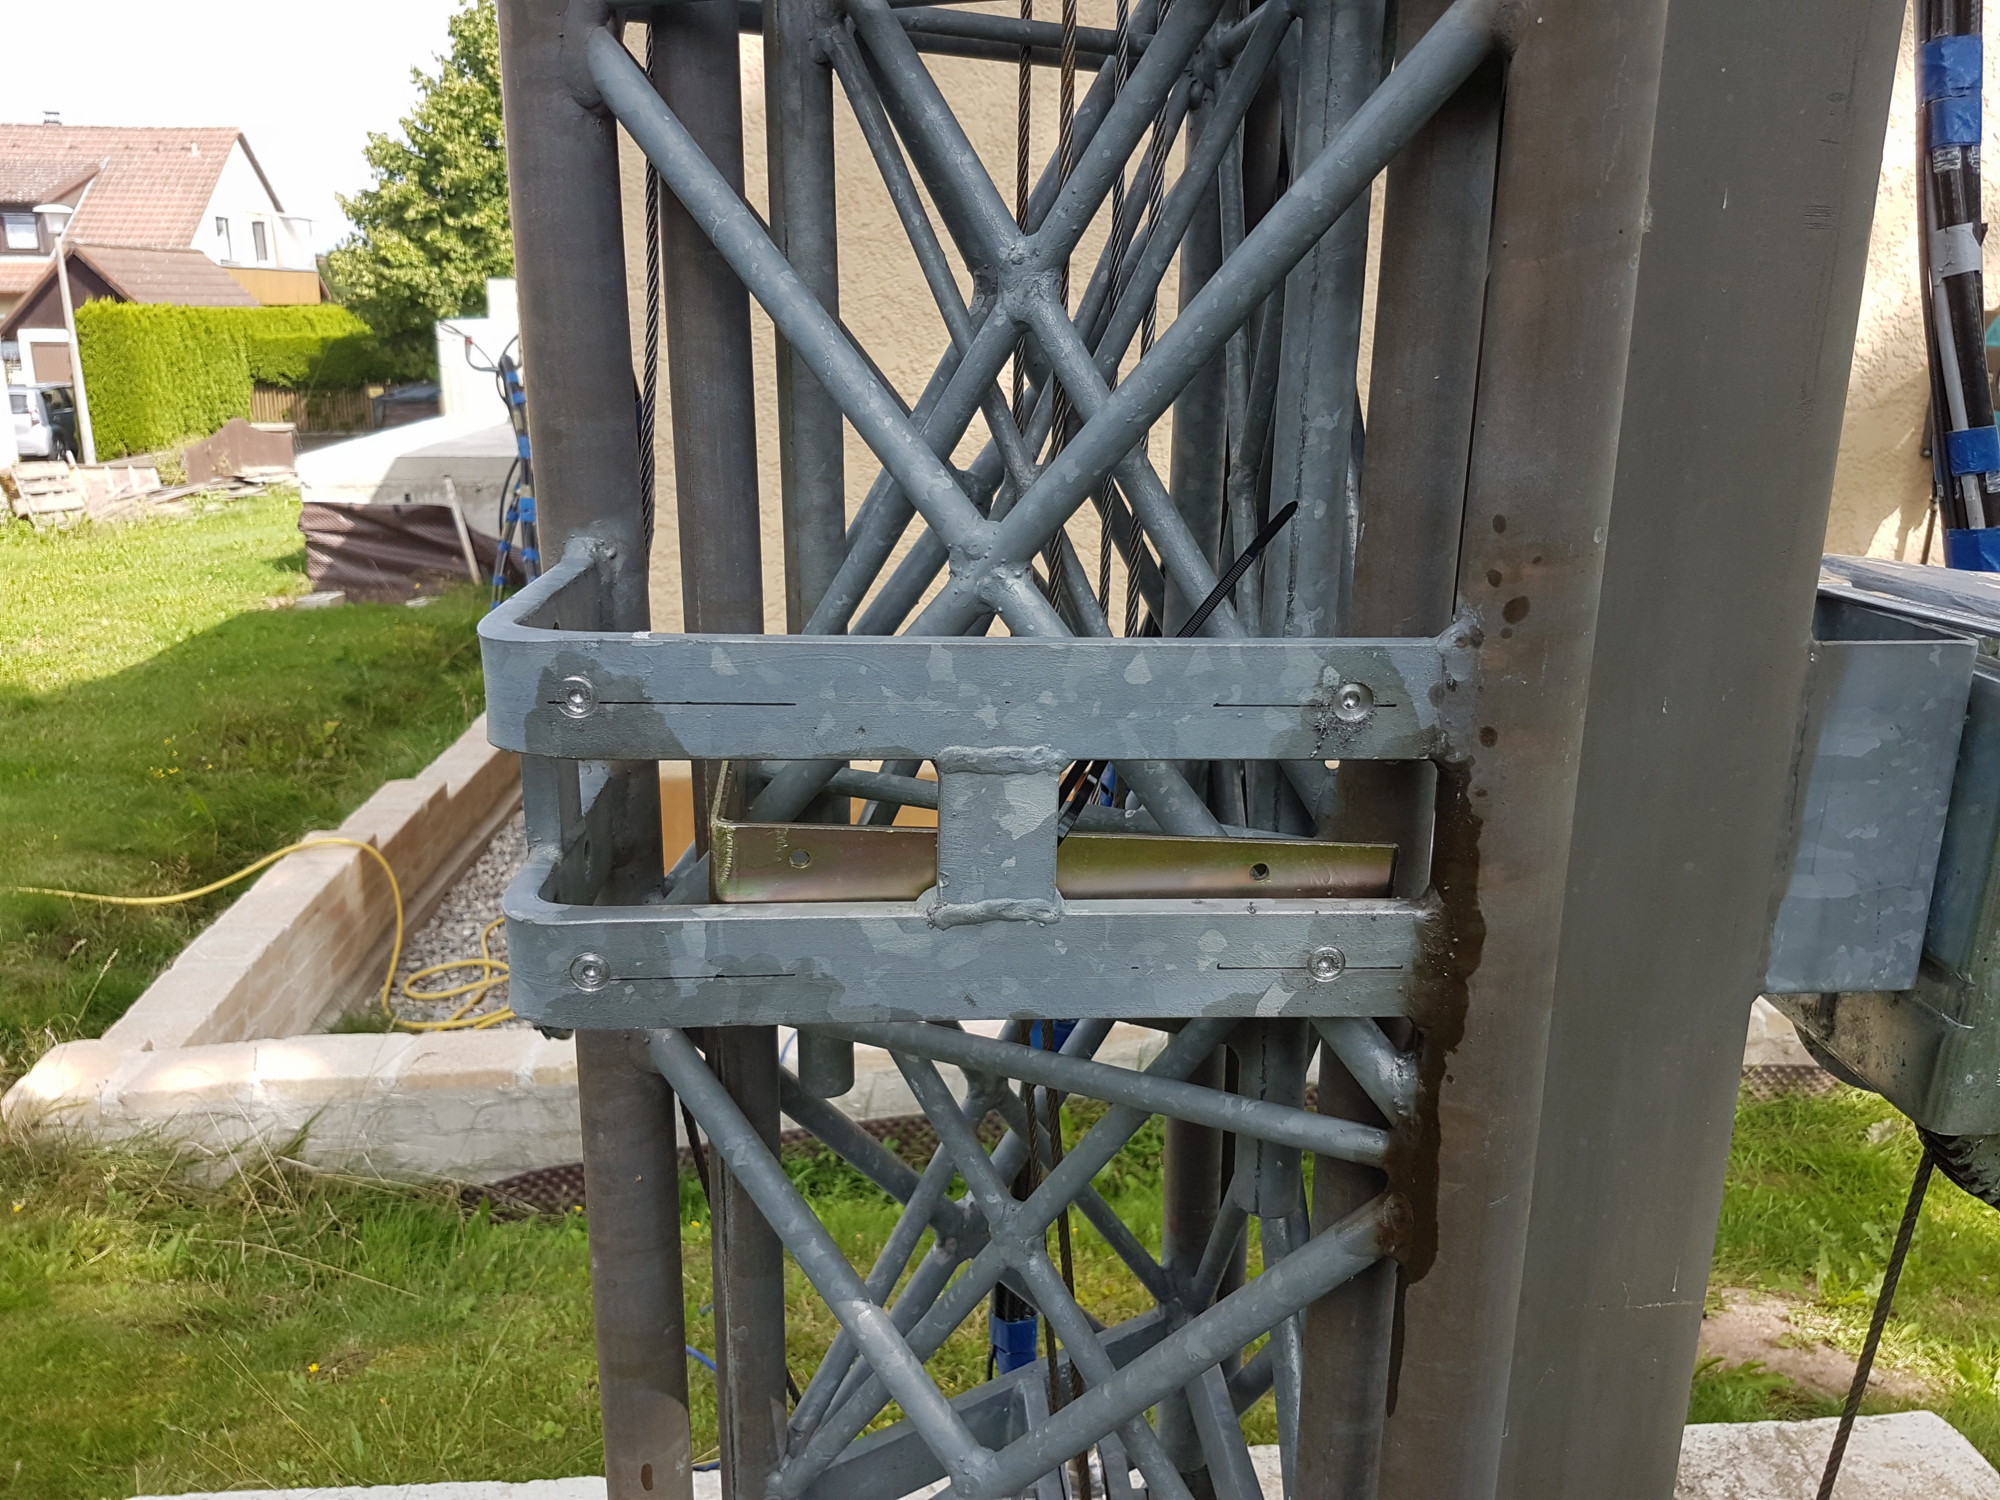
So I was told by an OM that with the Güde GSZ 500/1000 I even could use the winch without changing anything with the fitting.
I ordered the winch, but how should this 4 holes of the winch fit to the 3 holes of the tower mounting frame????
So I tried to fix the winch with the help of the original fixing clamps.
this looked nice, but did NOT work!
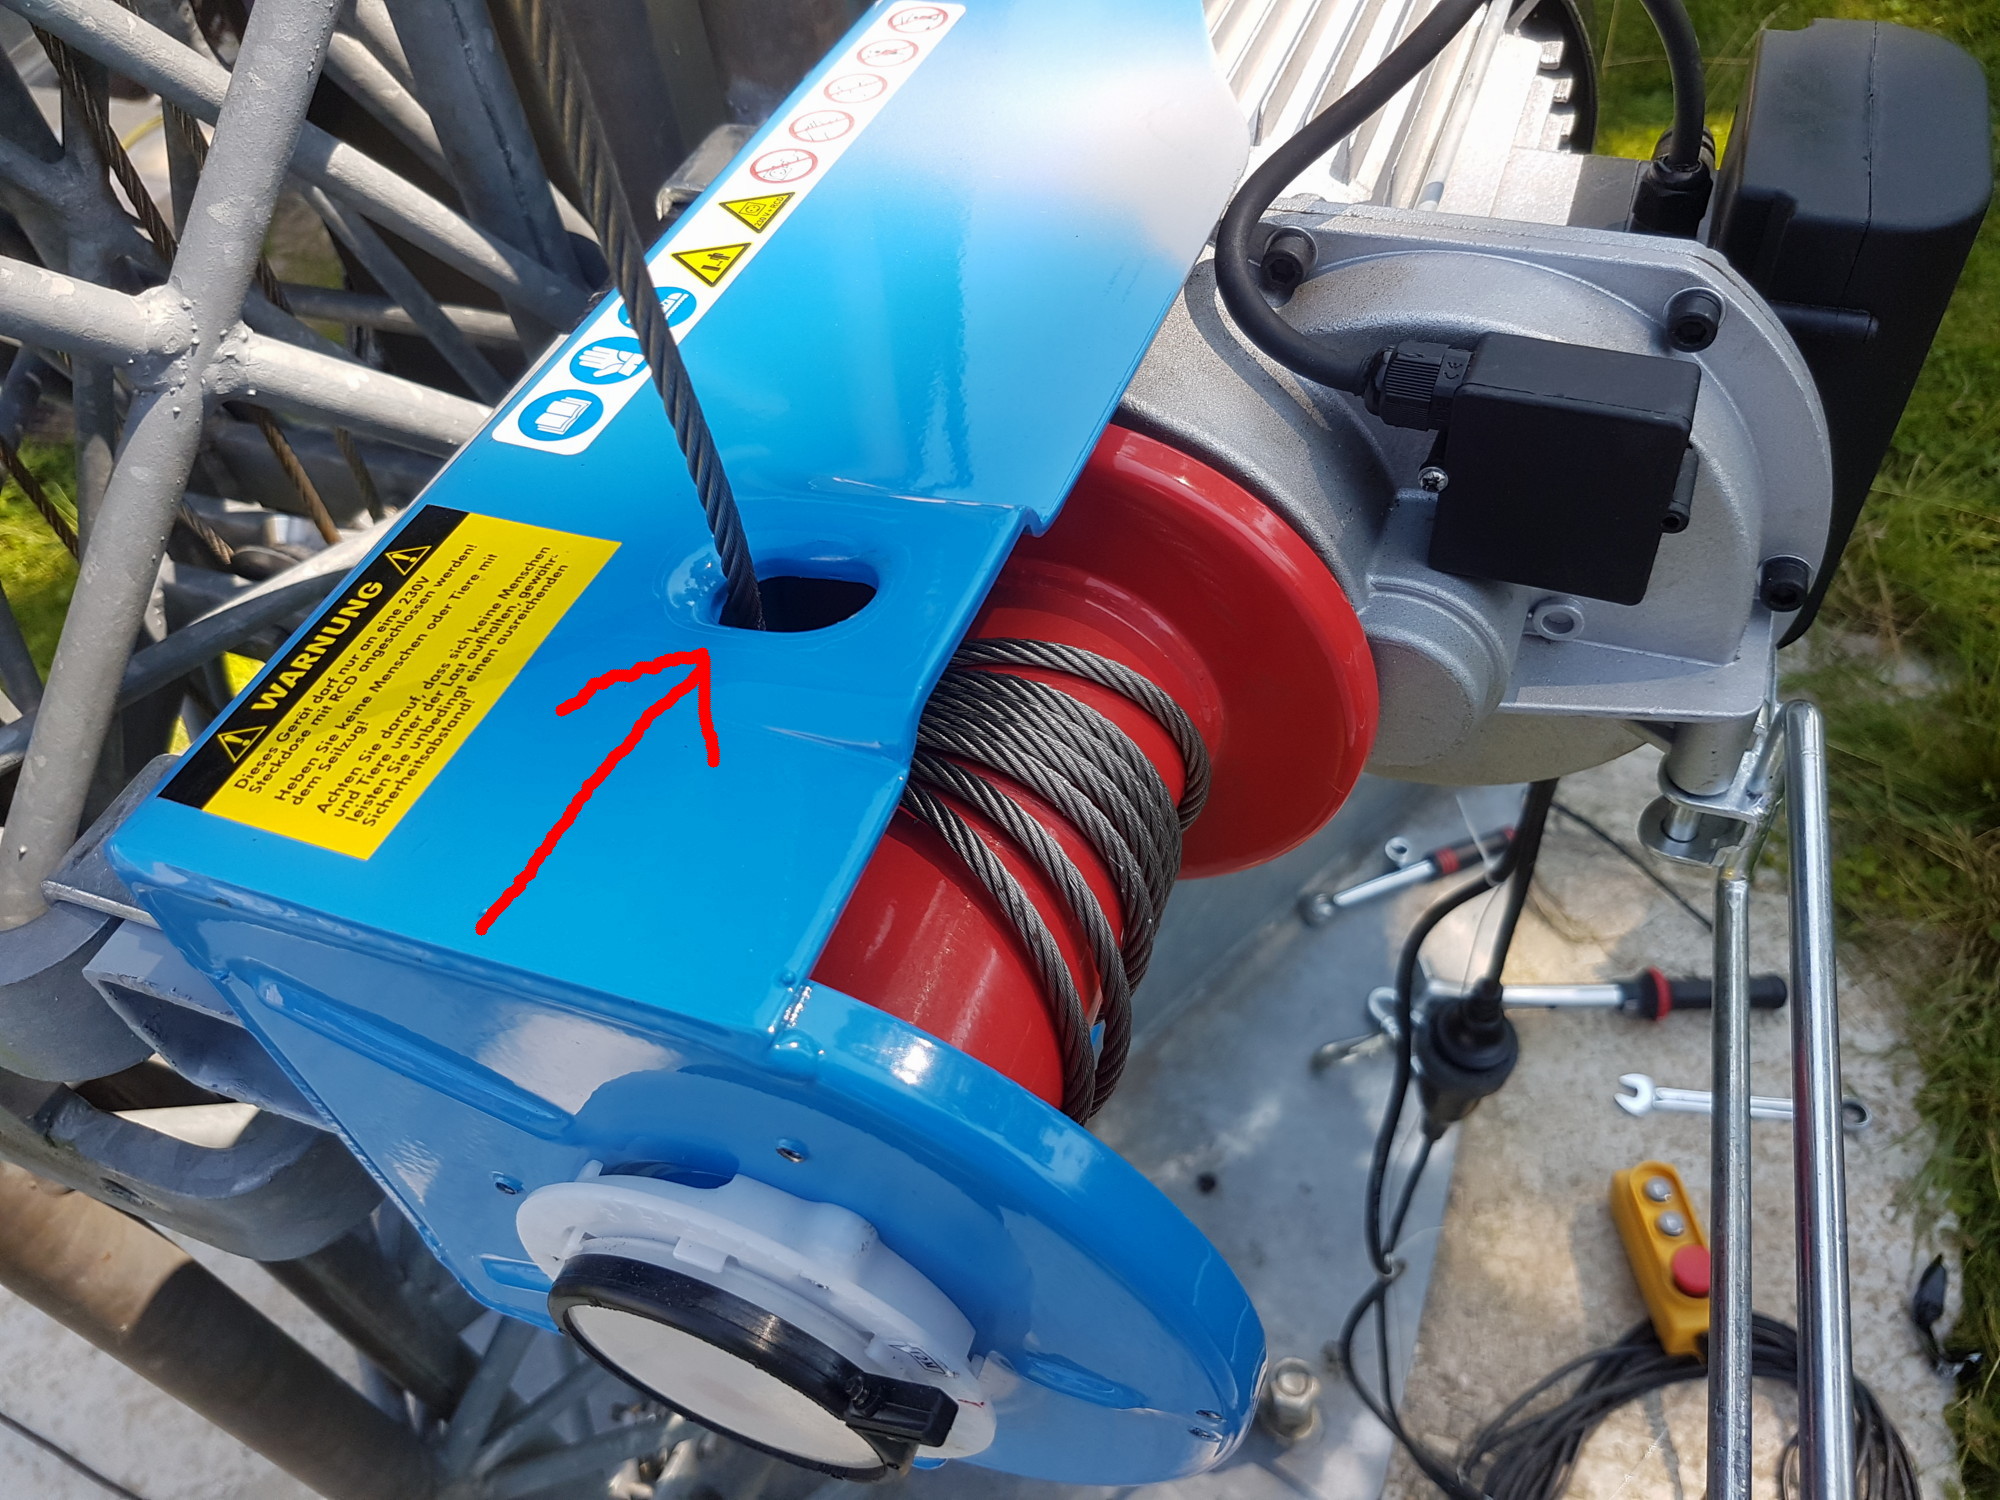
First problem was that the winch was moving up in the fixation when it worked and then stopped working, second the cable was scratching at the hole of the chassis.
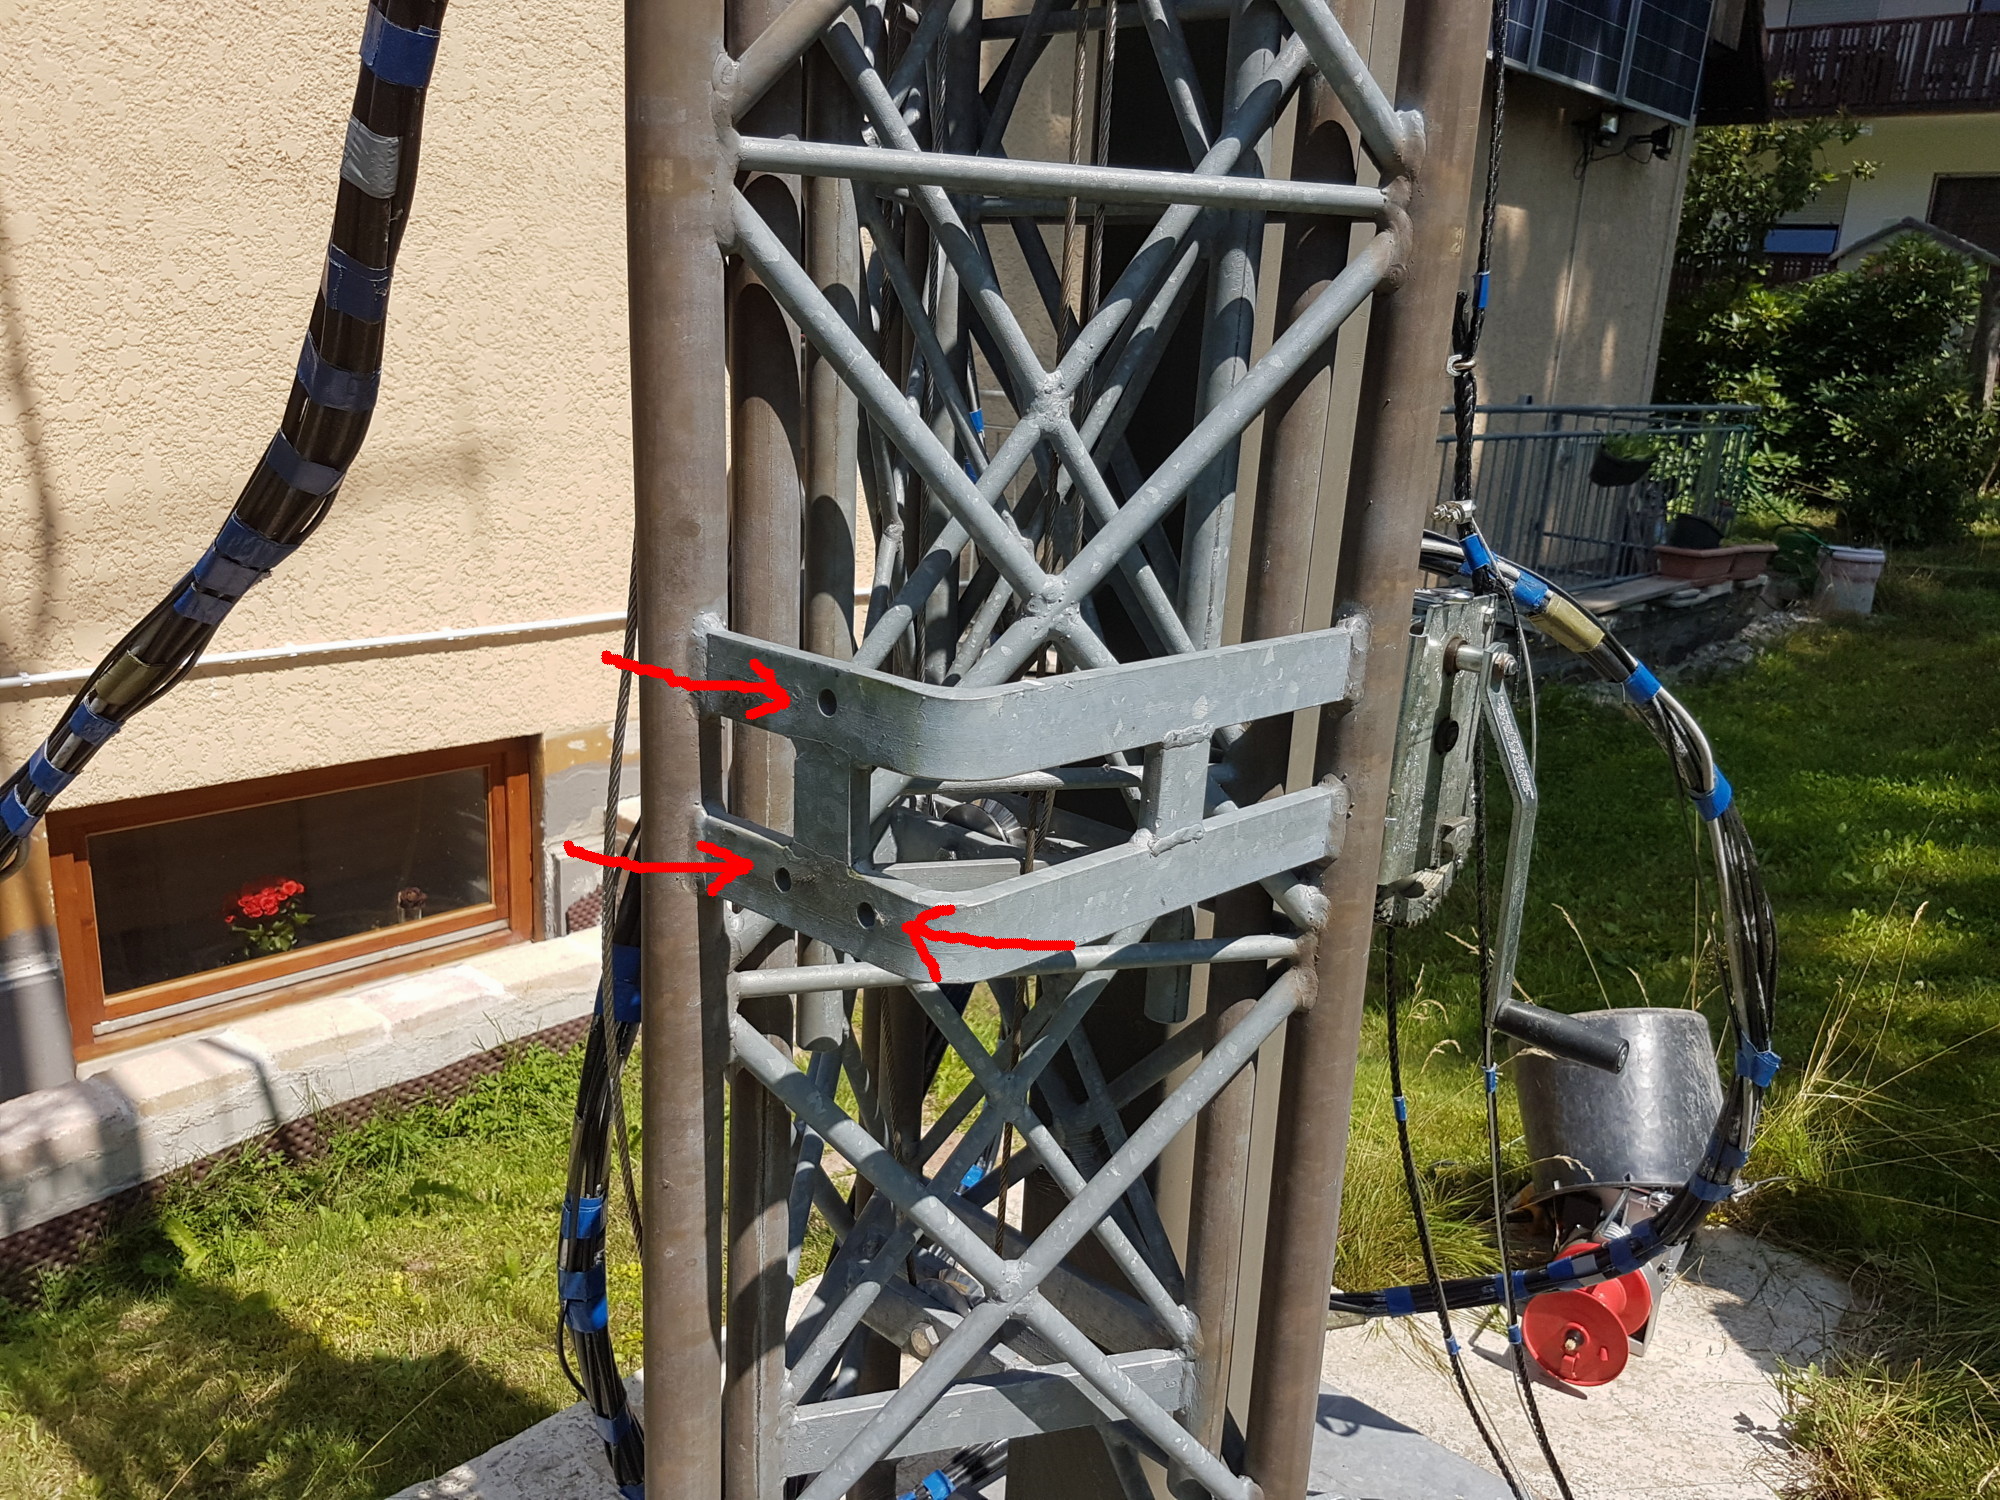
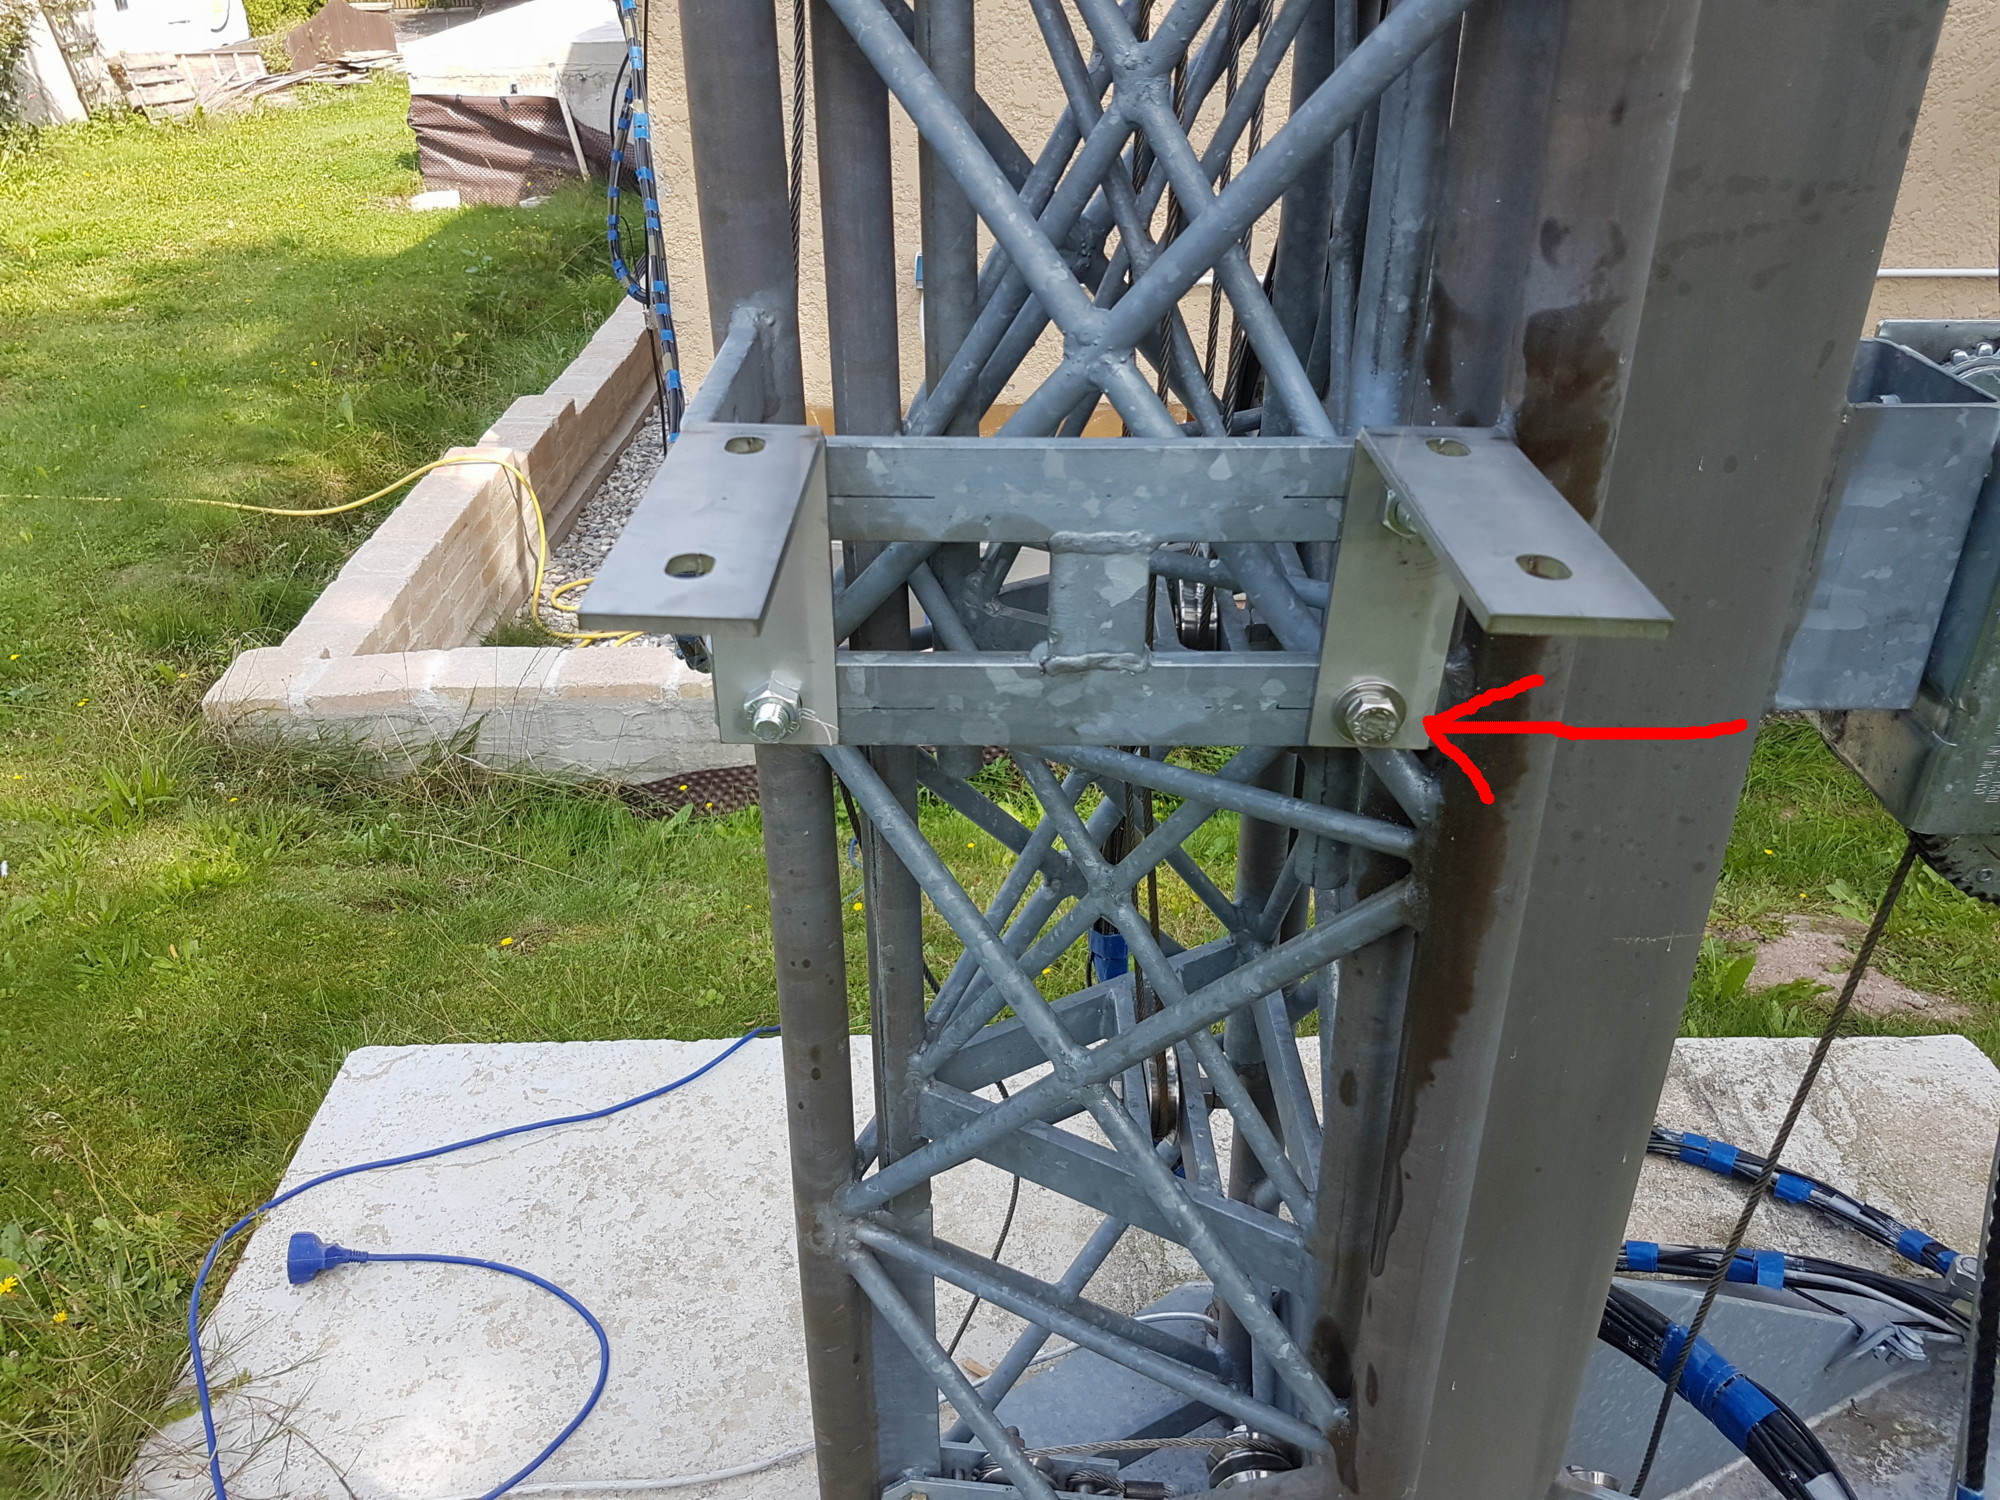
So after some days of thinking and searching in the net I decided to still use the long side of the fixing frame of the tower, but I had to order a specific bracket.
The problem is, that the length of the straight frame is just enough fo the dstance of the mounting holes, but you have to get close to the right, so you still can get the whole chassis to the straight part without getting in trouble with the vertical tower part.
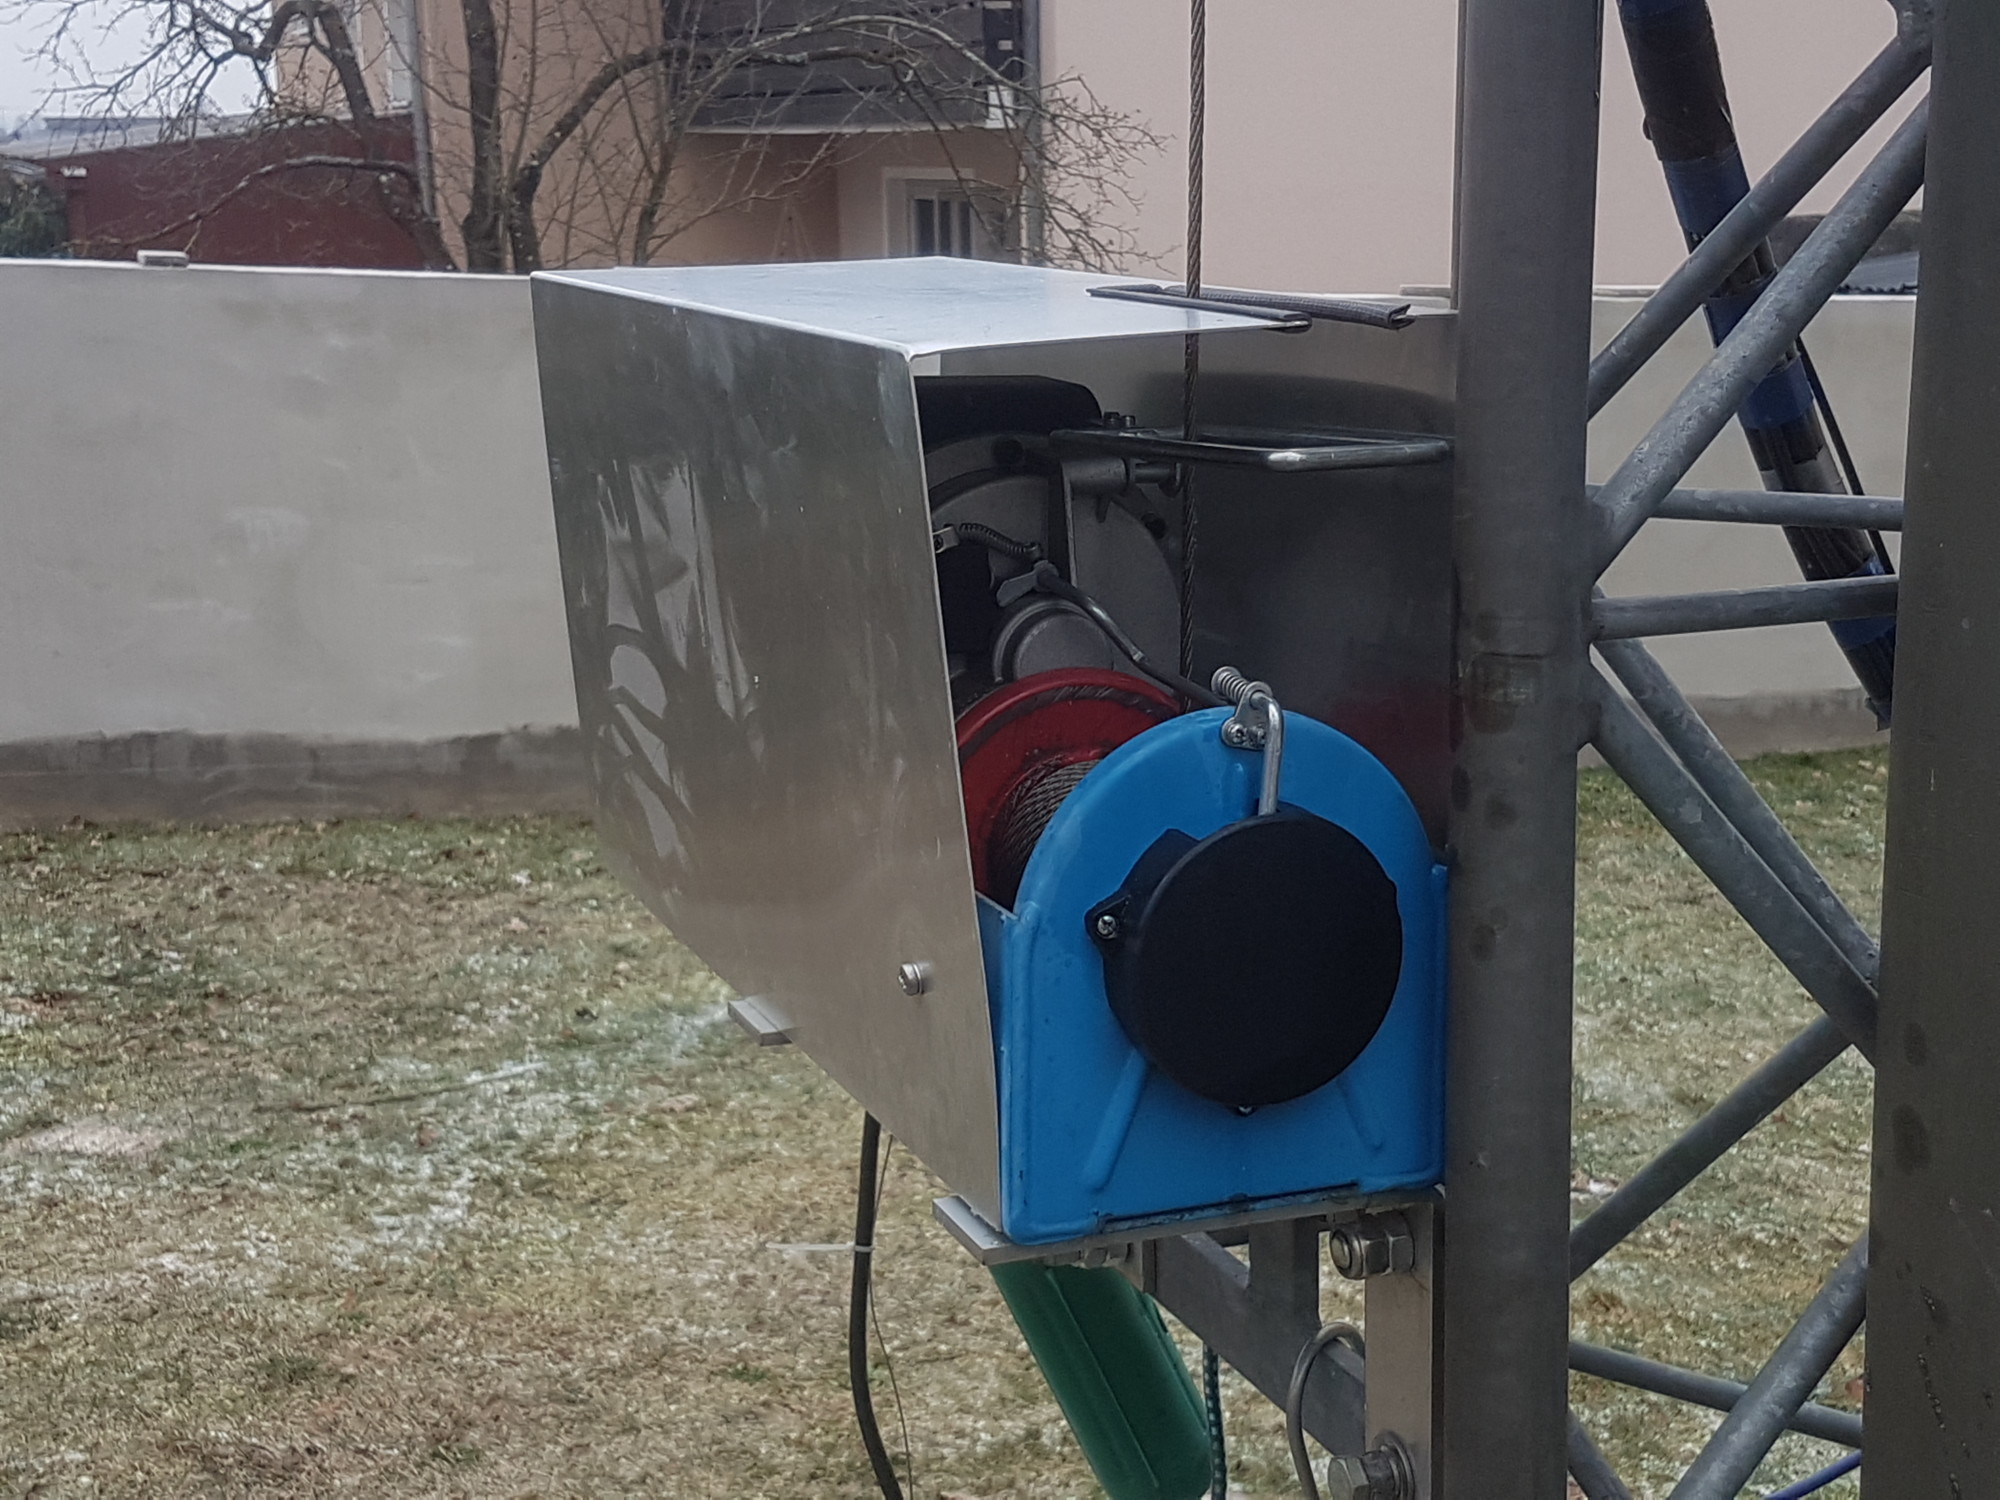
So this are the fixing frames (6mm V2A) I could order in the internet:

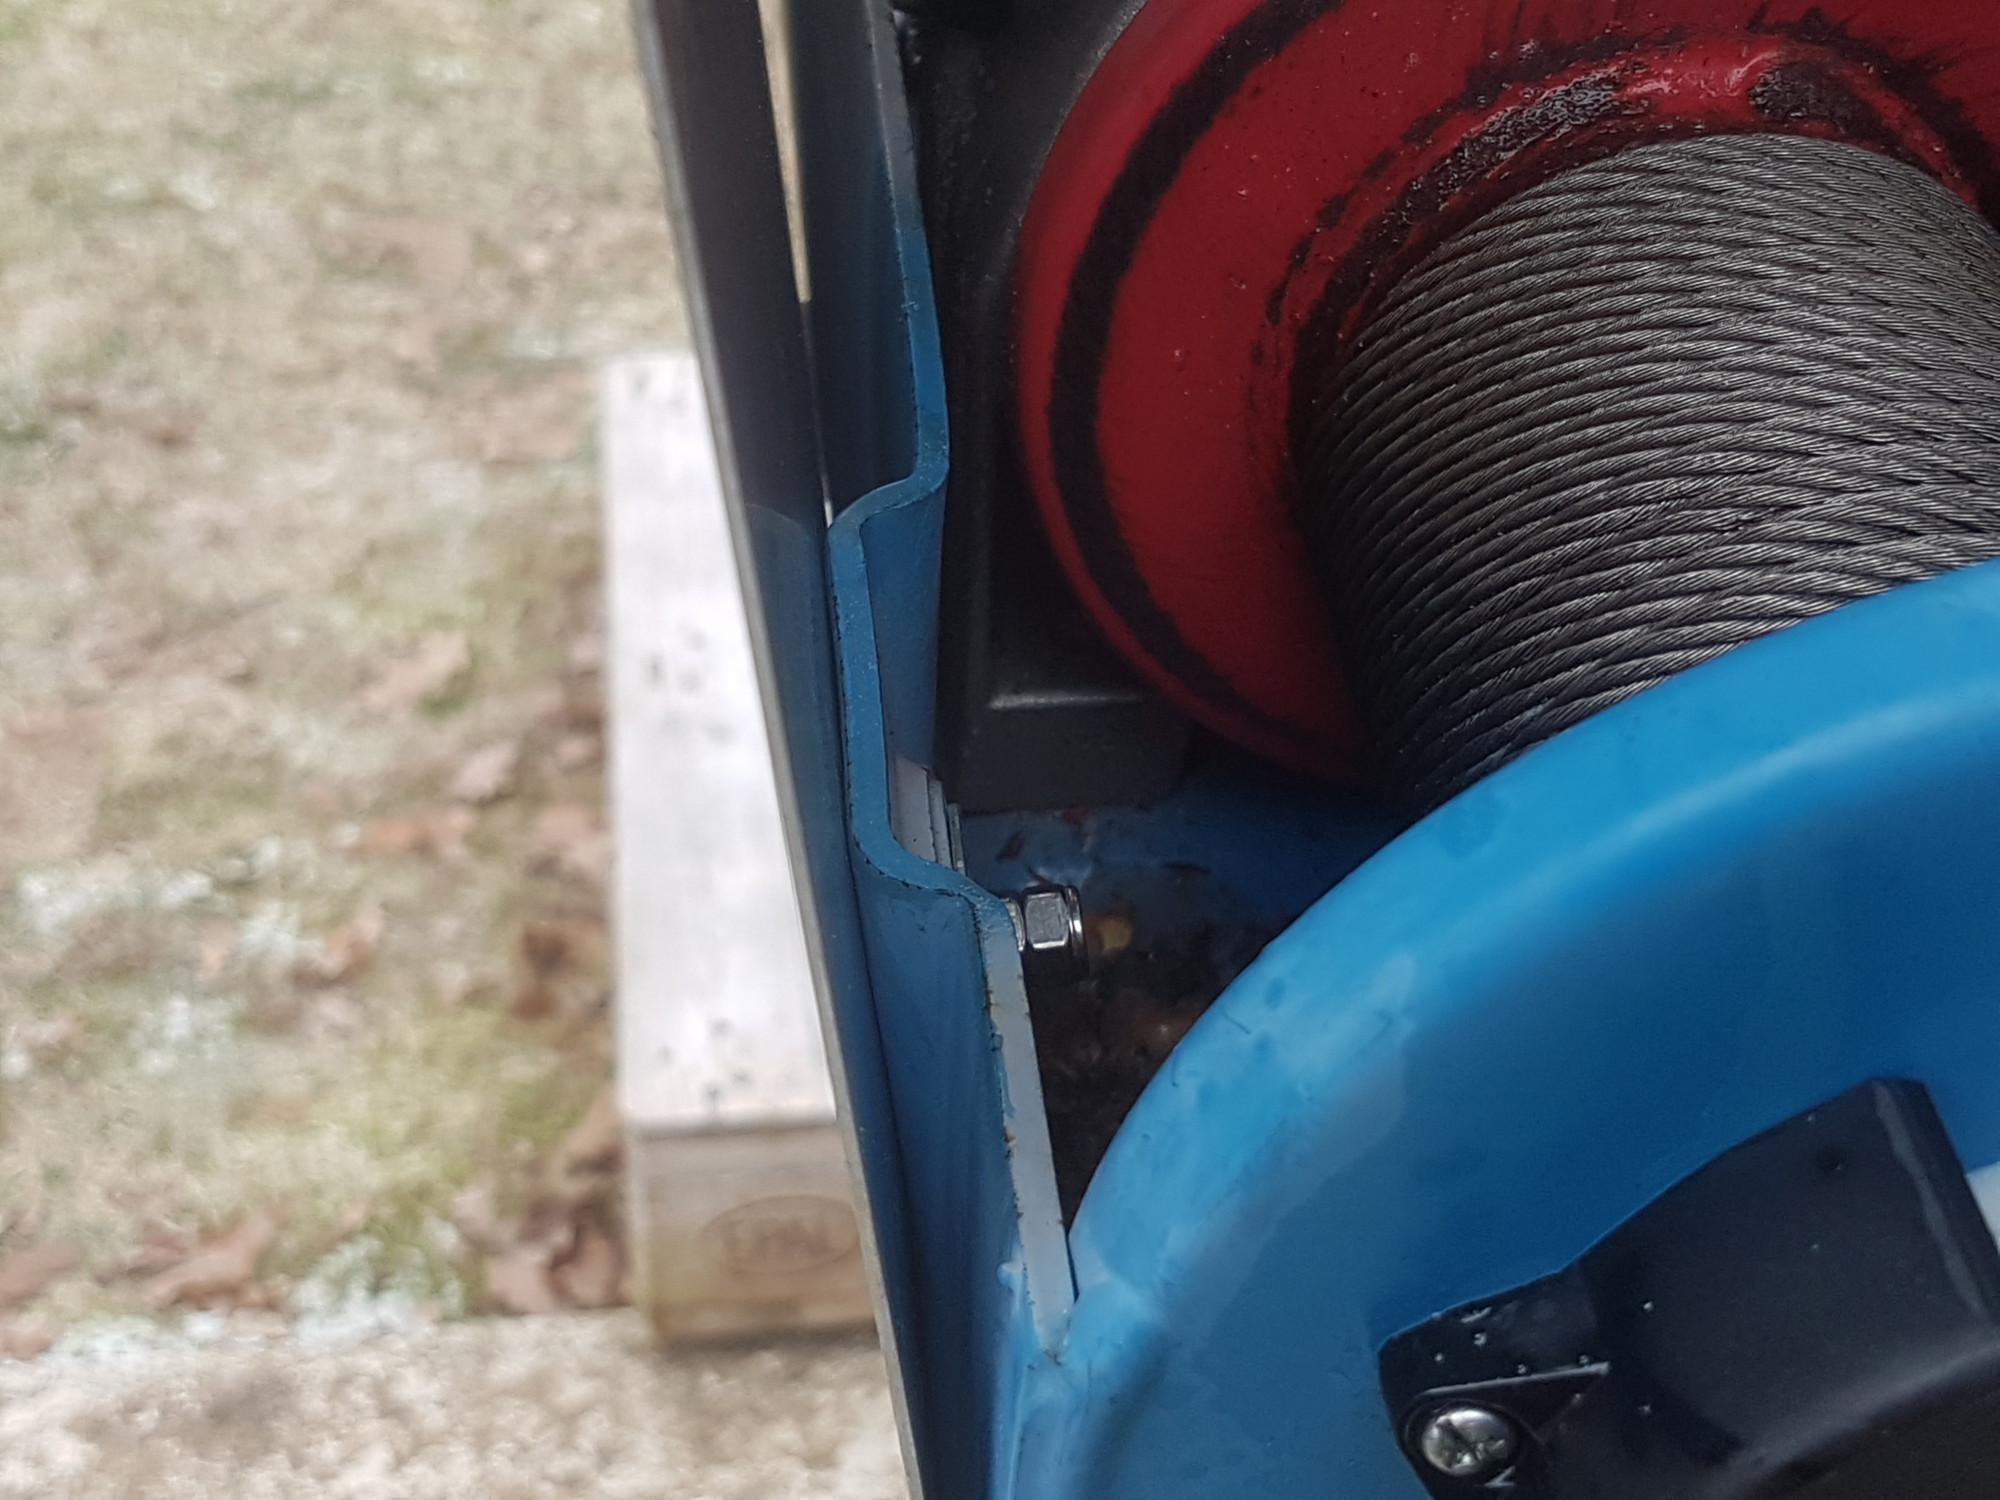
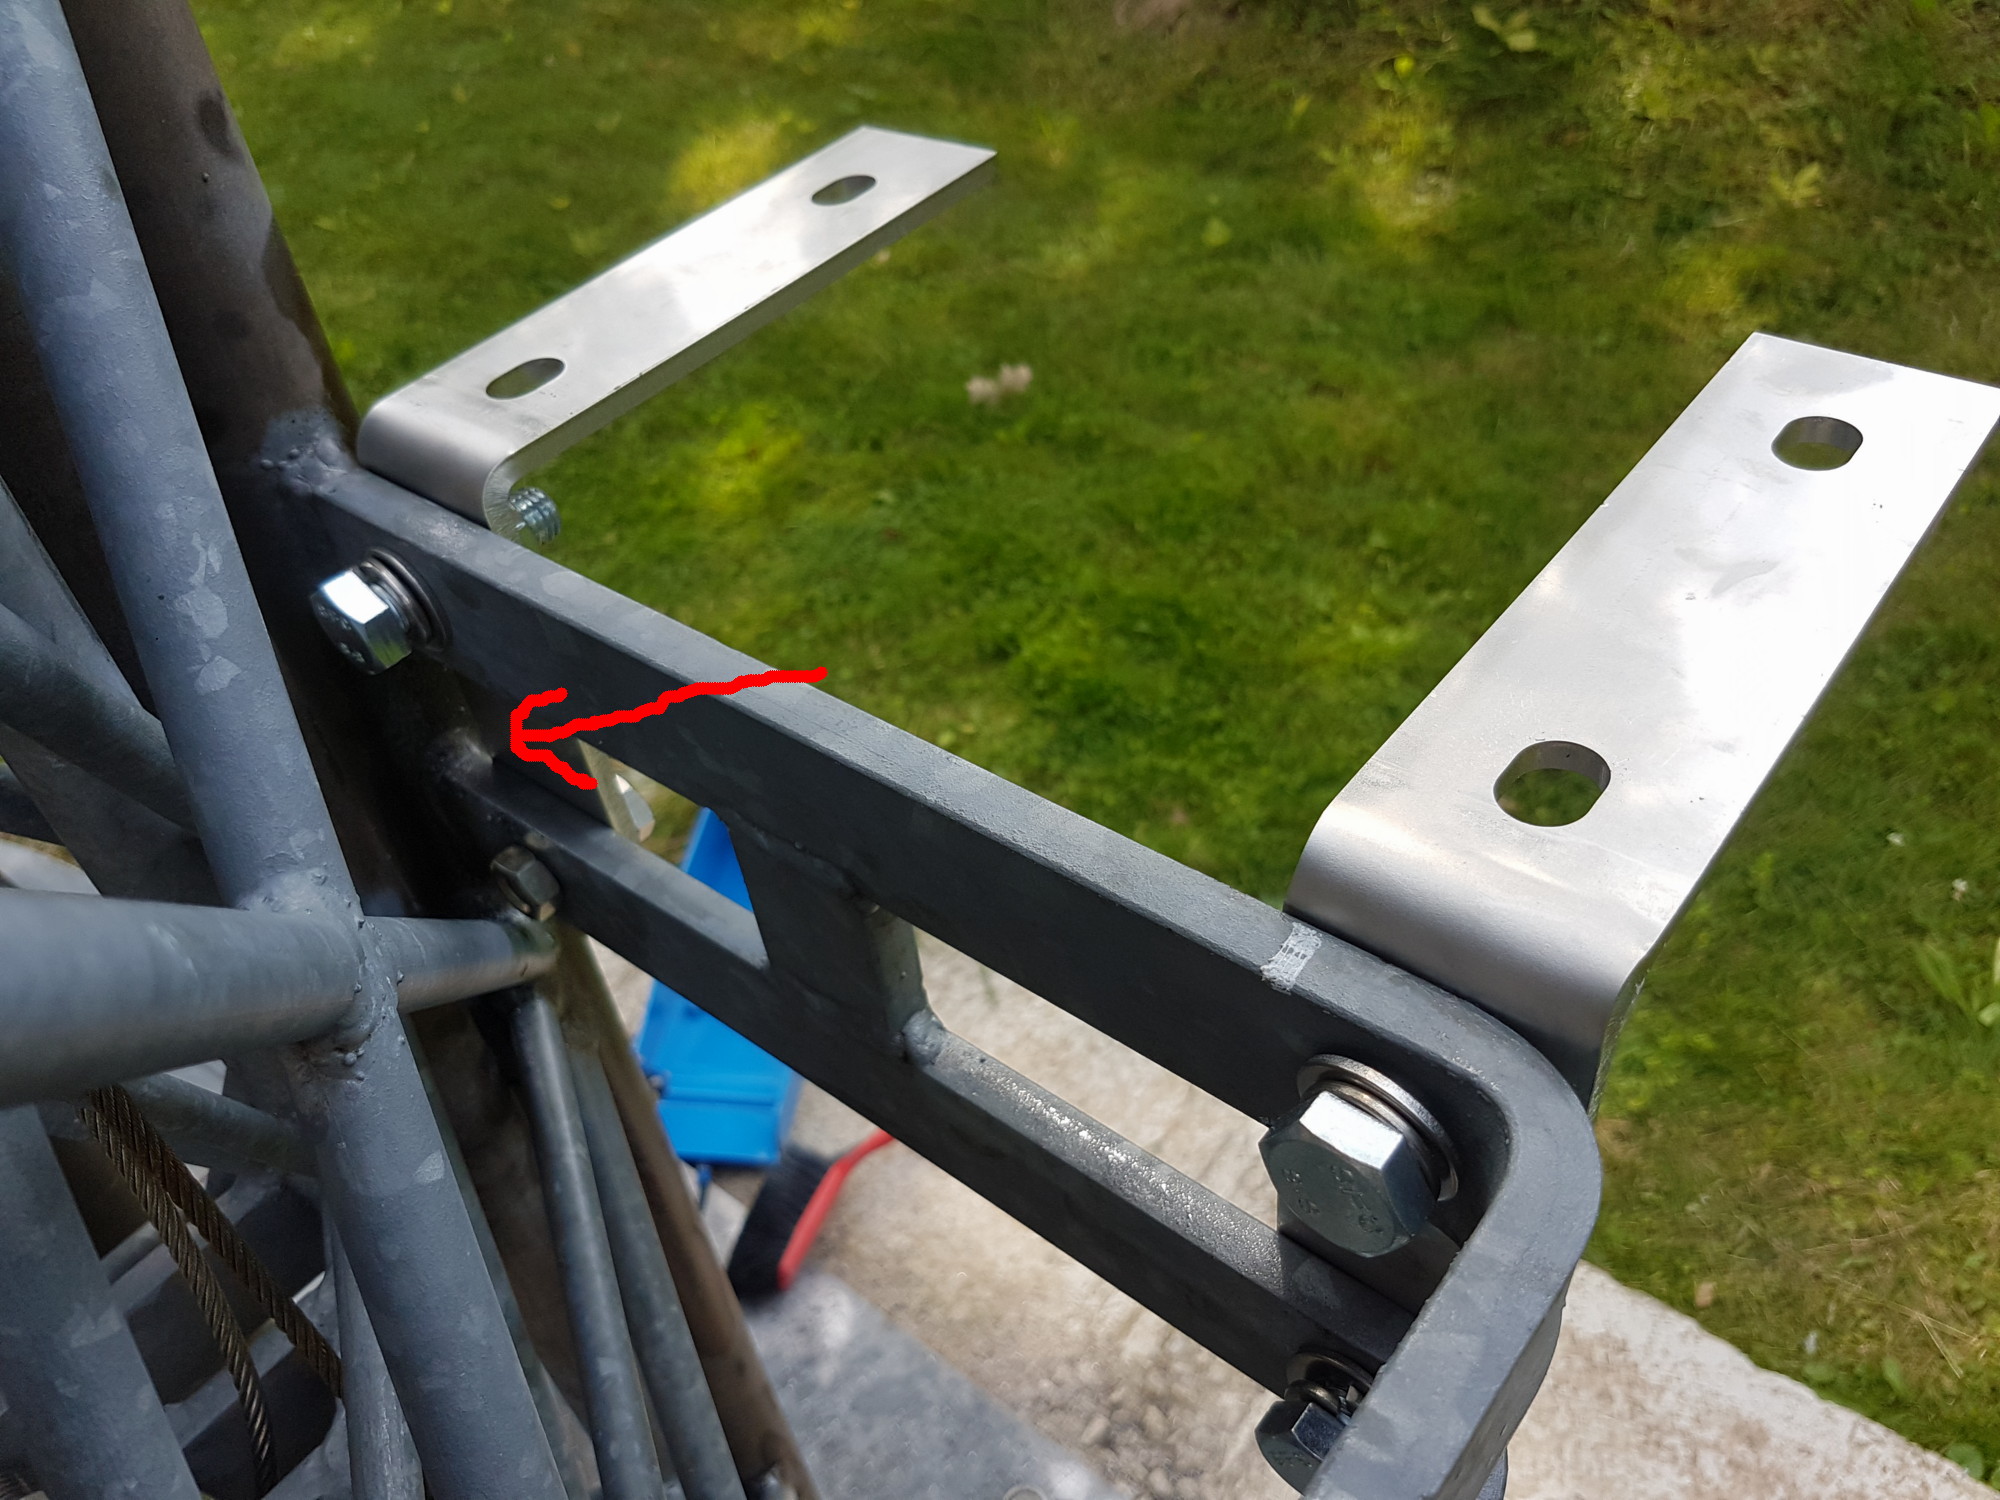
Then I had to drill 14mm holes for the M14 screws into the 12mm thick metall:
note: the right lower bolt has to be a short one and showing to the inside because there is a lack of space.
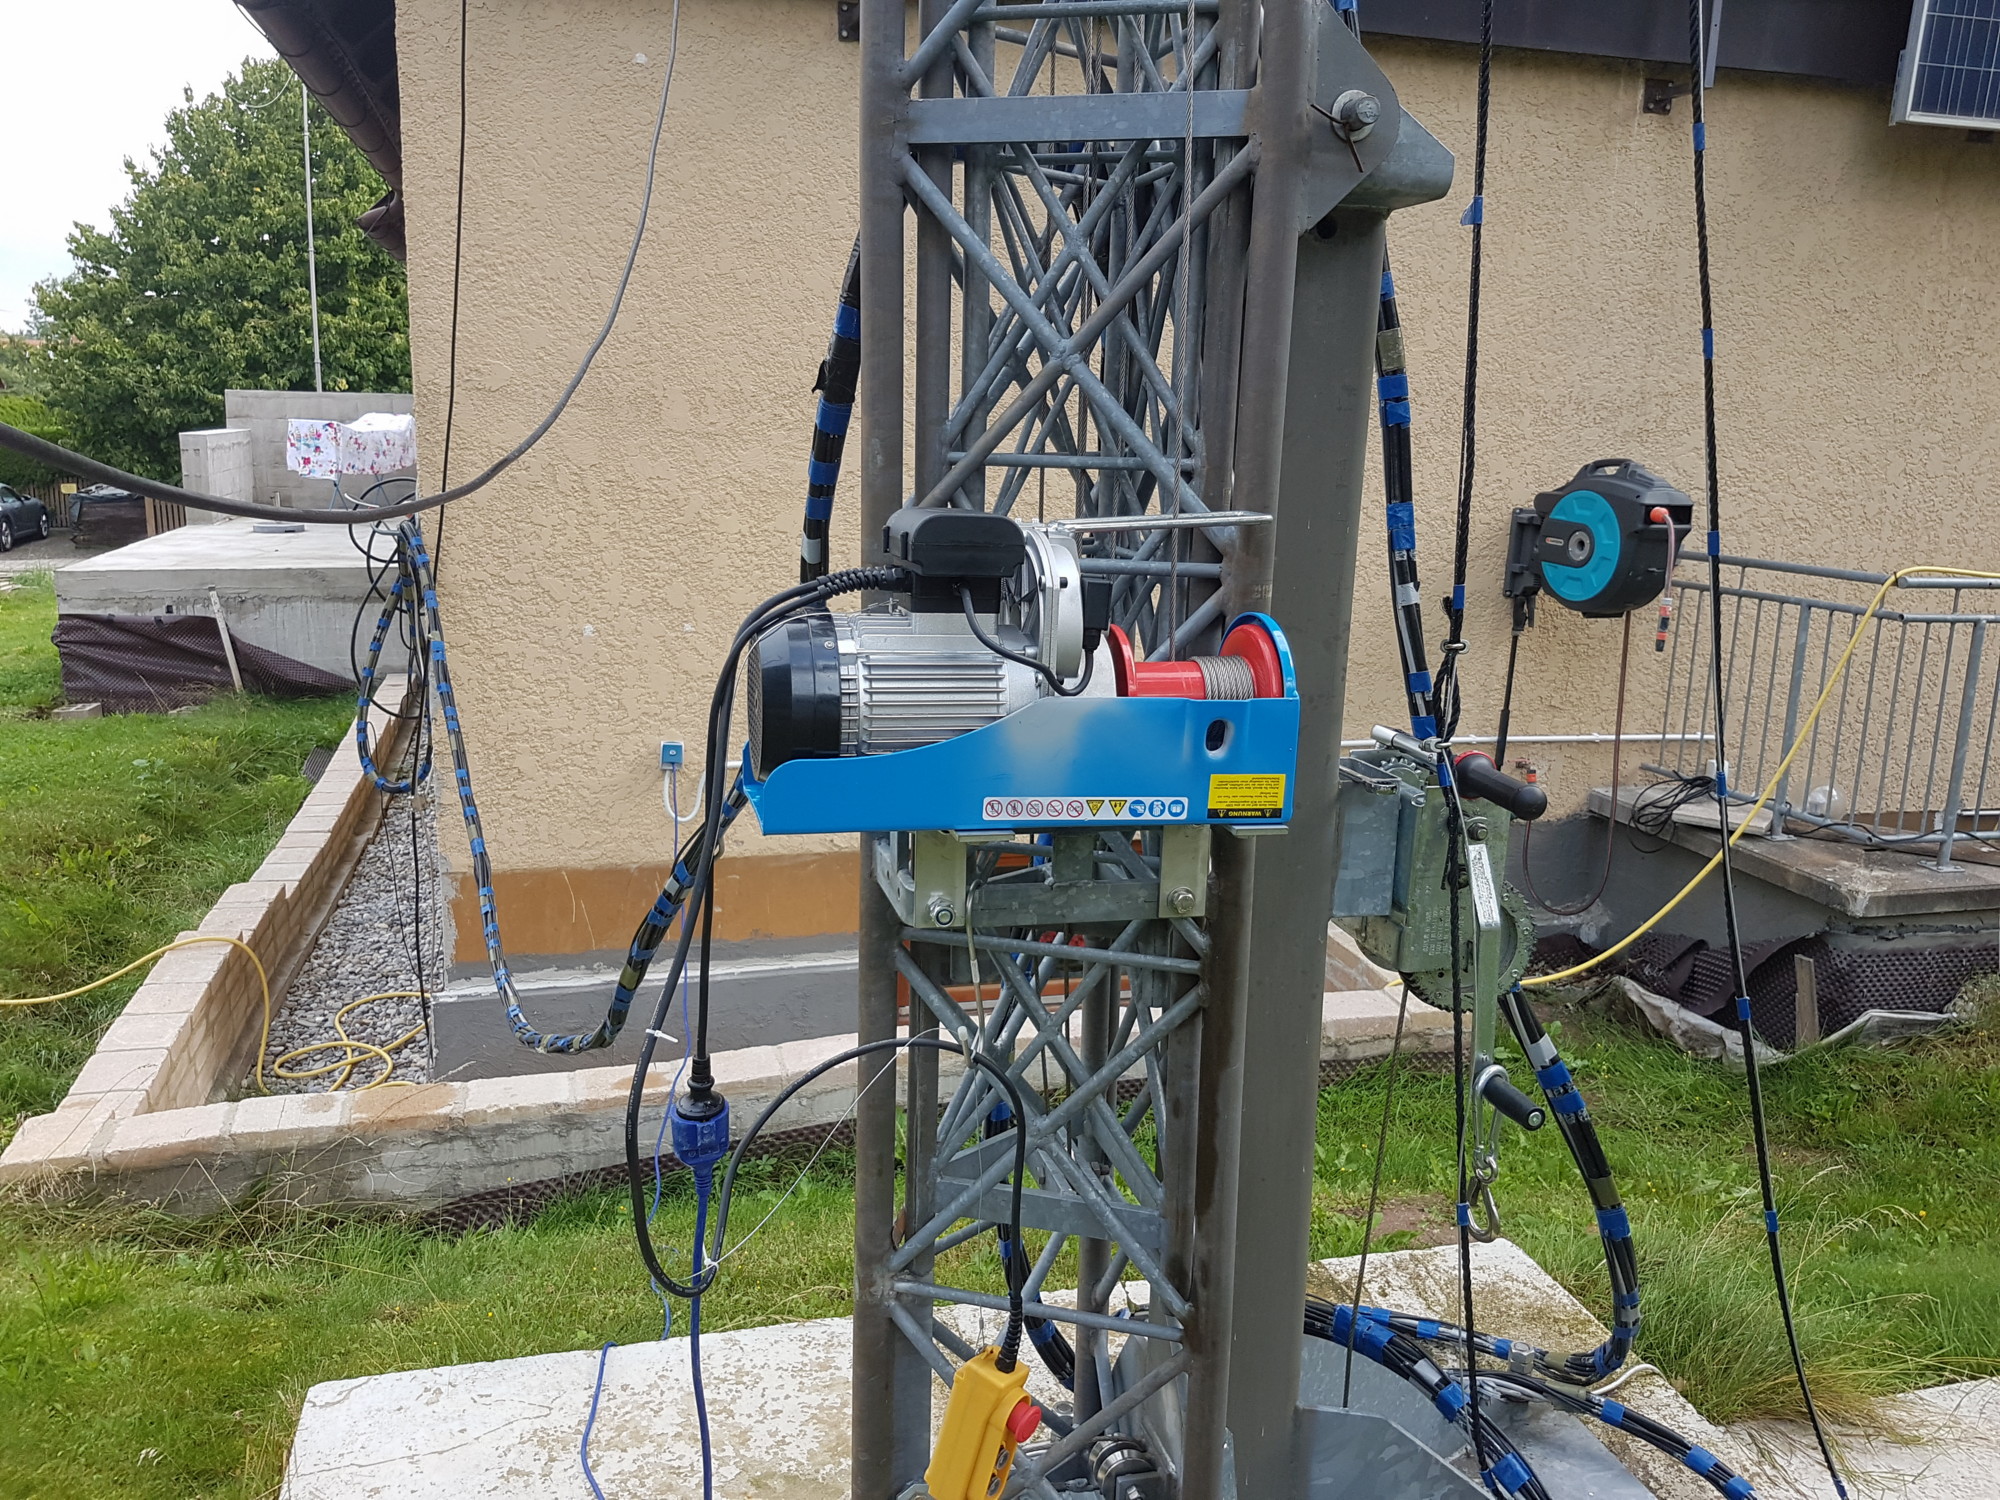
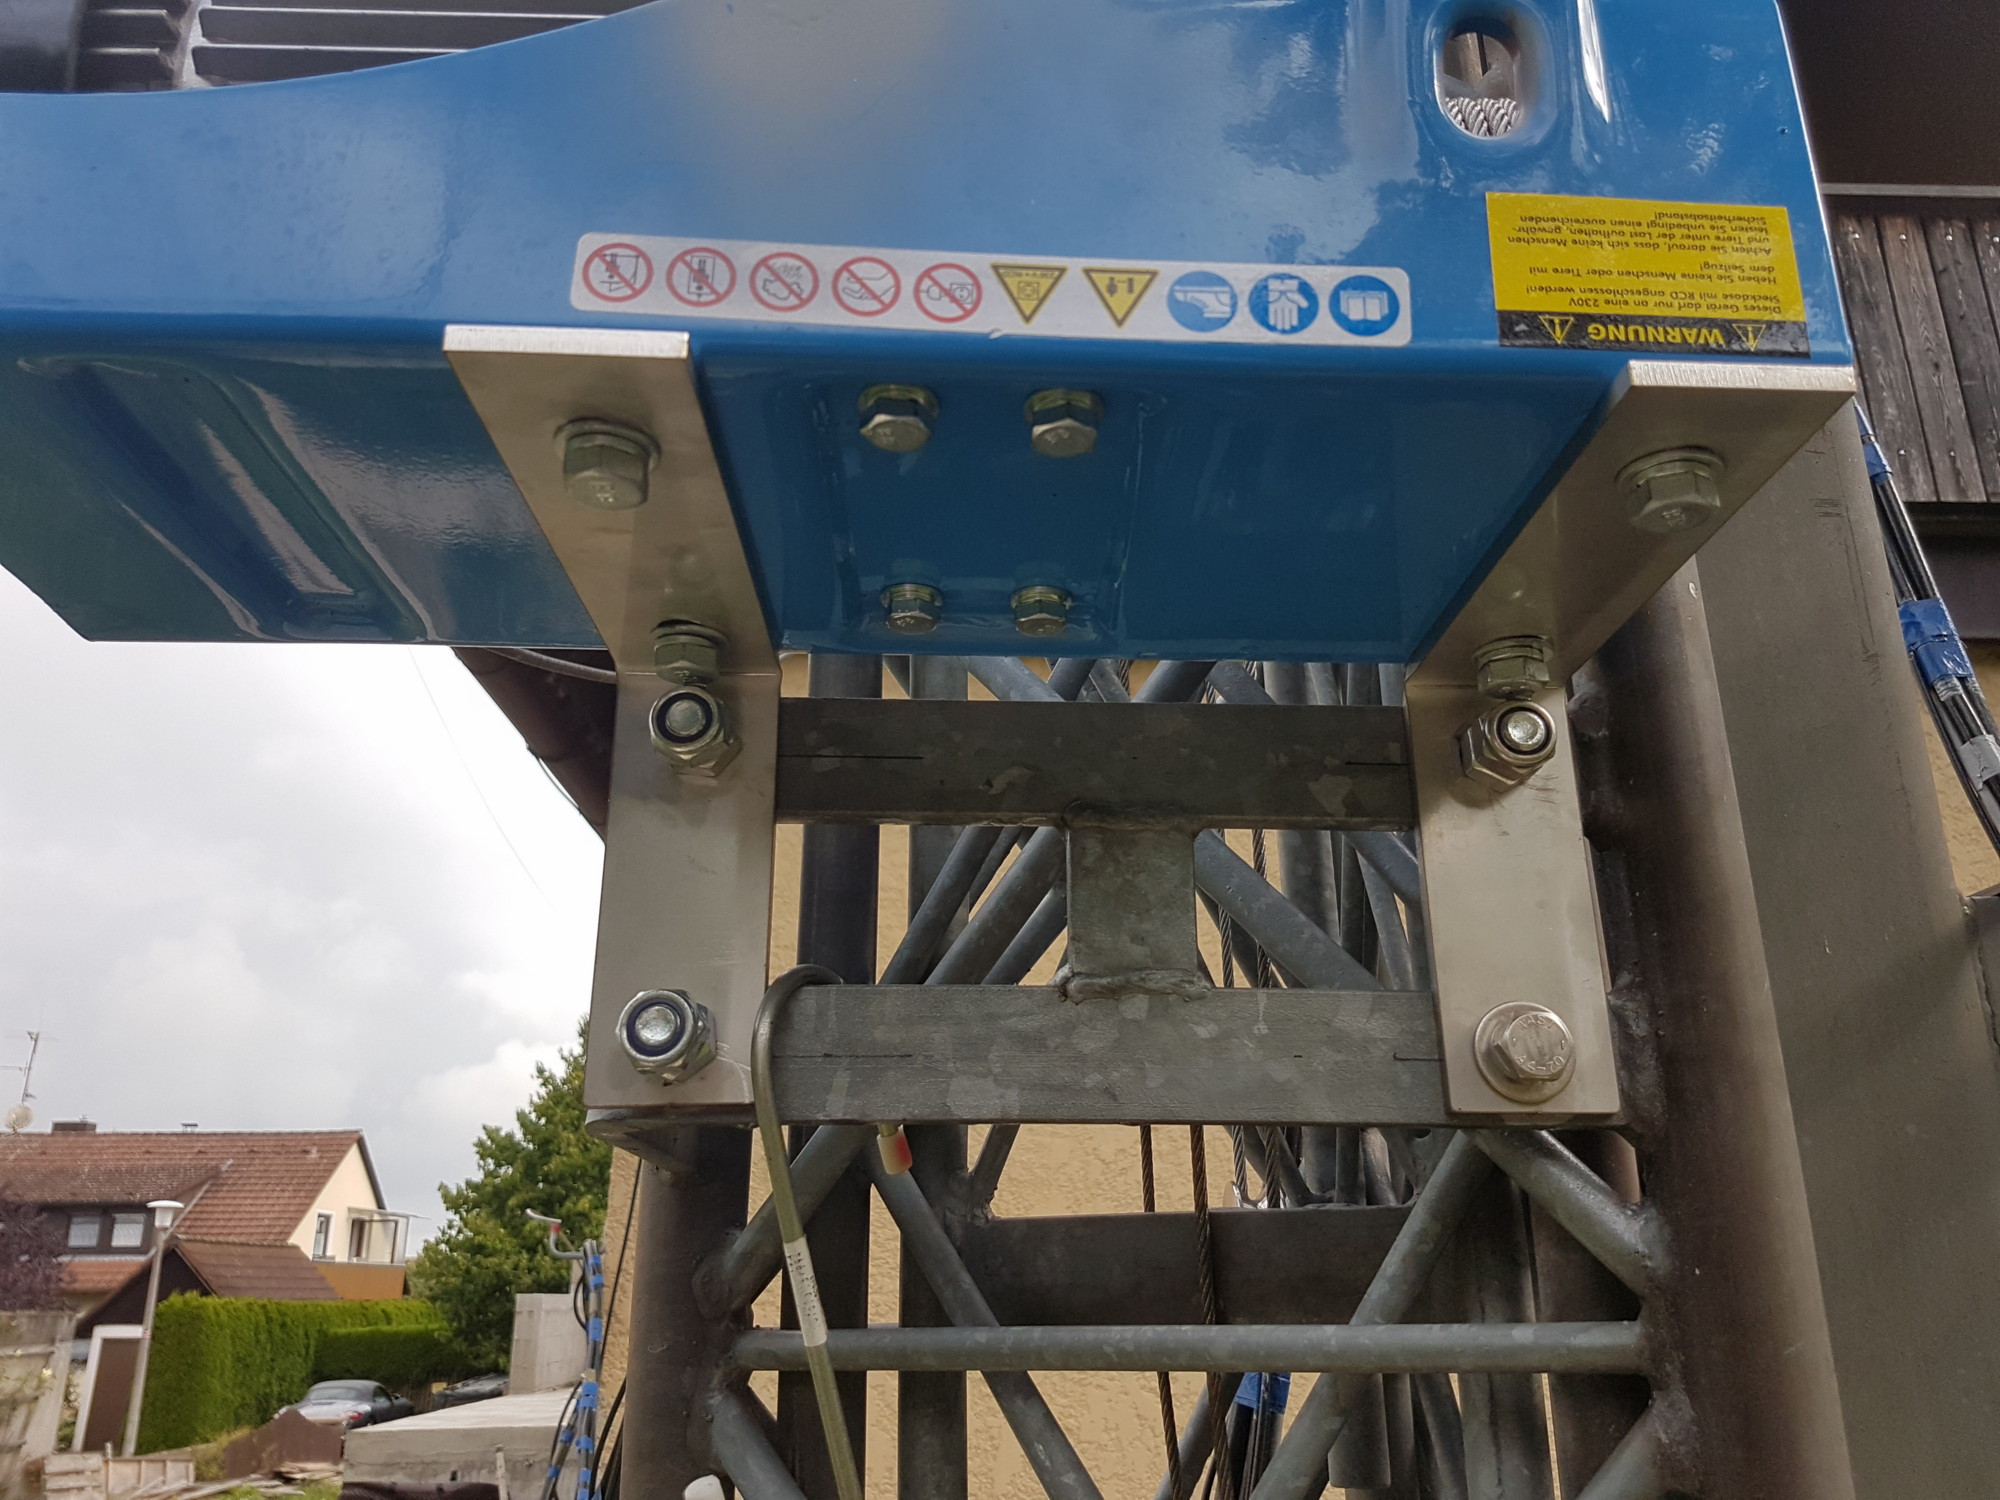
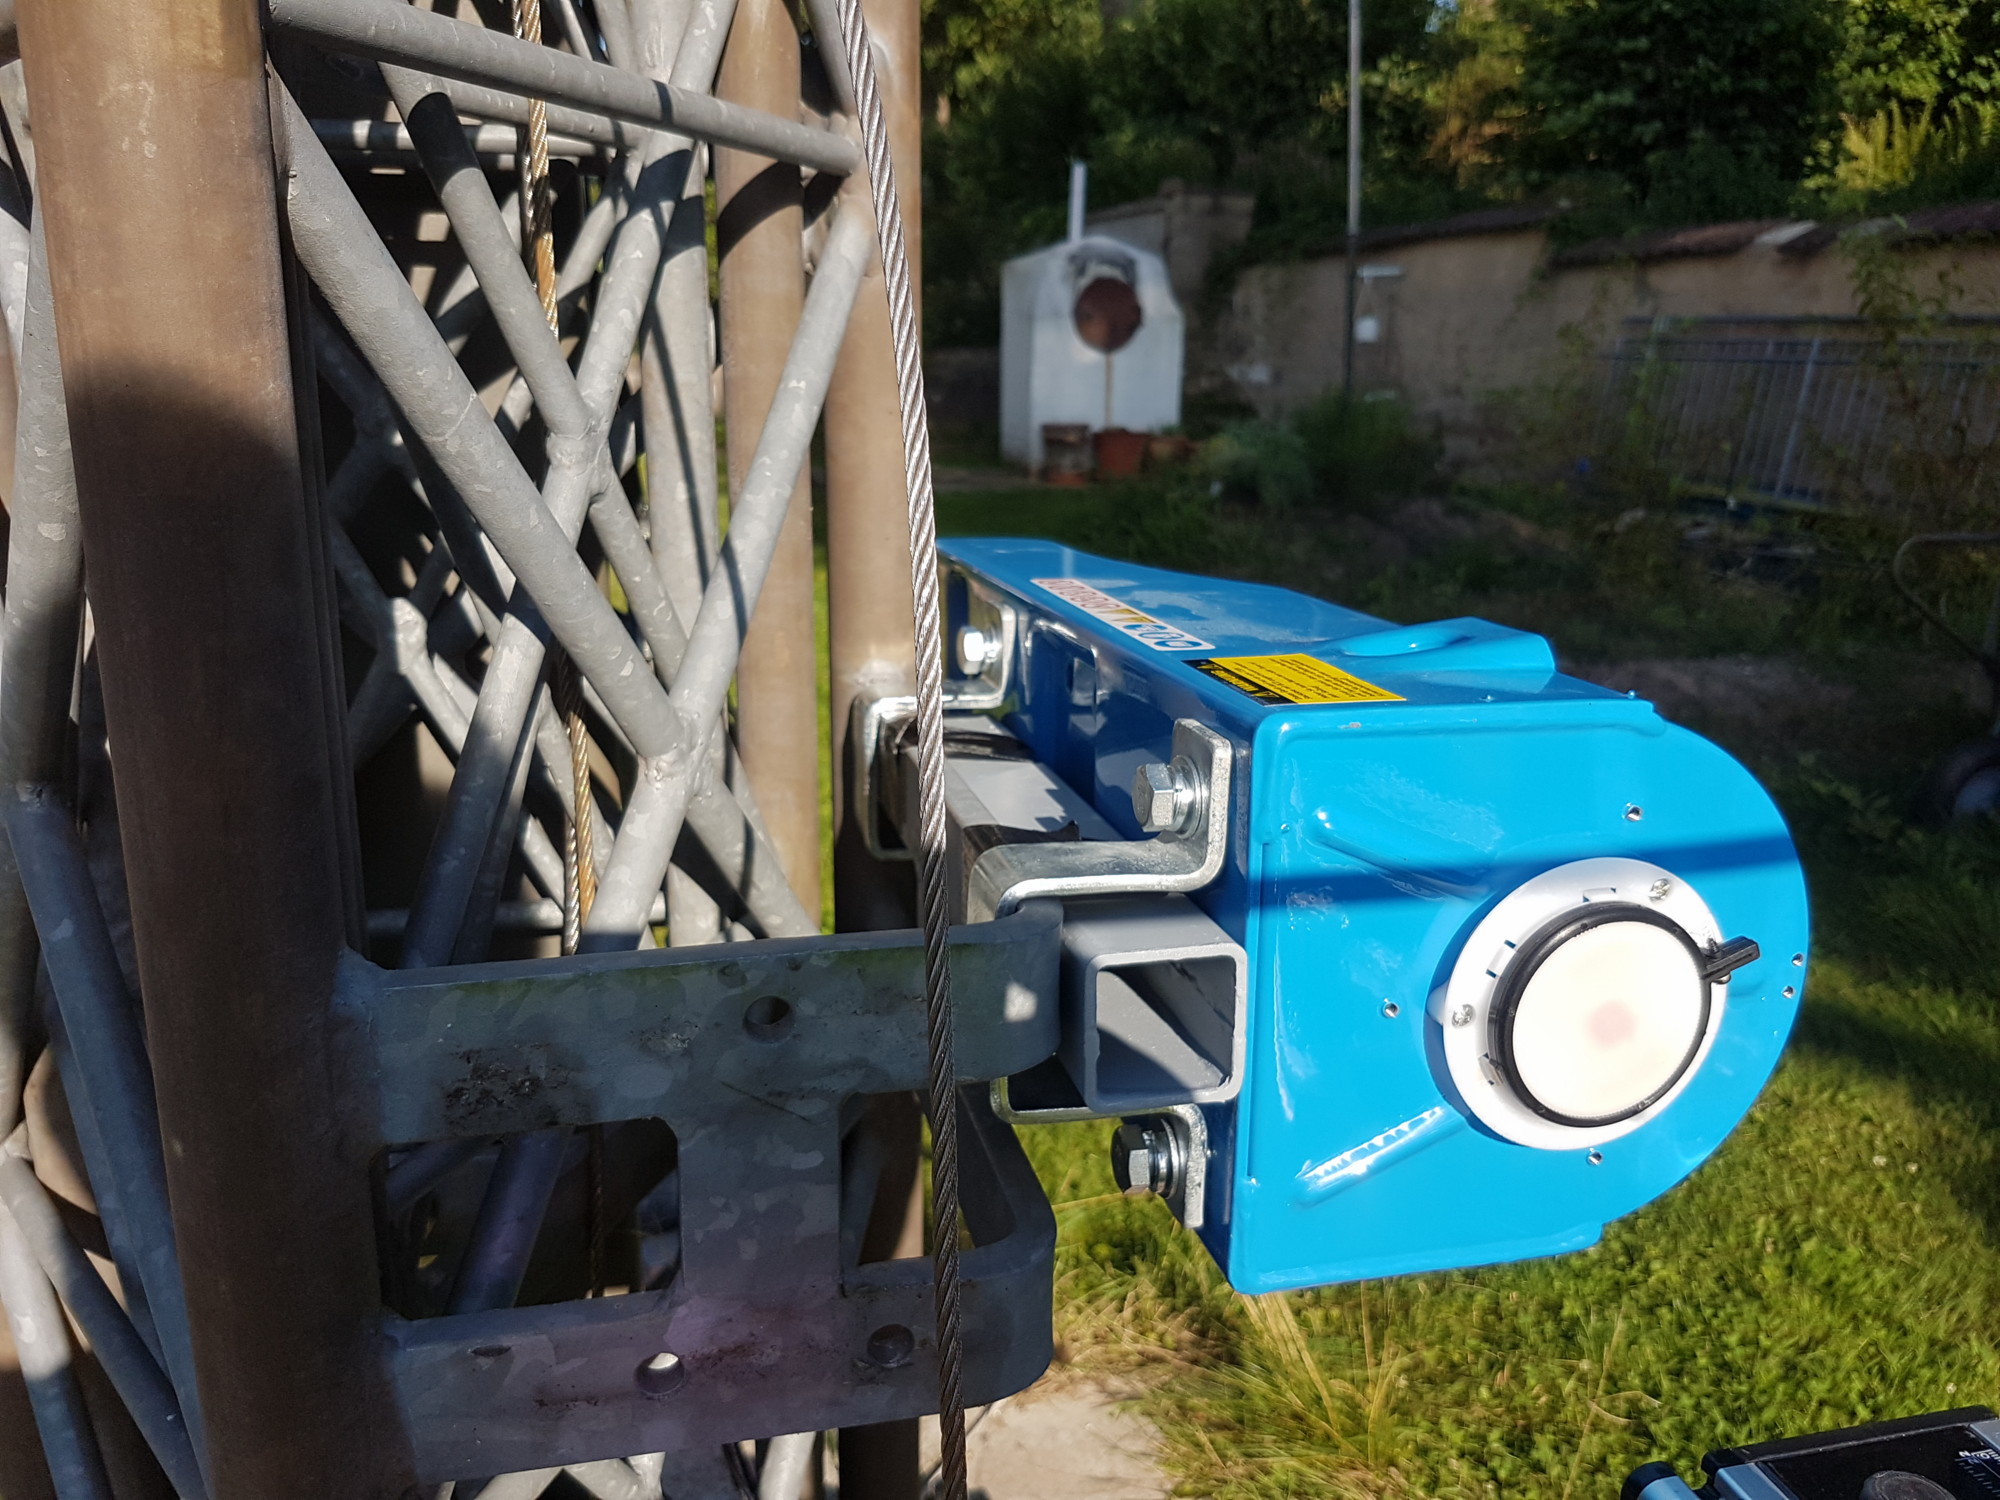
And now everything is working fine and without getting exhausted :-)
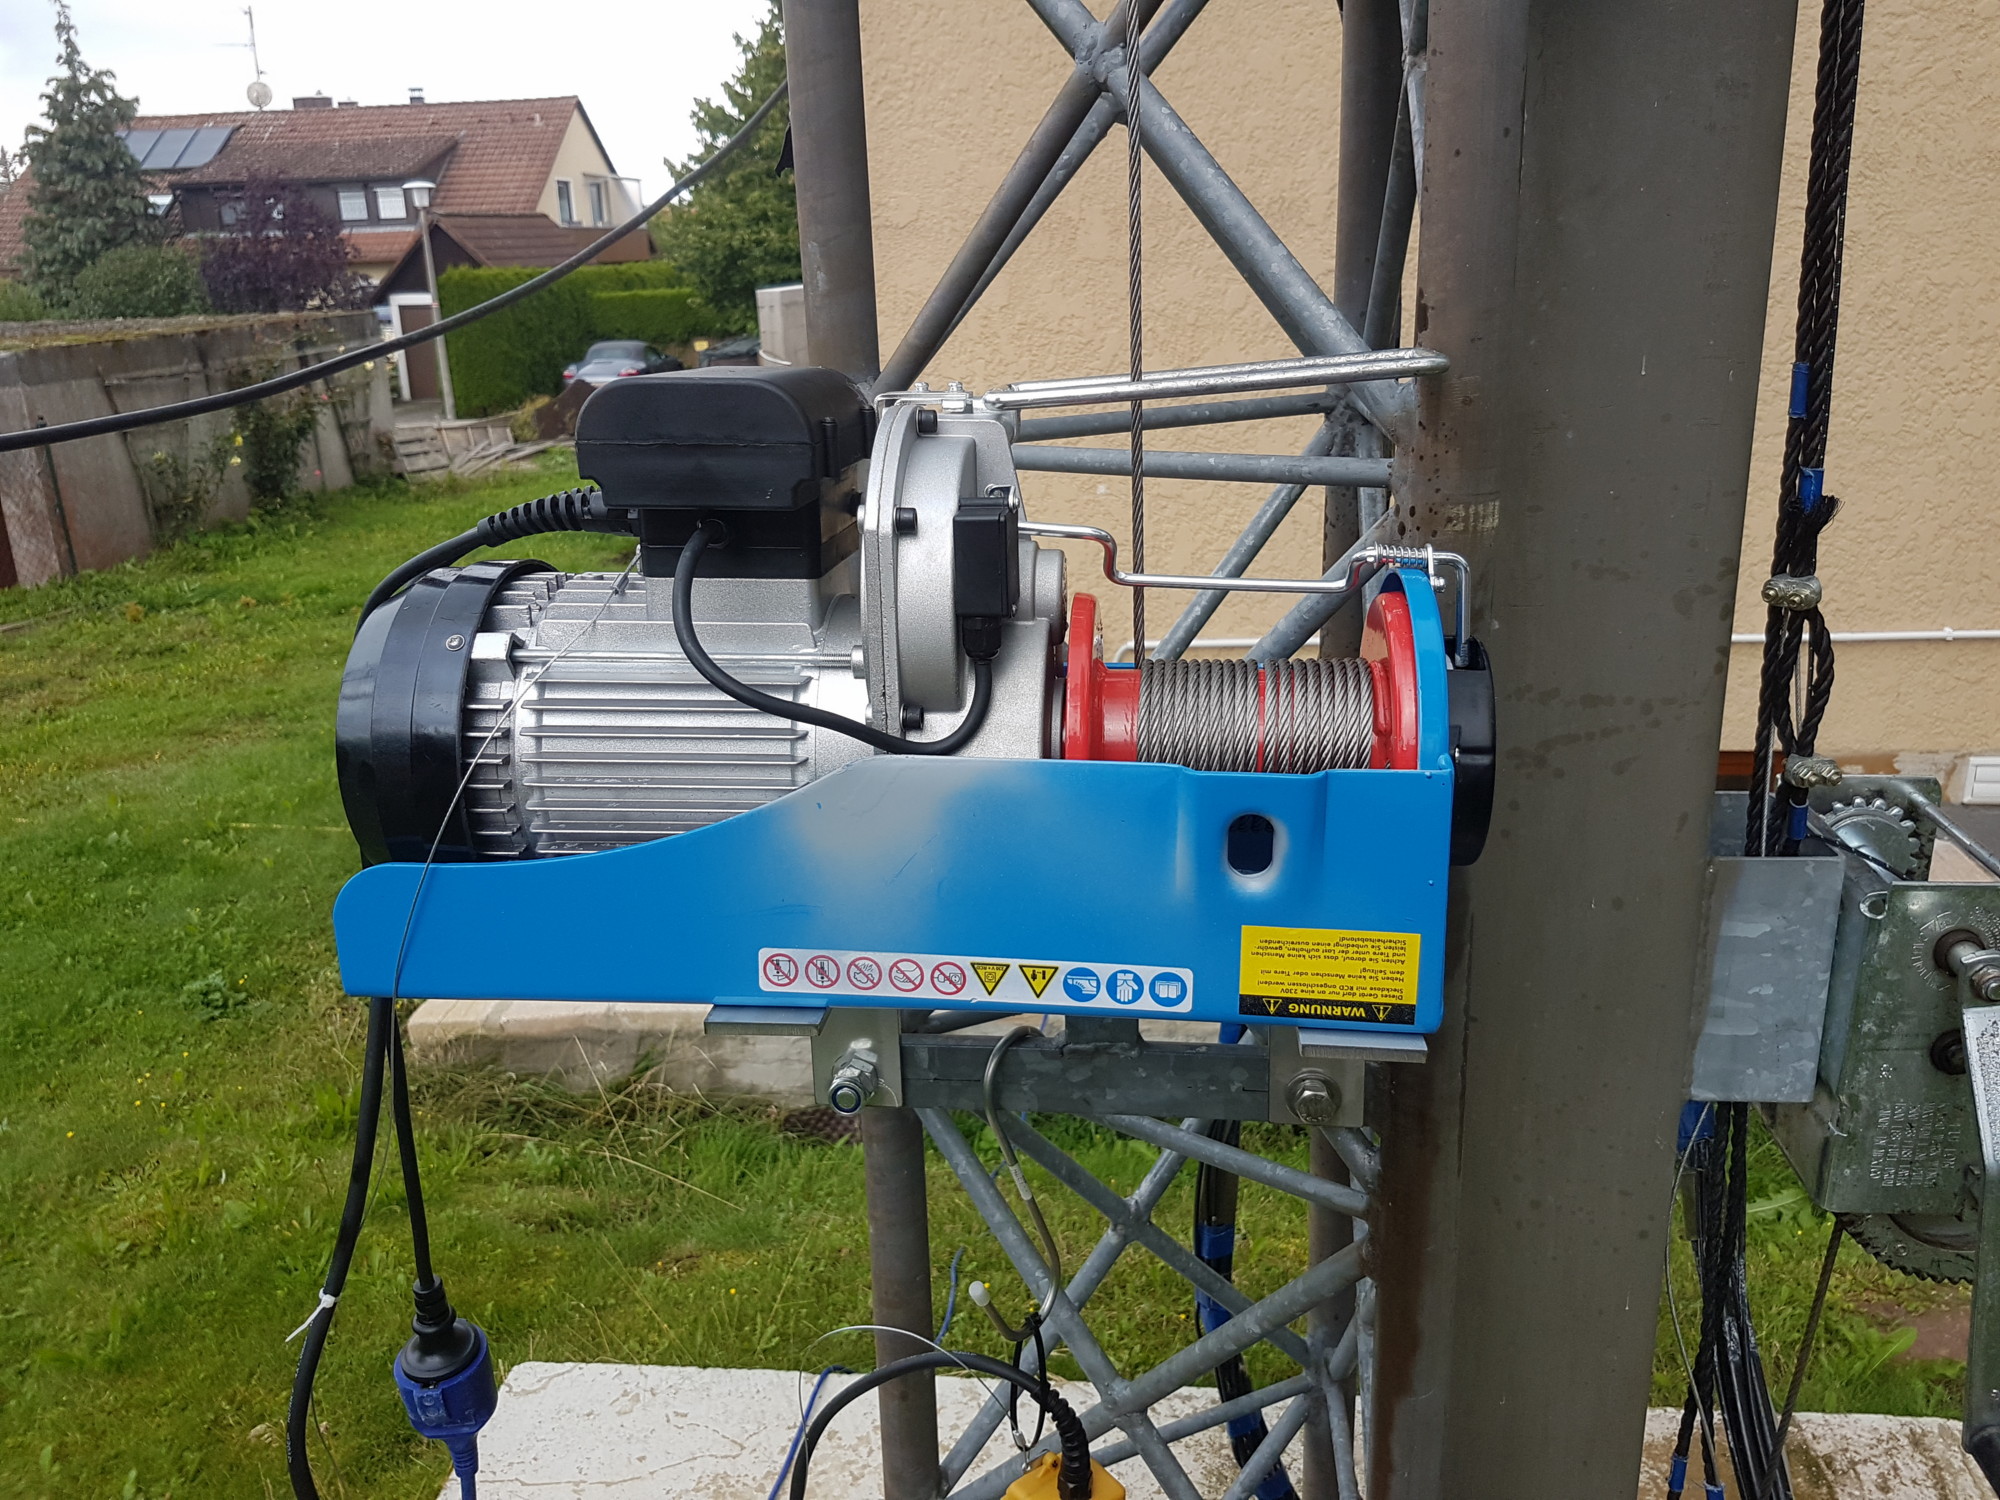
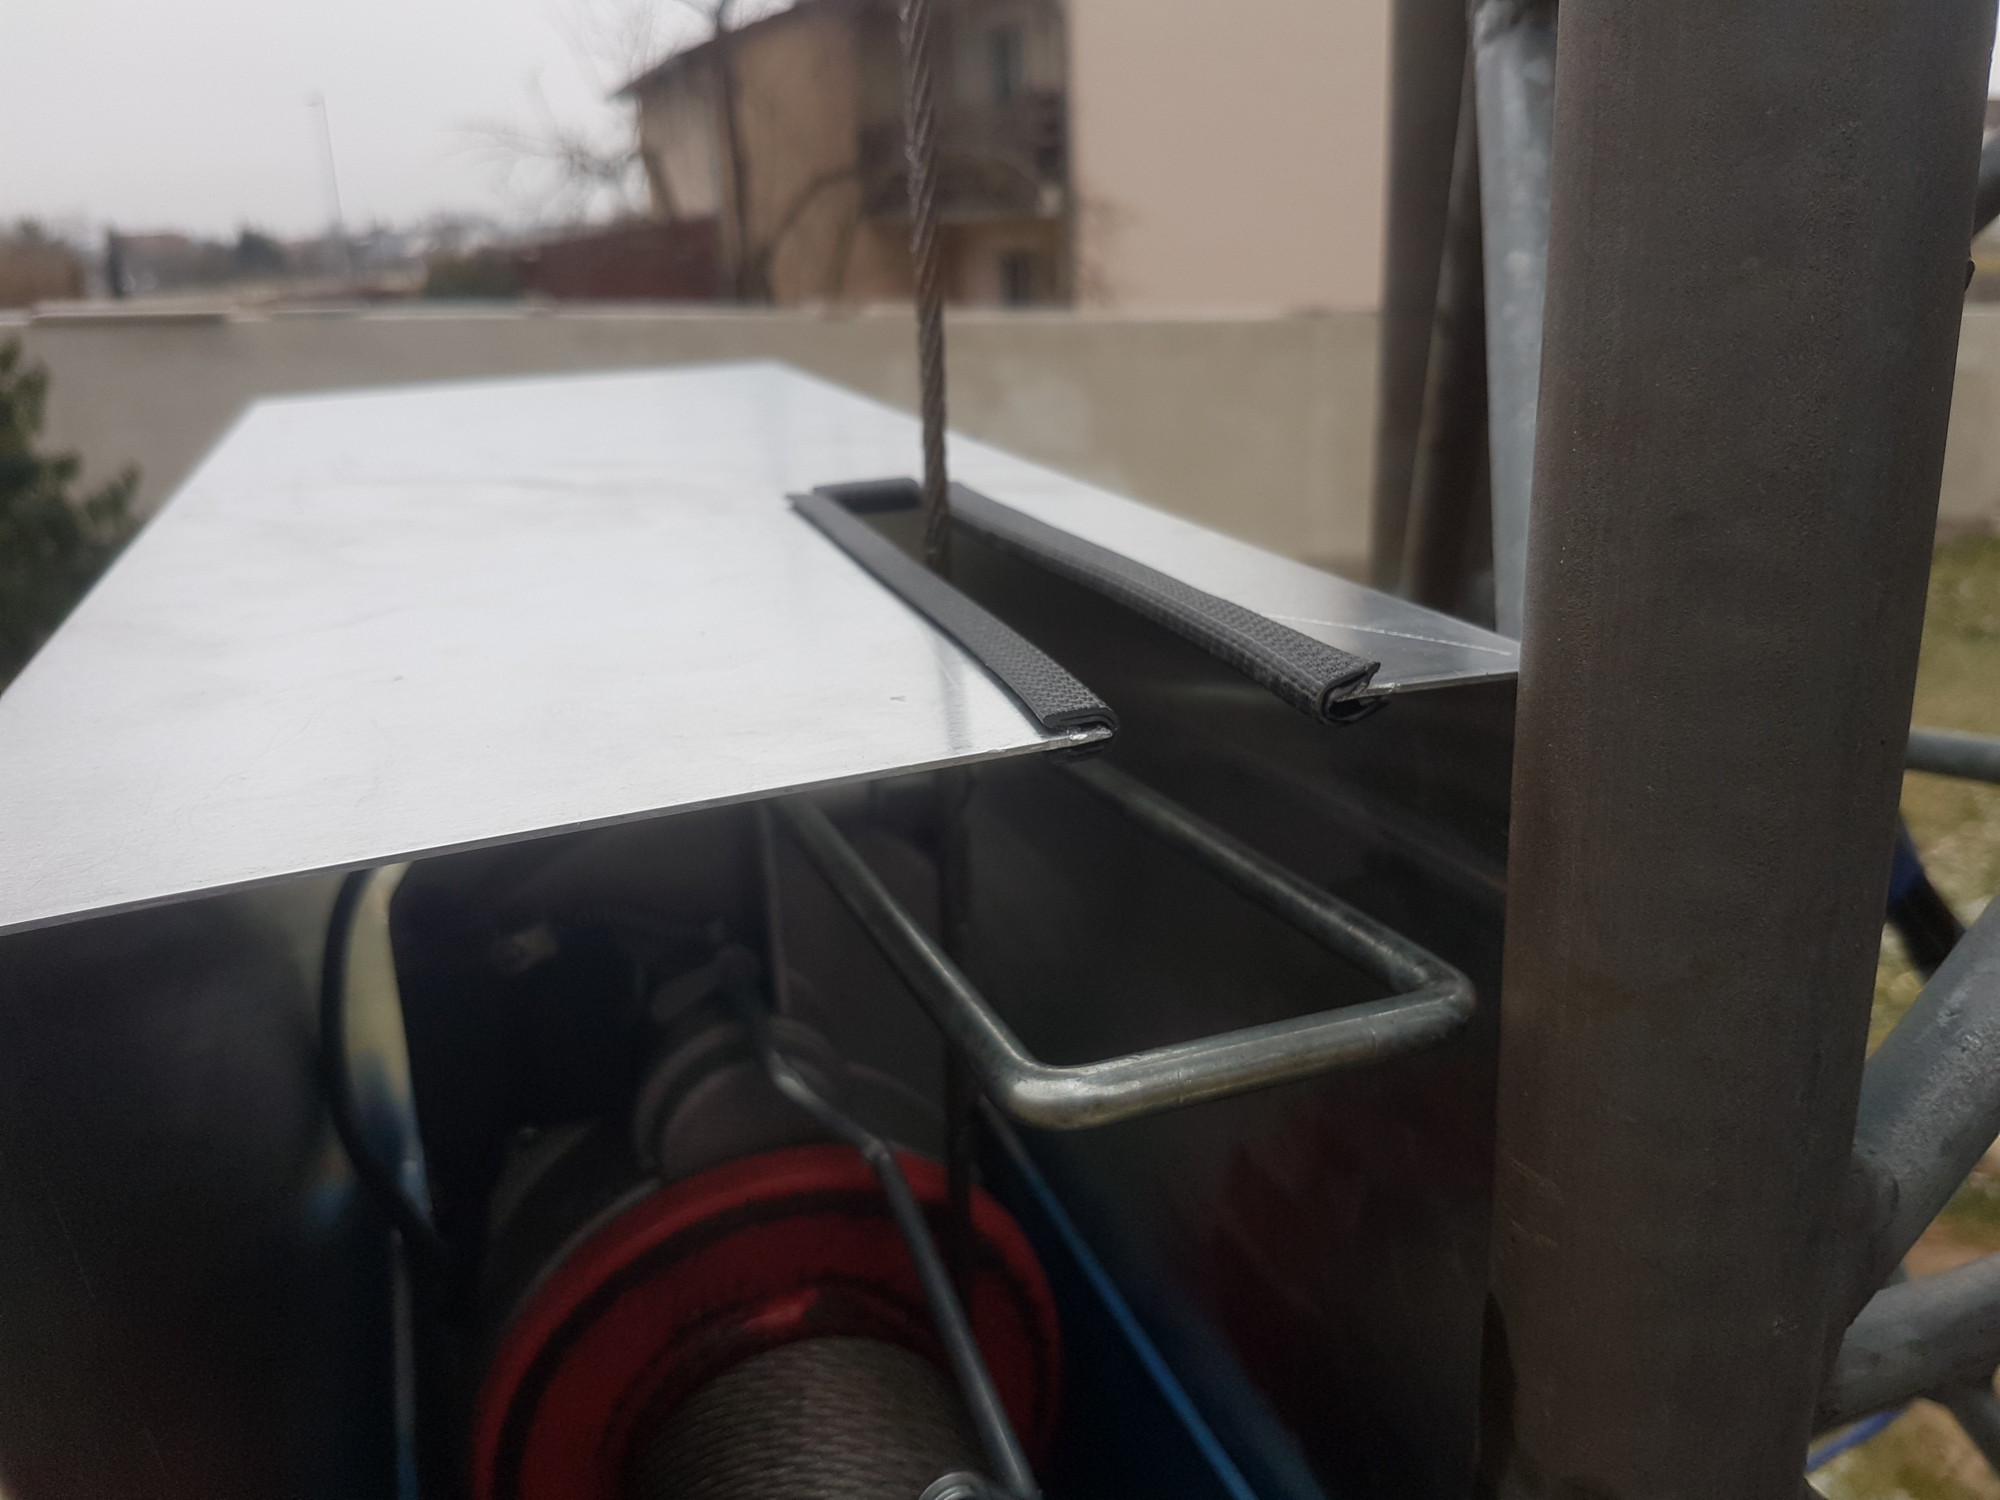
For fixing the electric cabel and the controller I use a hook under the winch. At the moment I use a plastic box with a notch for the cable as rain cover and already ordered a aluminium cover. If the notch is long enough it can permanently stay above the winch even when it is working.
For the 230V connection I mounted an outlet at the wall which can be locked and I have to switch on power with a switch so not everybody can play with the winch.
12th January 2024
Now I use a aluminium cover for the winsch: